
Chenille-It Sew Along: Week 3
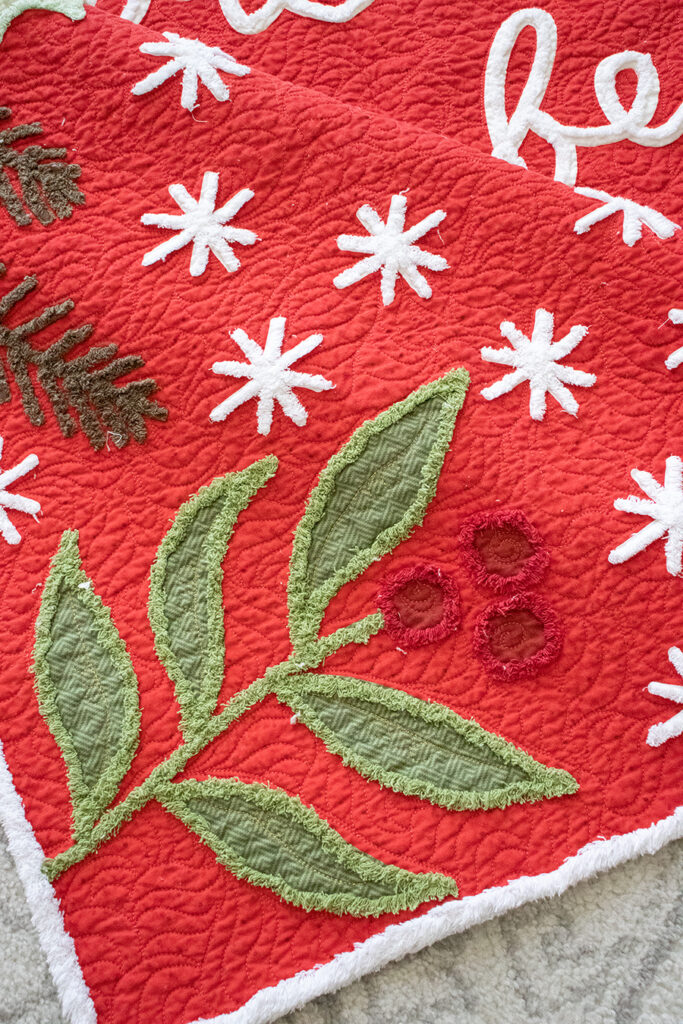
Welcome to Week 3 of the Chenille-It Sew Along of my ‘Tis the Season quilt panel. Last week, we finished adding Chenille-It to all the floral elements to our panels. I have seen some of your posts and am so glad you are all enjoying this as much as I am. For Week 3, we are focusing on quilting the embellished top.
But first – congrats to Lisa Para @whatsundermyneedle and Rita Gillis @rfpurvis for for winning the Christmas Eve Layer Cakes. (Congrats ladies!) There will be another giveaway for participants this week – details at the bottom of this post.
Week 3: Quilting
There are a couple different options when it comes to having your embellished panel quilted. Custom quilting is ideal with this project and really the easiest way to avoid interference with the Chenille-It blooming bias. (With custom you can avoid stitching over the Chenille-It altogether.) Whether you tackle custom quilting yourself on a domestic machine – or send it to a professional – that is option 1. The second option, would be having edge-to-edge quilting done. For this route, be aware that you should choose a pantograph design that is loose (the more dense a design, the more it’s going to run over the Chenille-It and potentially disrupt the way it “blooms” after washing.) The Week 3 video mainly focuses on the custom quilting, be sure to give it a watch below for tips and tricks there:
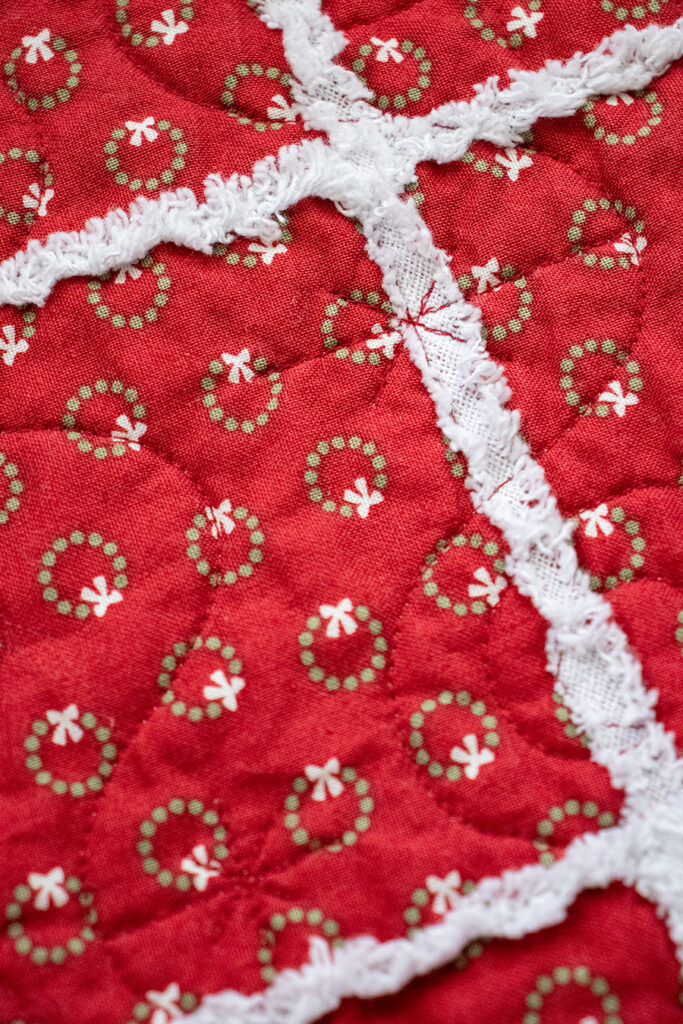
I’ve decided to have mine quilted on a long arm using an edge-to-edge design to show you what that looks like. Unfortunately, I got behind on Week 2, so I’m just barely sending my top off to the quilter and don’t have the finished product to show you yet. However, I did a little experiment a couple months ago by having Kaitlyn at Knot and Thread Design try a couple pantographs of varying densities on scraps that had Chenille-It sewn onto it. I washed the quilt afterwards so you could get an idea of how fraying would be affected. (Disclaimer: I haven’t learned any pro tips about the washing/fluffing process from our expert, Nanette, yet. This was purely to test how different edge-to-edge effect on Chenille-It before I sent in mine.)
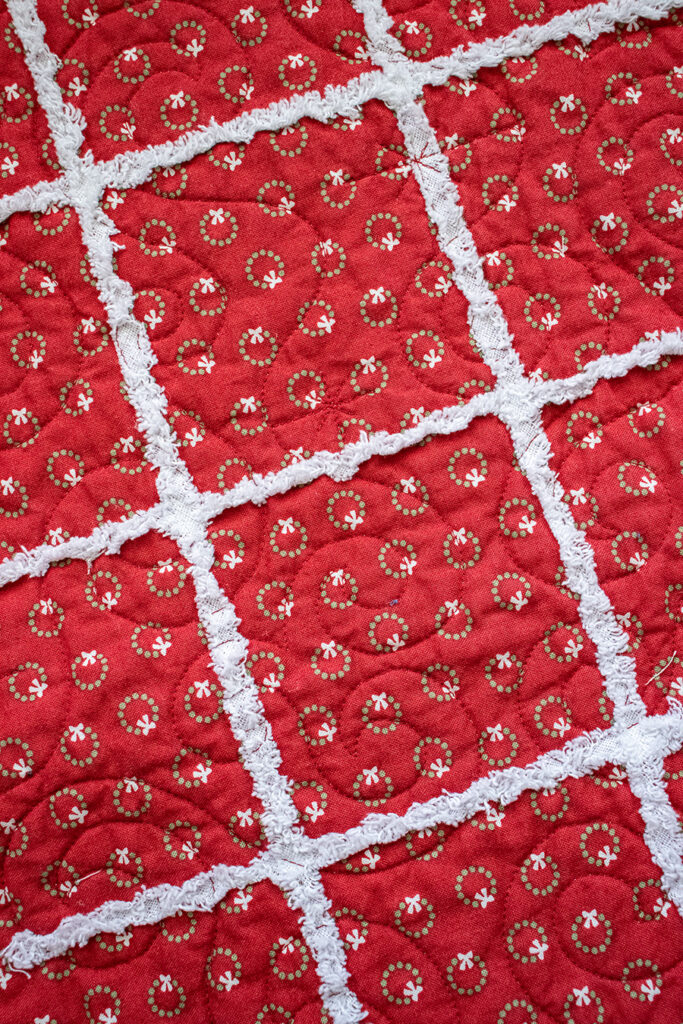
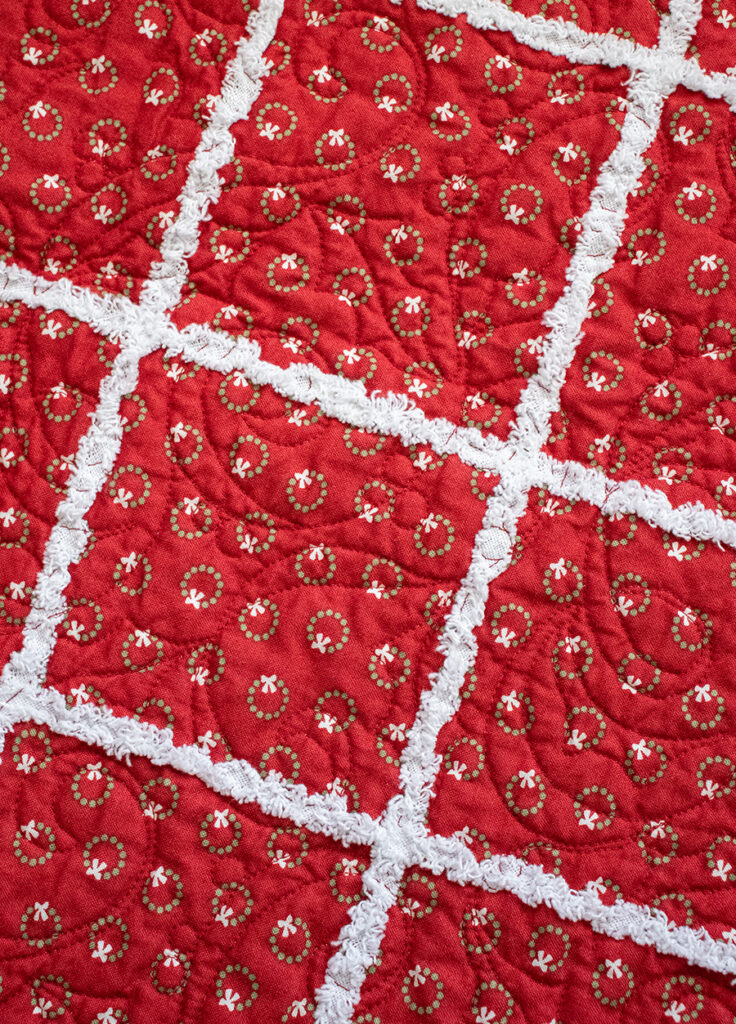
You can see looser swirls on the left design. I think both designs worked as options. I do like the looser design on the left better – although that one had a little star detail that I would rather omit. You can see (below) how it obstructs the Chenille-It where it landed. And again, because this was a quick experiment, I wasn’t focused about proper washing/fluffing techniques to get the Chenille-It to “bloom” optimally so it will actually be fuller than what is shown. (We’ll learn about that in Week 4). I hope this can still give you a good idea on the direction you want to go with the quilting.
Nanette and I totally understand it may not be reasonable to get yours quilted within a week’s time (especially if you’re outsourcing that part like I am) so please don’t feel pressure about that. This and next week’s information will be waiting for you when you are ready!
Post for Prizes #ChenilleItSAL
It’s been so fun to see everybody’s progress, so this week there’s another prize! Post a pic of your progress for Week 3 (get creative here) on social media and use the hashtag #ChenilleItSAL to be entered. (You can simple post about your quilting plans for it if you’re sending it off.) The prize for Week 3 is a fat eighth bundle of Christmas Eve fabric! Just like this week, I’ll announce the winner on next week’s post.
Also. If you have any questions that aren’t answered in the YouTube video, please drop them in the comments below. Chances are, if you have the question – someone else probably does too! You can also ask them directly on the YouTube video.
Like this post? Drop your email in the box below to get new post notifications via email.
Leave a Reply
You must be logged in to post a comment.
3 Comments
Rita Gillis
July 24, 2023 at 8:00 amThank you Vanessa! I am thrilled to be a winner of a Christmas Eve layer cake! My mind is spinning with the possibilities for this fabric. I am enjoying this sew along so much. Thank you and Nanette for doing this!
Esmeralda Carter
July 24, 2023 at 3:13 pmI was wondering why you couldn’t have the panel quilted before you attach the chenille bias tape? Seems like ut would be speedy fast after that step and the design wouldn’t show through the tape🤗👍🏼
Thurndotte Ray
July 24, 2023 at 6:10 pmI had initially wondered about this too. Then I realized if I quilted it first, I would have to stitch the Chenille-It on through all layers of the quilt sandwich, and the stitching would be noticeably visible on the reverse side, possibly a distraction from the quilting pantograph design.