
Free Quilt Binding Tutorial

You could say I’ve bound a few quilts in my life… I have never attempted to count just how many, but I do know I’m well past the 100-quilt mark. When I first learned to bind a quilt, I learned to stitch it by hand–at a nice, leisurely pace. It’s a wonderful activity, and while I love (and miss) the process of stitching the binding by hand, I have had to look for quicker solutions as life’s gotten a little busier. I’ve learned a lot over the last few years, and am excited to share a full quilting binding tutorial with you. You can decide if you want to finish binding by hand or by machine.

As is the case with many crafts, there’s a learning curve; it takes experience to get better at this quilt binding thing. As you implement these techniques, I’m confident you will see improvement on your quilt bindings. It’s possible yours will not look like mine on the first attempt, but don’t give up! Again, I’ve done this a lot and have been able to perfect this aspect of the craft. This is literally an example of practice made perfect.
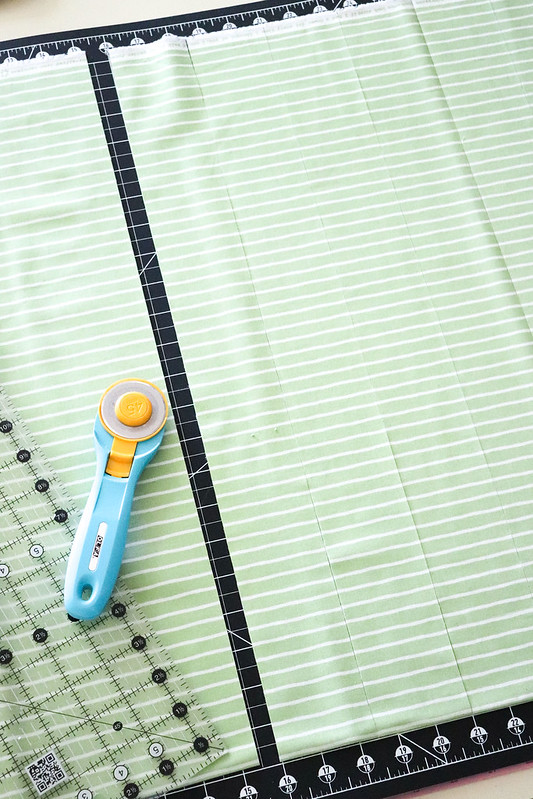
Let’s get started! The first step is to gather your binding fabric and cut 2½” strips. If you’re following a quilt pattern, the instructions should tell you how much yardage + how many strips to cut. Otherwise, you can figure it out on your own with a simple calculation:
1) Determine the perimeter of the quilt (add the length of each side of the quilt) + 15″.
2) Divide that sum by the 40″ WOF, then round up.
For example, if my finished quilt top is 75″ x 75″, I’ll add together:
75″ + 75″ + 75″ + 75″ + 15″ = 315″
If I divide that 315″ sum by 40″ WOF, I get 7.87 strips. Rounded up is 8 strips 2½” x WOF.
To cut the binding fabric, line up the folded edge of the yardage with the bottom line on your cutting mat. It’s important to have that folded edge aligned correctly so the strips will still run straight when you unfold them. Once everything’s aligned just right, use a ruler and rotary cutter to carefully cut the required amount of 2½” strips.
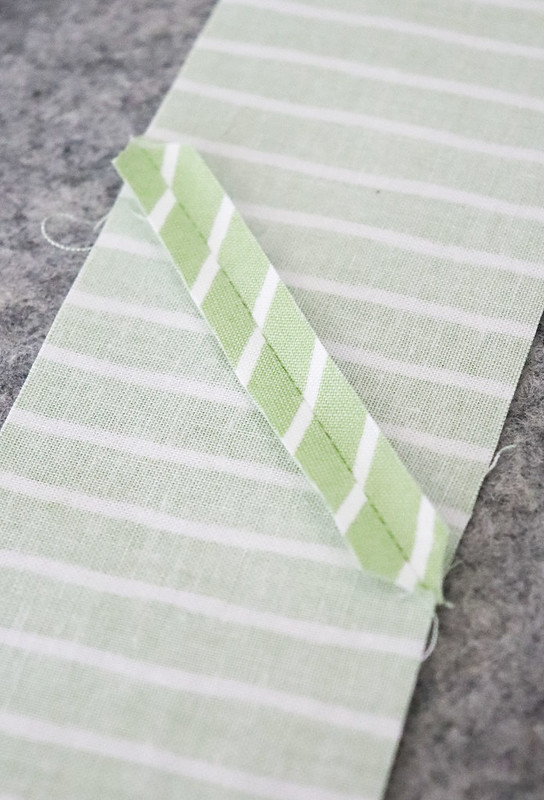
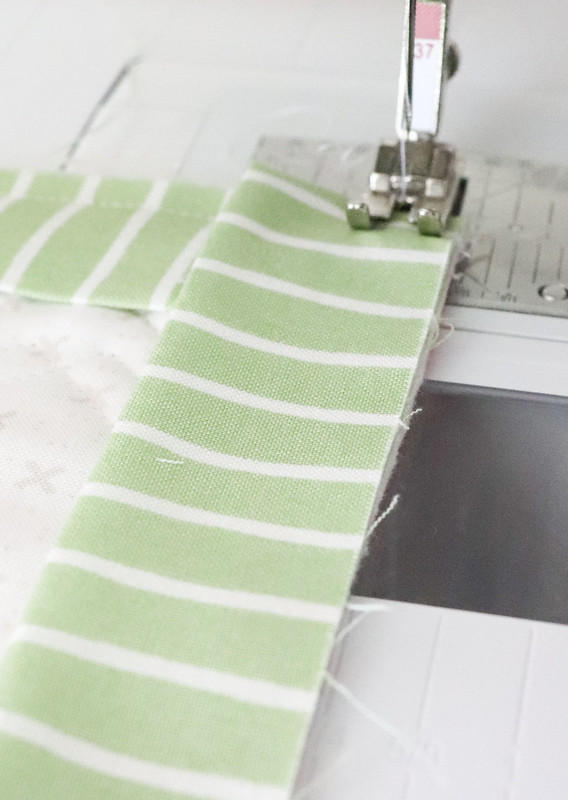
Next, sew all of the binding strips together end-to-end, at a bias, to get (1) long strip. Sewing them together “at a bias” will reduce bulk (via a diagonal seam). To do this, just bring the ends of two strips right sides together at a 90 degree angle. Notice the ends overlap by quite a bit (to get rid of the unwanted bits of selvage). Draw a diagonal line as shown and pin in place.
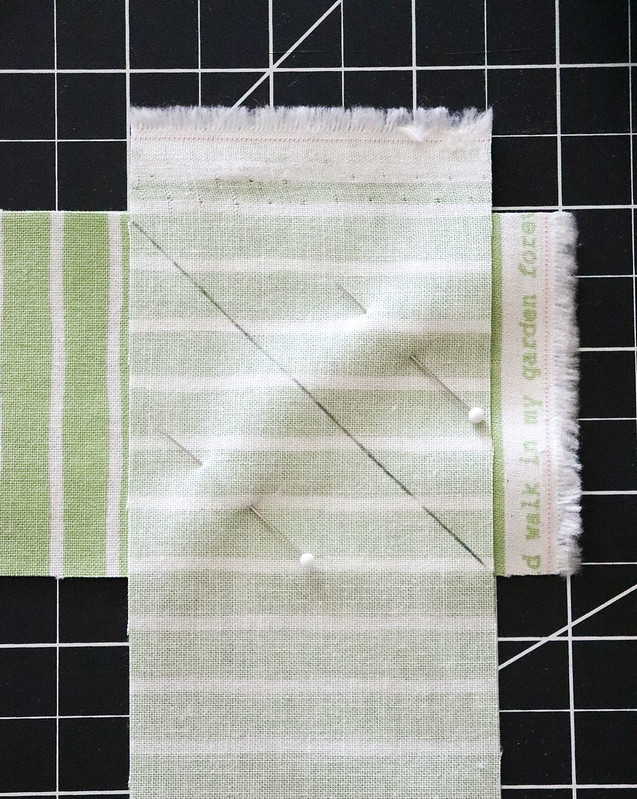
Sew along the marked line.
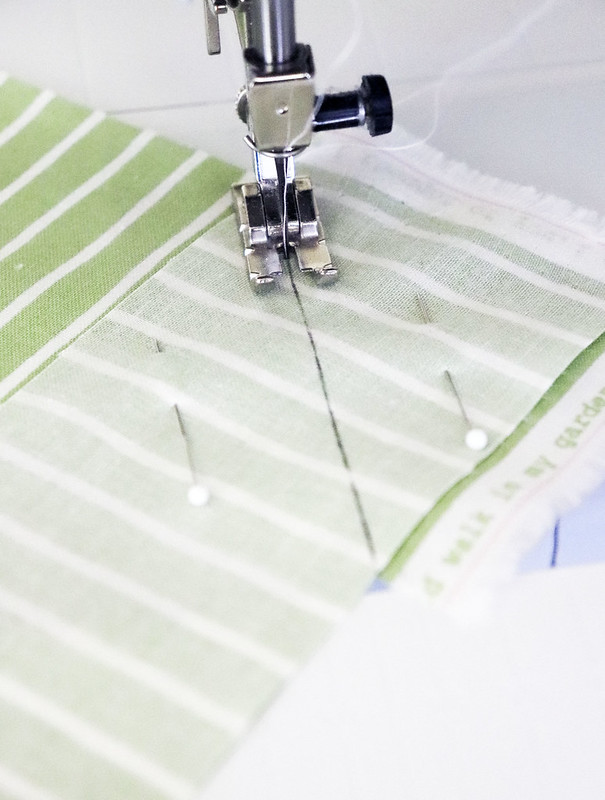
Trim excess to 1/4″ seam allowance.

Press the seam open.
Proceed until all strips are sewn together end-to-end. Next, press the strip in half, wrong sides together. As you press a small section at a time, you can roll it up nicely like I did… or not. Sometimes mine ends up in more of a heap.

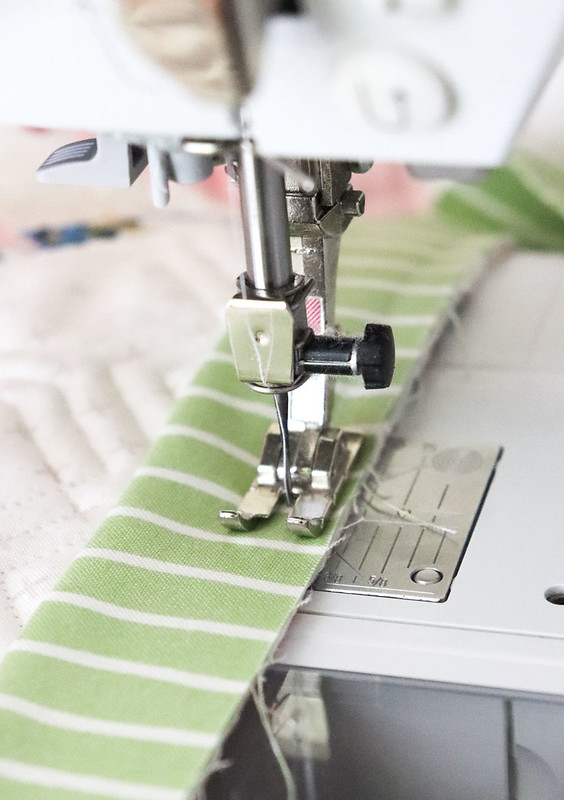
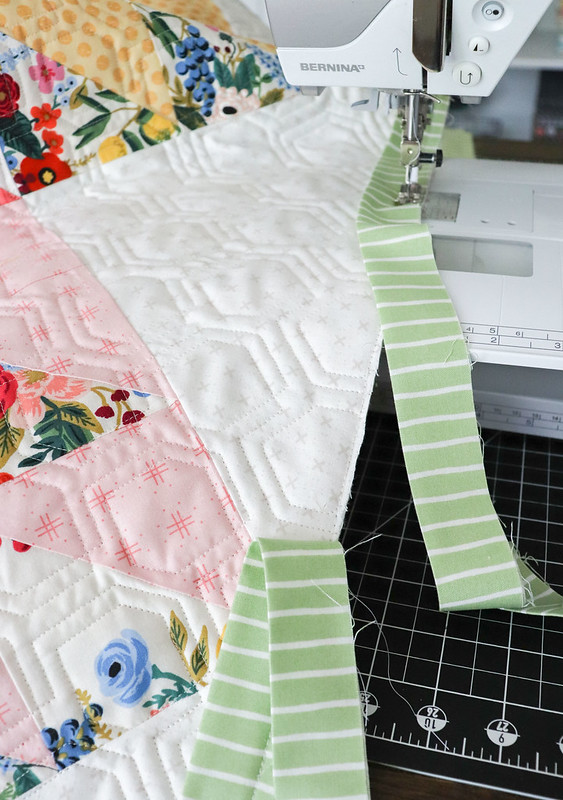
Starting in middle of one side of the quilt: align the raw edges of the binding with the raw edge of the quilt. Skipping approx. the first 6″ of binding fabric, start stitching using scant 3/8″ seam allowance. (I stuck a pin to show you where I plan to start stitching.) A walking foot is strongly recommended for stitching through the bulky layers. (A walking foot essentially adds a second set of feed dogs on top to make sure the fabric feeds through evenly.) My machine is heavy duty and handles the bulk just fine with my quilter’s foot so that’s what I’m using.

I mentioned using a scant 3/8″ seam allowance. My quilter’s foot is a perfect 1/4″ so you can see I’m stitching just a little outside that. I aim to keep it between 1/4″ and 3/8″ but the most important thing is consistency.
Keep sewing down that first quilt side, slowing as you approach the bottom. Stop approx. 1/4″ away from the bottom edge–the idea is to be equidistant from the bottom edge as your seam allowance… i.e. if you were to draw a line from the last stitch to the corner, it would make a perfect 45 degree angle. I usually eyeball it. For the next step, pull the quilt a little ways out from under your machine…
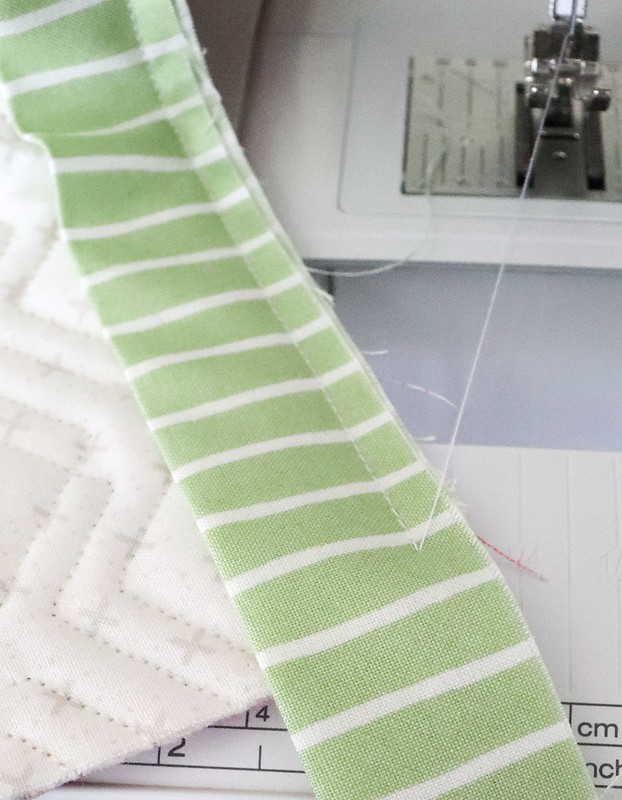
To prepare the edges for mitering later, fold the binding strip to the right, at a 90 degree angle. Notice the part of the binding strip that forms a 45 degree angle. Finger-press that 45 degree fold to flatten in place.

Fold the binding strip back onto itself–to cover the 45 degree fold–and run along the next side of the quilt (raw edges aligned).
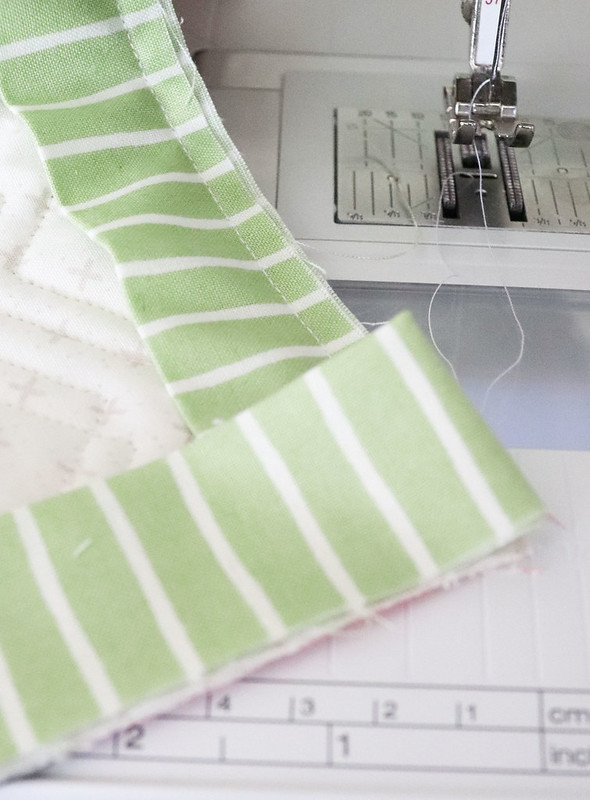
Rotate the quilt so you can keep stitching down the next side of binding. Check that the new “top” edge of binding (a fold) aligns with the top edge of the quilt and that the raw edges of the folded binding strip and raw edge of the quilt are also aligned down the new side. Keep stitching using the same seam allowance (scant 3/8″) and repeat the pivot at all corners.
After you have stitched past all four corners, sew until you are approx. 12″ away from the first stitch.
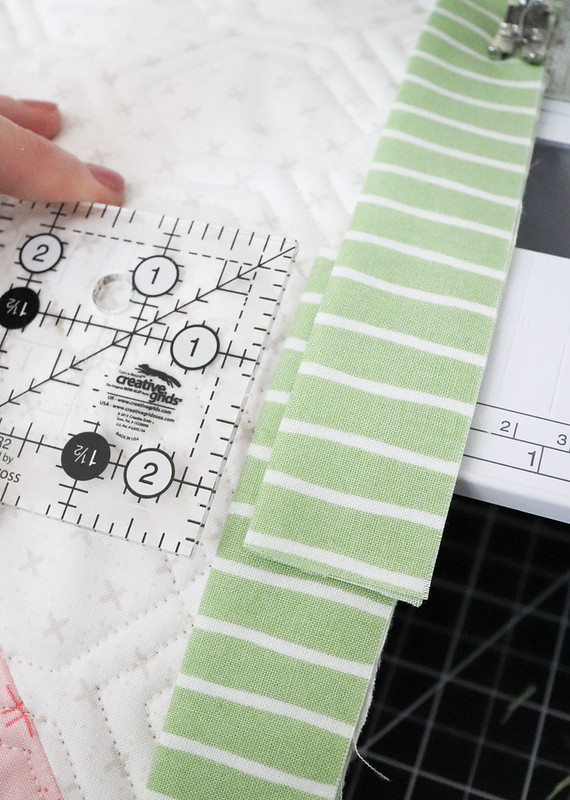
Pull the quilt out from the machine and flatten the unbound area as best you can. Bring the binding tails together (keeping them flattened with the quilt) and trim so they overlap by exactly 2½”.
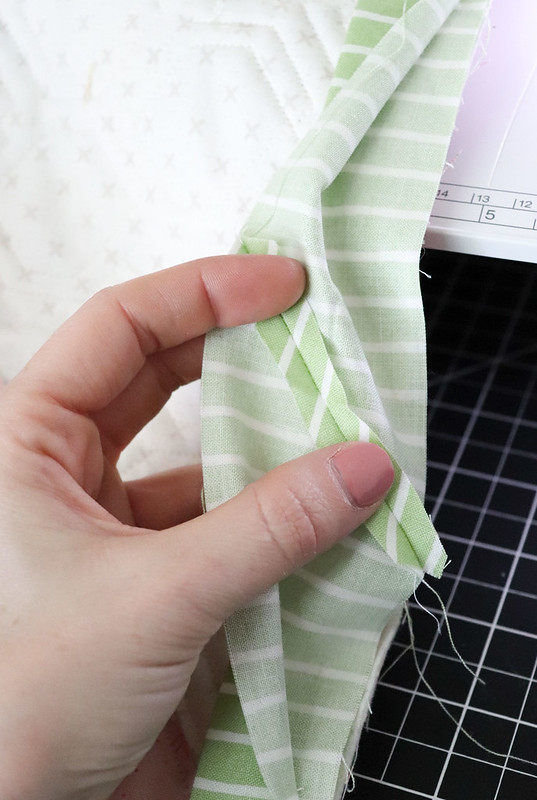
Unfold the binding tails and bring them right sides together at a bias (same as earlier), but overlapping the ends by 1/8″. (This will feel like a small wrestle because of the heaviness of the quilt attached to the binding, plus threads keeping you tethered to the sewing machine, etc. Pull the quilt out enough from the machine so you can move it the way you need to; also fold/bunch the quilt as needed to help. Whatever you need to do to accommodate the binding tails so they can be brought right sides together at a 90 degree angle, overlapping by 1/8″. Mark a diagonal line, and pin in place.

Sew along the marked line and trim 1/4″ seam allowance. When you let go of the binding, it should be a perfect fit to the quilt. (Double check by holding the quilt taut–the binding should stretch to fit the area… if it feels a little too loose, it’s easy to pick out the stitches of the diagonal seam and make a small adjustment.)

Once you know it’s good, finger-press the seam open. Re-fold the strip in half, and finish stitching the binding to the quilt.
Take the quilt to your ironing board, front facing down. (This is what it will look like before folding the edge of the binding over to cover the seam.) I just want to point out that the goal is to cover that seam by approx. 1/8″, because that seam is basically where the stitching will come through again. Covering the seam by 1/8″ with consistency is important and help it look as flawless as possible.

Working from right to left, fold the binding over and press. (At the ends, the binding will form a point.)
After the section is pressed, draw a thin line of Elmer’s School Glue above the seam.

Re-fold the binding down and iron with a quick shot of steam, again focusing on covering the seam consistently by 1/8″. Because of the glue, the binding will be stuck in place right where you want it to stay! Keep moving along the quilt in sections to press/glue the binding in place.
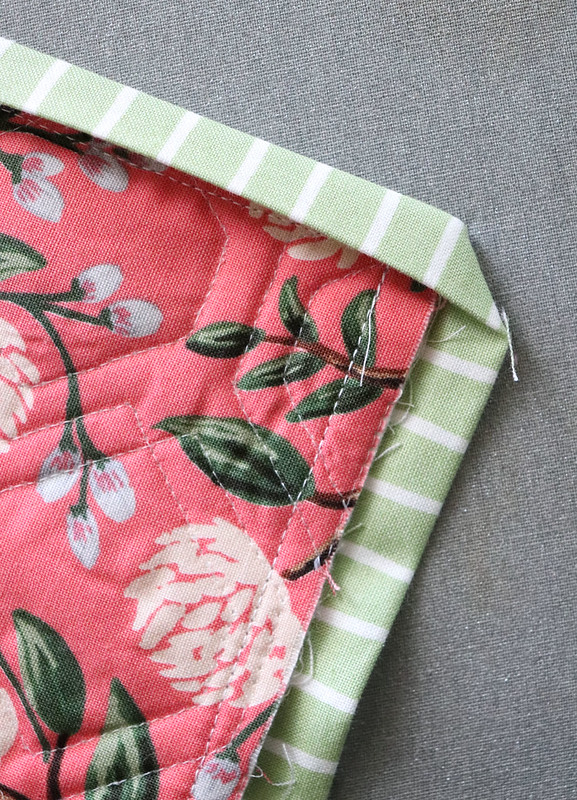
When reaching the end of a side, again, the binding will come out to a point like this.

Fold in the adjacent side of binding to miter the corner. Proceed to press and glue that adjacent side until you’ve gone around the whole perimeter of the quilt.
For the next step–you have two options.
1) Finish by stitching the binding to the back of the quilt by hand with a needle and thread. No binding clips needed!
– OR –
2) Finish stitching the binding in place by machine in the following steps:
Bring the quilt (face up) back under the sewing machine and “stitch in the ditch” (aka the line where binding meets quilt). Since we’ve covered the seam on the back by 1/8″, the stitching hits right where we planned it to. I will sometimes place my finger on top of the quilt where I’m about to stitch to feel the binding edge underneath to confirm it’s 1/8″ out from where I’m about to stitch. (NOTE: If you’re worried about the seam not hitting the right place on the back, you can actually stitch into the top binding area instead of “in the ditch.” Just be consistent with whatever you choose.)
And that’s it! As I said earlier, it takes practice and you will discover what works best for you along the way. Here’s how mine looks on the back. Not technically perfect, but pretty darn close.
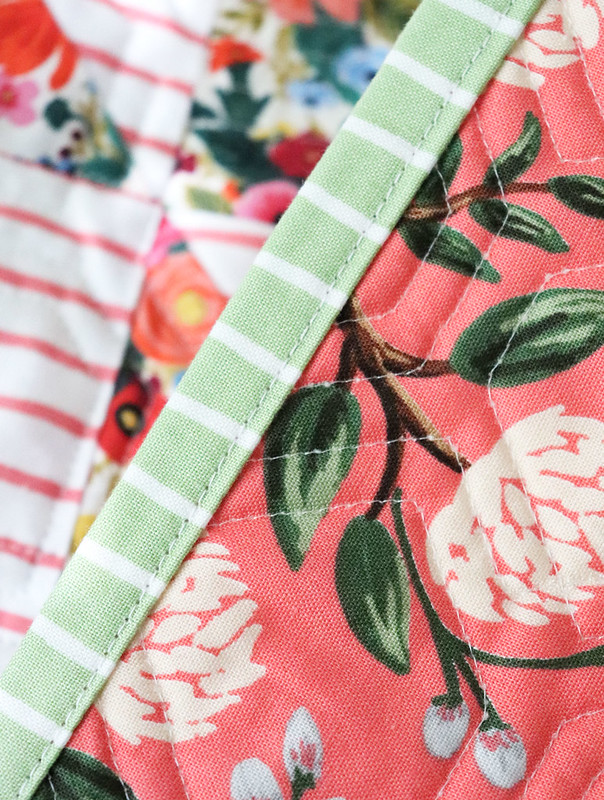
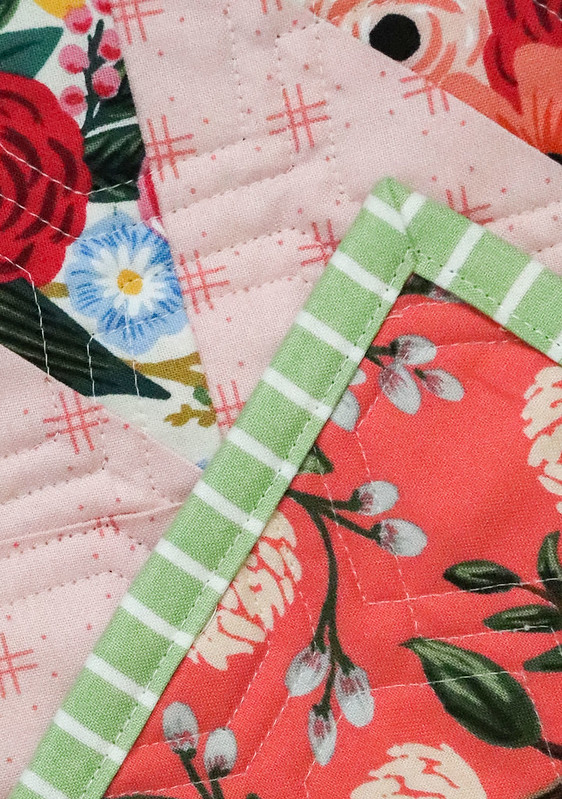
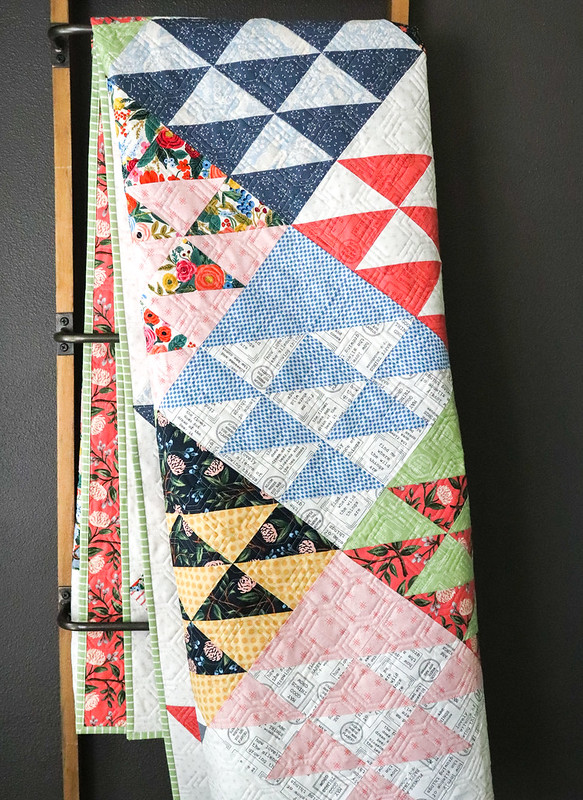
Oh and in case you’re wondering–this quilt is one of my Homestead quilts–mixing my Lollipop Garden fabric with Wildwood by Rifle Paper Co for Cotton + Steel. The binding is a striped print from Lollipop Garden.
Hope you found this helpful, the ironing and gluing has made a big difference for me!