Scrappy Sunflowers in Country Rose Fabric
Halloween is around the corner, and I have something spooky to share – a pattern correction! (Eeeek!!) This one’s regarding my Scrappy Sunflowers quilt pattern and I felt it was extra important to get the word out as it pertains to the version in Country Rose fabric that has just arrived to shops. You see, I had the pattern reprinted recently, mocked up in Country Rose fabrics. Well it turns out, there needs to be a tweak to the cutting directions to specifically accommodate the unidirectional prints of Country Rose.
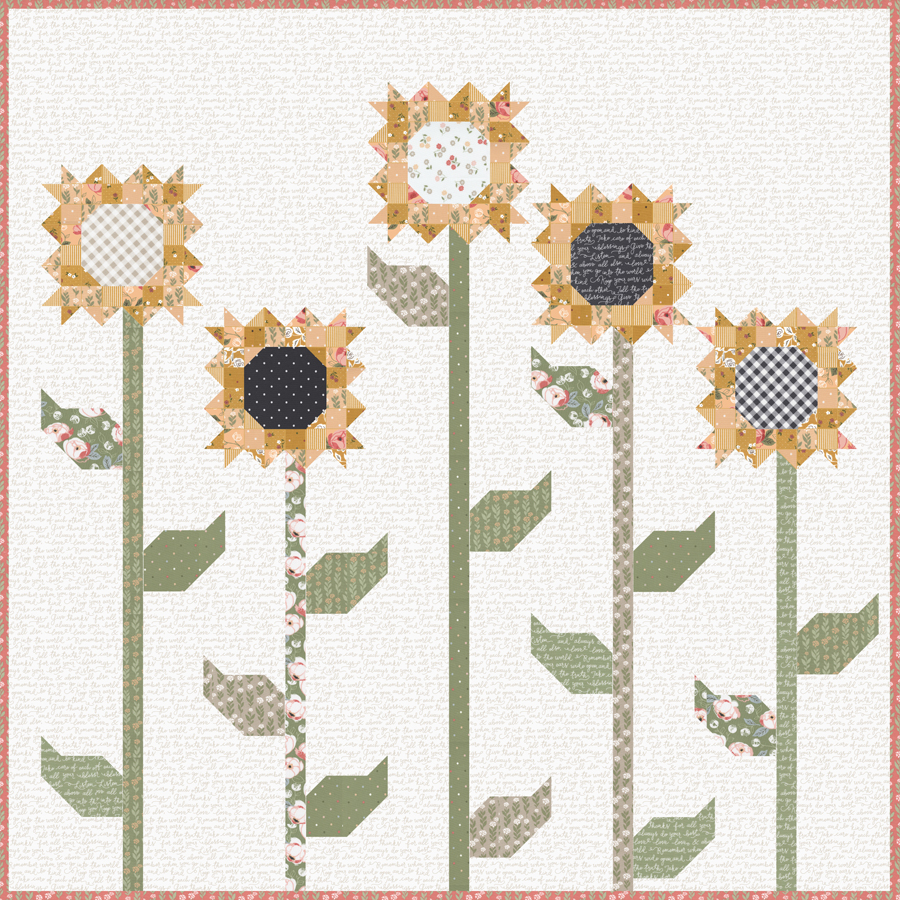
The original Scrappy Sunflower quilt pattern used the same lovely text print for the background. Of course, I wrote the pattern instructions to accommodate it – with the stipulation that the instructions will accommodate any unidirectional print that runs parallel to the selvedge.
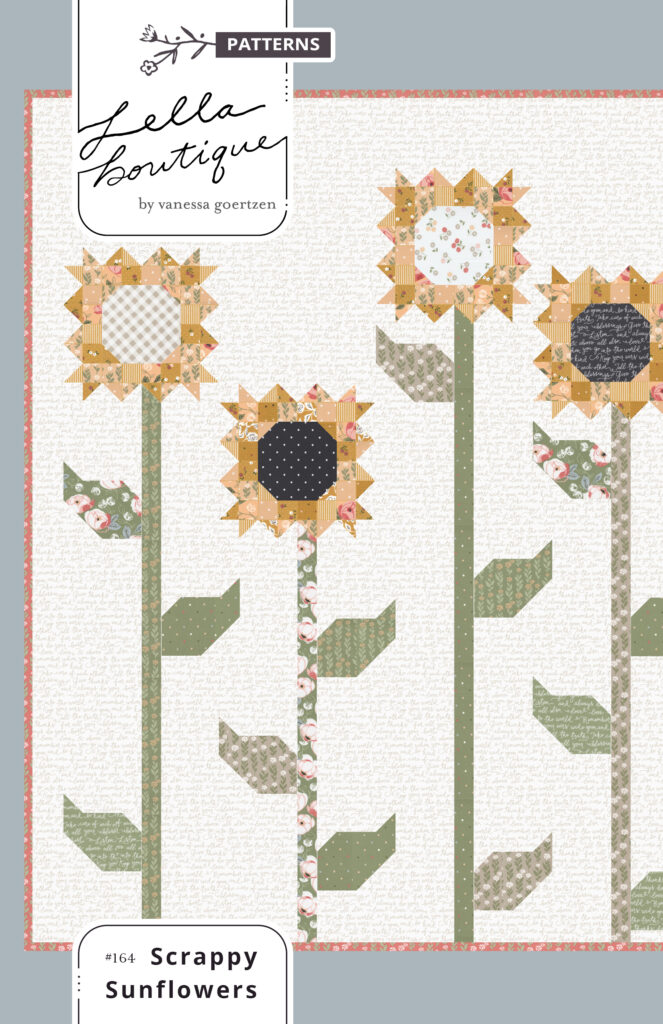
After some time, the text print became obsolete, and I started getting emails about bringing it back. So I did! Enter Country Rose – which just arrived to shops – and I wasn’t aware of it until now, but apparently the text print (as well as the other unidirectional prints in the collection) run perpendicular to the selvedge. Yikes! It didn’t even occur to me to check this out, so I apologize. The good news is, the yardages are not affected. (If you have purchased a kit, all is well.) If you read the pattern instructions (i.e. it says to check for pattern corrections before beginning), all is well. So on my Pattern Corrections page, I’ve added cutting instructions to accommodate unidirectional prints that run perpendicular to the selvedge. (This not only applies to the background fabric cutting, but some of the green leaf/stem cutting as well.)
In addition to the Pattern Corrections page, I’m adding the information below as well. Please let me know if you have any questions in the comment section below. Chances are, if you have questions, others will too. (If you want to print this out, highlight the info below and paste it into a Word document.)
#164 SCRAPPY SUNFLOWERS
NOTE: The cutting instructions are written to accommodate a unidirectional background print IF it runs parallel with the selvedge (i.e. the original text print used from Farmer’s Daughter). If you want to use a unidirectional print that runs perpendicular to the selvedge (i.e. the text print in Country Rose), here are the cutting modifications below – they have been grouped out of order to minimize waste. (Refer to the pattern for specific unit subcut dimensions. New diagrams included below.)
BACKGROUND FABRIC CUTTING:
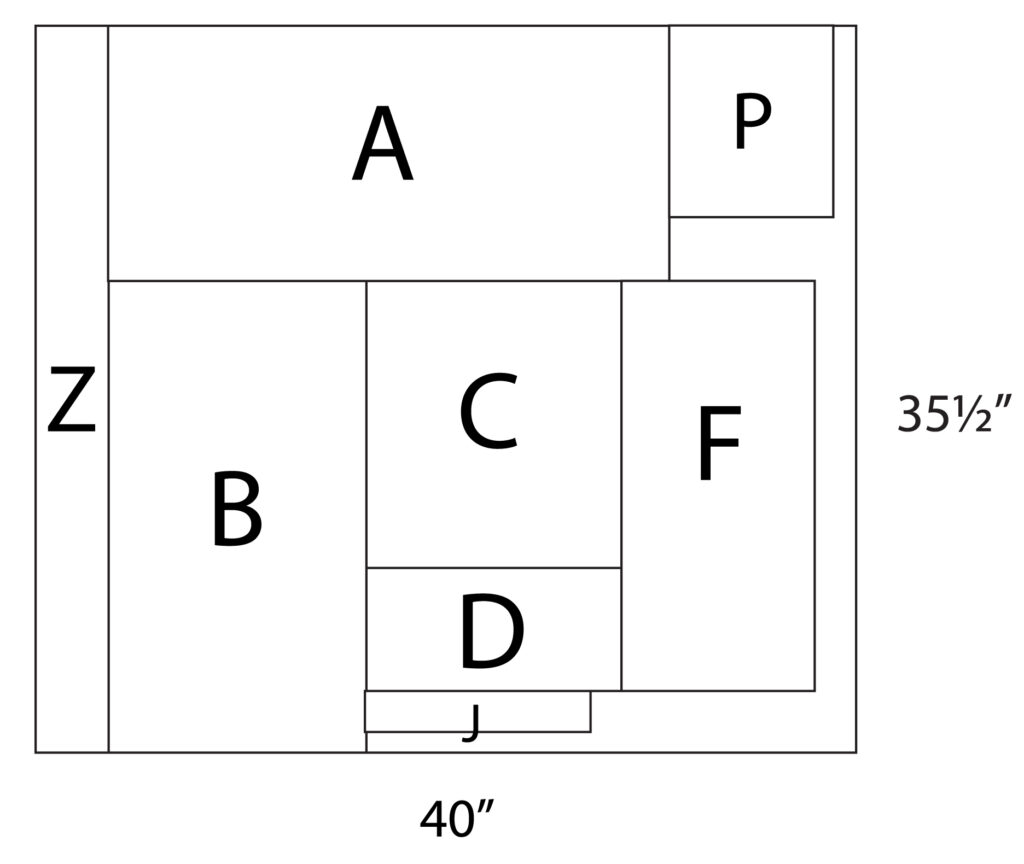
– (1) strip 35-1/2″ x 40″. Referring to the diagram, subcut:
- (1) Z rectangle
- (1) A rectangle
- (1) P rectangle
- (1) B rectangle
- (1) C rectangle
- (1) D rectangle
- (1) F rectangle
- (1) J rectangle
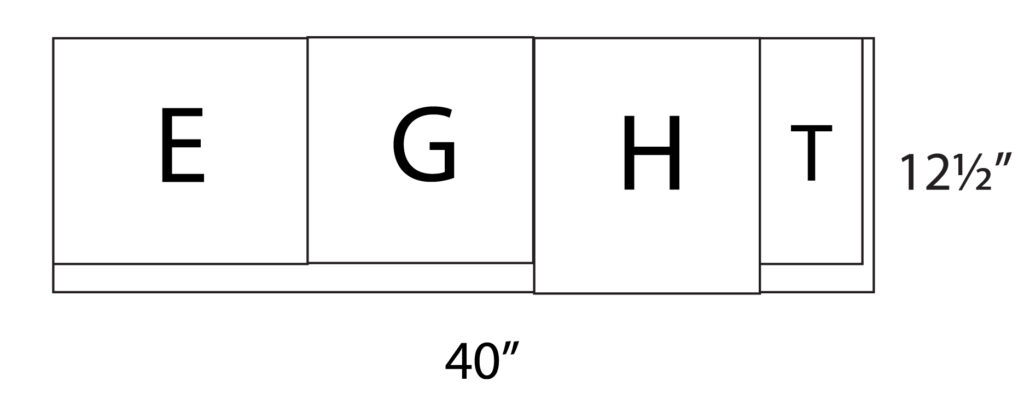
– (1) strip 12-1/2″ x 40″. Referring to the diagram, subcut:
- (1) E rectangle
- (1) G square
- (1) H rectangle
- (1) T rectangle
– (1) strip 5″ x 40″. Referring to the diagram, subcut (3) I rectangles.

– (1) strip 5″ x 40″. Subcut:
- (1) I rectangle
- (1) N rectangle
- (1) L rectangle

– (1) strip 3-1/2″ x 40″. Subcut:
- (3) L rectangles
- (1) M rectangle

– (1) strip 6-1/2″ x 40″. Subcut:
- (2) K rectangles
- (1) O rectangle
- (2) X rectangles

– (1) strip 17″ x 40″. Referring to the diagram, subcut:
- (1) Q rectangle
- (1) R rectangle
- (1) S rectangle
- (1) W rectangle
- (1) V rectangle
- (4) U rectangles
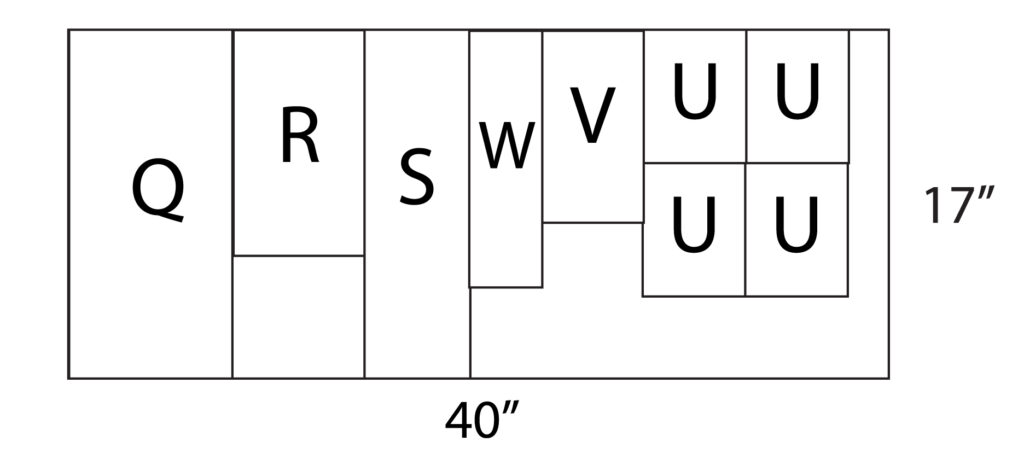
– (1) strip 6-1/2″ x 40″. Subcut:
- (6) U rectangles
- (1) Y rectangle

– (2) strips 3-1/2″ x WOF. Subcut (15) squares 3-1/2″ x 3-1/2″.
– (4) strips 2-1/2″ x WOF. Subcut (60) squares 2-1/2″ x 2-1/2″.
– (3) strips 2″ x WOF. Subcut (15) rectangles 2″ x 6-1/2″.
– (2) strips 2″ x WOF. Subcut (35) squares 2″ x 2″.
LEAF PRINT CUTTING: Because of the required length of the stem units (35″), it is trickier to accommodate unidirectional prints that run perpendicular to the selvedge without a ton of waste… However, this can be done by piecing shorter vertical pieces together. For example – green print #1, you could modify the cutting by cutting the following:
- (5) vertical rectangles 2″ x 7″ instead of (1) horizontal rectangle 2″ x 32″. After you sew the vertical rectangles into a column, trim the excess (approx 1″) to get 2″ x 32.
- (3) vertical rectangles 5″ x 6-1/2″
- (2) vertical rectangles 2″ x 5-3/4″ instead of (1) horizontal rectangle 2″ x 11″. After you sew the vertical rectangles into a column, they will measure 2″ x 11″.
- (1) square 2-1/2″ x 2-1/2″
- (3) squares 2″ x 2″

Leave a Reply
You must be logged in to post a comment.

1 Comment
Samantha Salmonson
September 27, 2022 at 12:17 pmThis is a cool design. I’m not thinking “directional “ fabric, because I don’t really care. I’m not entering any contests, it’s just for my walls. Like it or not , it’s your choice.