
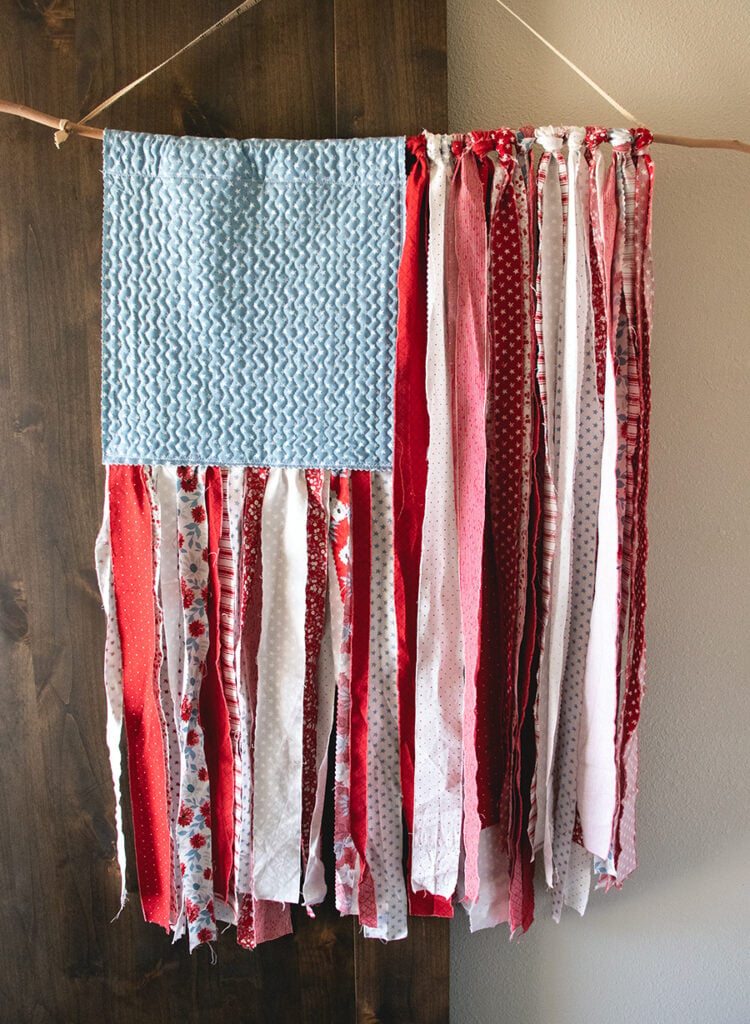
Scrappy Rag Flag in Old Glory Fabric
Here’s some 4th of July eye candy you never knew you needed… and it’s all about scraps. Gather up your favorite red and white strips leftover from projects, or cut what you need from your stash. This quilted, scrappy rag-flag is sure to make everybody swoon wherever you hang it. Perfect for the porch, a barbecue, or 4th of July party.
The Fabric
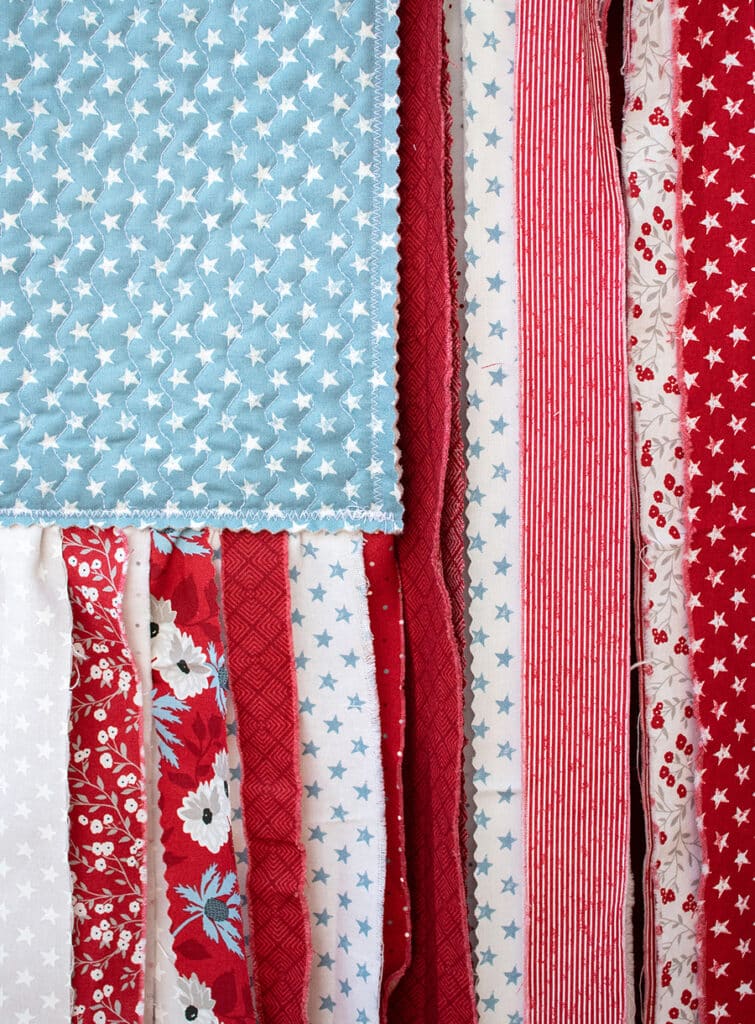
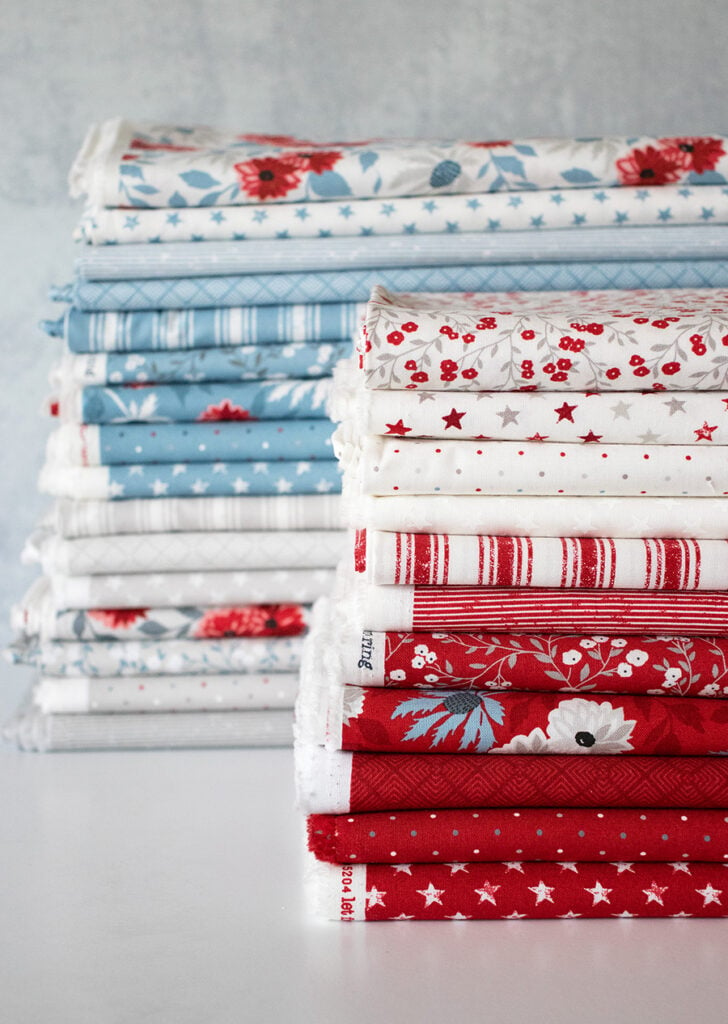
I used Old Glory fabric to make my scrappy rag-flag. The Old Glory fabric collection is a new collection in shops now (it arrived Feb 2024). You will mostly need a mix of red and white (i.e. low volume) prints to create the scrappy stripes + a blue print for the accent rectangle.
Materials Needed
- (14) 1/4-yard cuts of assorted red and white prints
- 1/2 yard blue accent print
- (1) rectangle 18″ x 20″ batting
- rod or dowel to hang from – I found a stick 44″ long and no wider diameter than 1/2″
- ribbon or twine
- Optional: a special rotary cutter blade for “pinking” the fabric edges
Cutting
1. To the (14) 1/4-yard cuts, cut the following per print:
- (2) strips 2-1/2″ x WOF
- (1) strip 1-1/2″ x WOF
- (1) strip 1″ x WOF
2. To the blue print, cut (2) rectangles 16″ x 18″.
TIP: You can use a special “pinking” rotary cutter blade to “pink” the edges of the blue rectangles. It’s not required, but I totally adore the look of it.
3. Trim the batting to 16″ x 18″.
Assembly
Fray the Strips
Machine wash the assorted red and white strips in cold water; I put all the strips together in a garment bag beforehand to help reduce how tangled up the strips get. I also tossed in a color catcher to make sure the reds don’t bleed onto the whites. After everything is washed, just dry as normal.
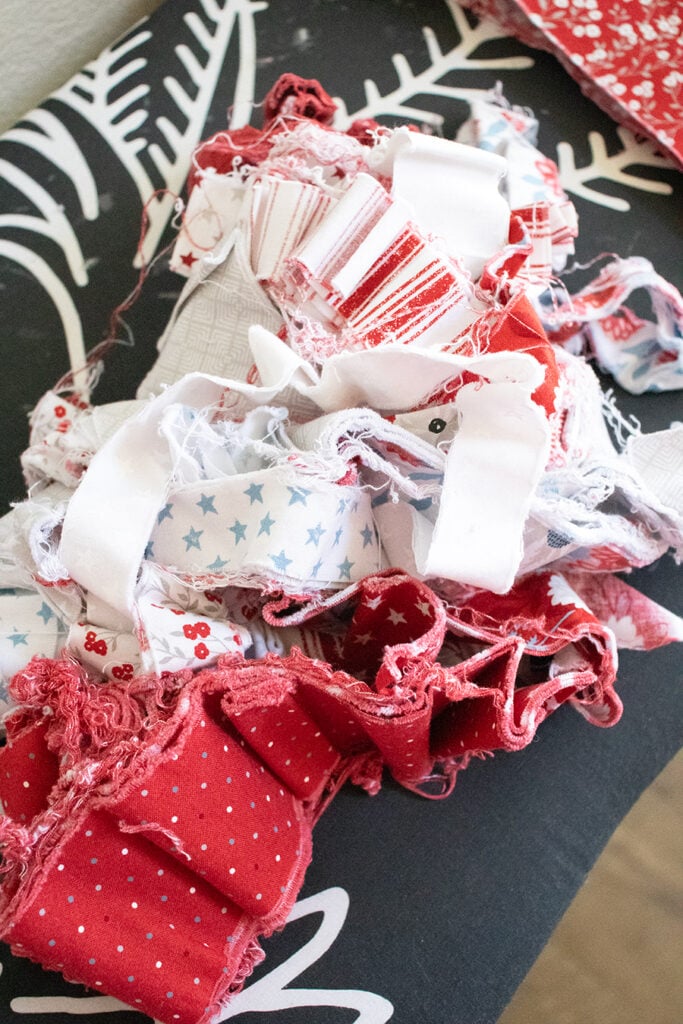
Next, you’ve got to detangle the strips from each other and trim the excess threads. After everything is cleaned up, press each strip.
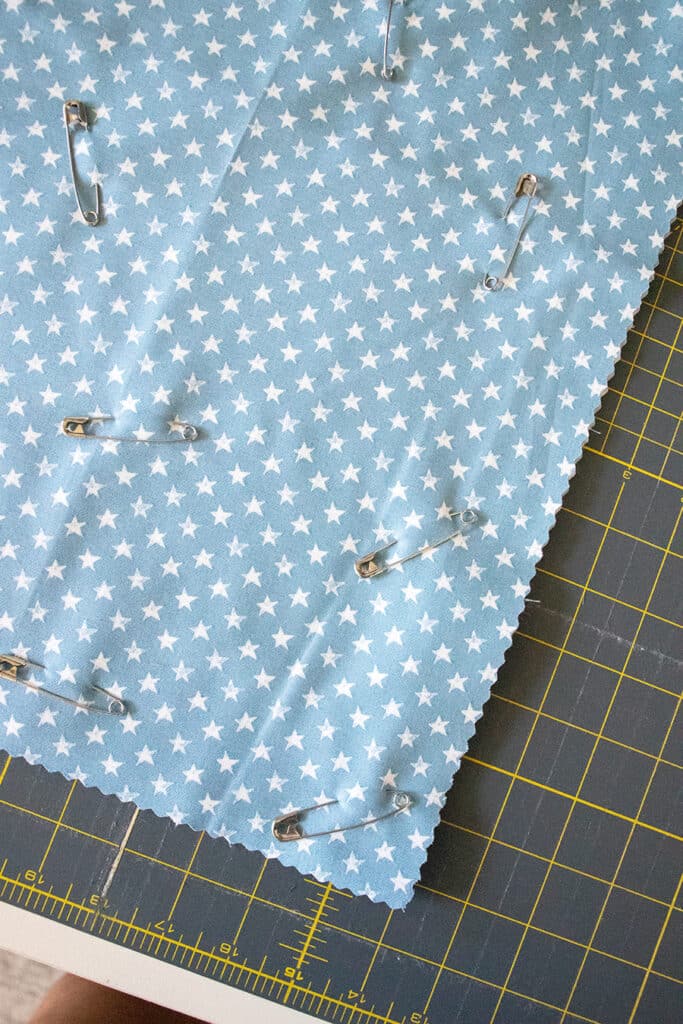
Preparing the Blue Accent Rectangle
Bring the blue rectangles wrong sides together with the batting center in between. You can “baste” the layers together with a sticky basting spray or by inserting safety pins throughout. (The purpose of basting is to prevent the layers from shifting while you quilt it together.
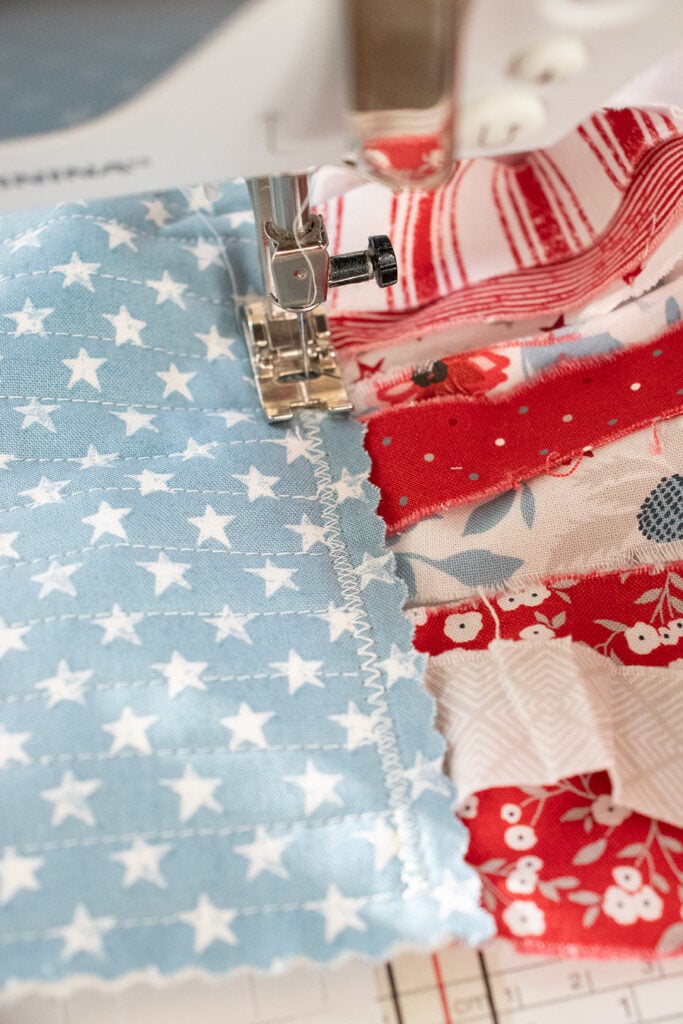
To quilt the layers, I just stitched straight lines on my domestic (Bernina) sewing machine. They are about 1/2″ apart – I just lined up the edge of the walking foot with the previous line.
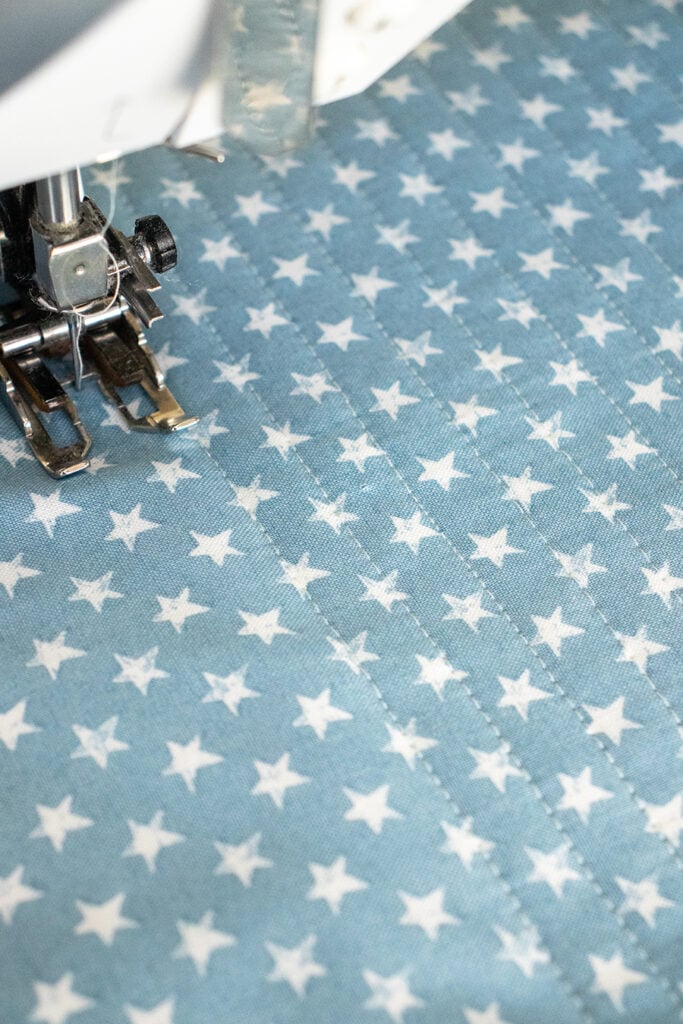
After it was all quilted, I topstitched around the perimeter, on top of the marked line, using a tight zigzag stitch to run perpendicular to (and “finish” off) the quilted lines.
NOTE: Despite your best efforts, the layers may have shifted during quilted. Feel free to trim and “square up” the edges. It started out 16″ x 18″ but I trimmed mine to 15.5″ x 17.5″.
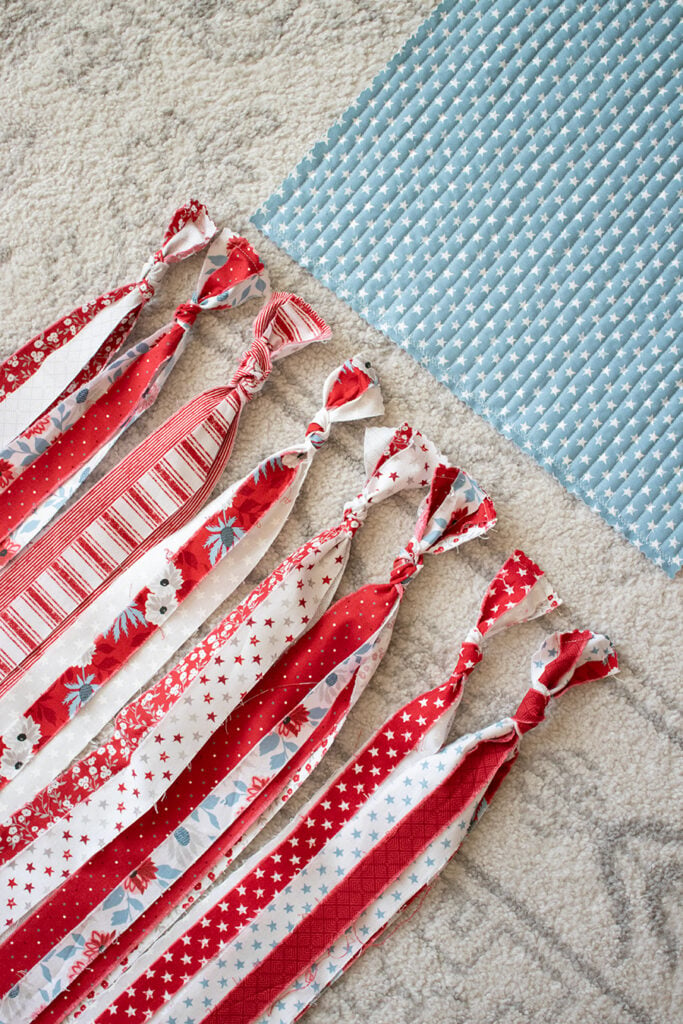
Arrange the Strips
It is helpful to get an idea of the arrangement you want ahead of time. I started out by laying down the 2-1/2″ strips first. I divided them so (12) strips were on the left side (under the quilted blue rectangle) and (16) strips to the right side. You will probably want to spread yours out a little more than I did.
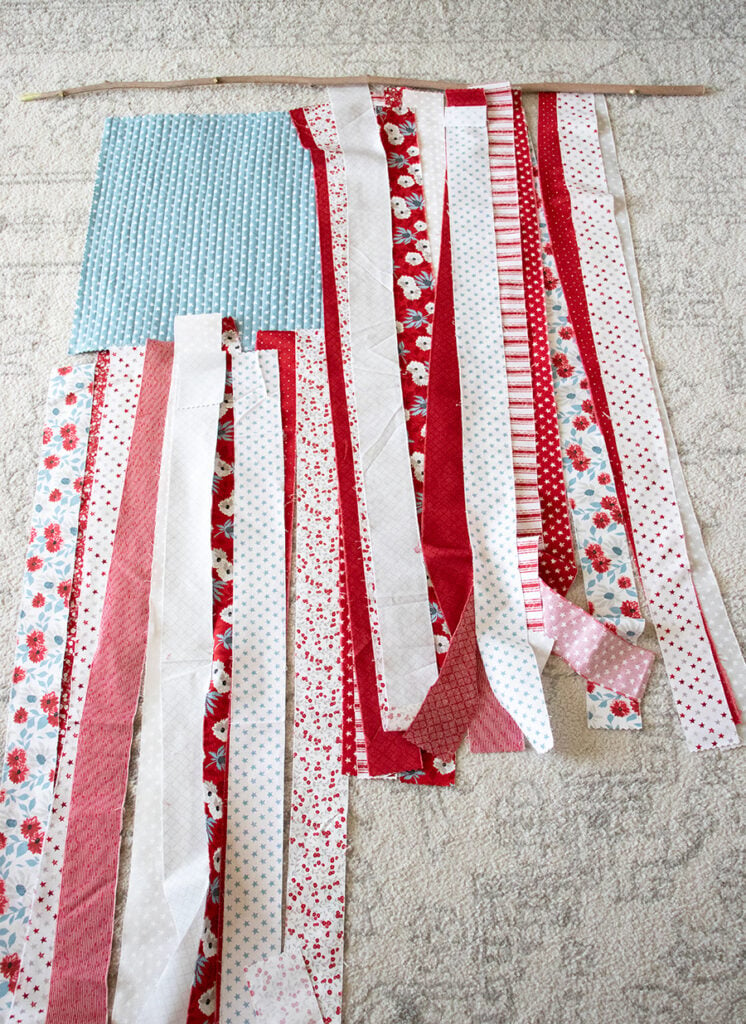
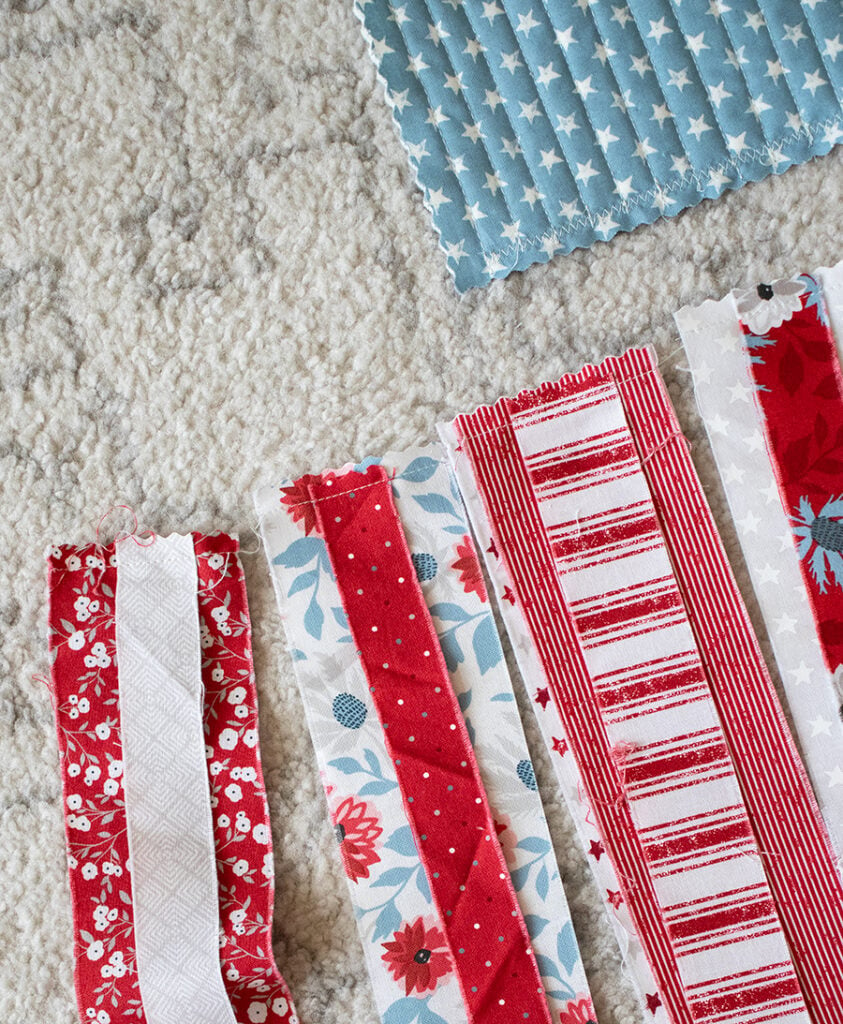
Once they are arranged to your liking (I look for an even distribution or red/white overall), add in the other skinnier strips. From there, I started organizing them into mostly pairs – but even a few trios as well. From there, I stitched them together along the top edge, all prints facing up. They don’t have to be centered or layered perfectly – the point is to look scrappy and imperfect. Pay attention to keep them in their left/right sections.
Right Side: Making Knots
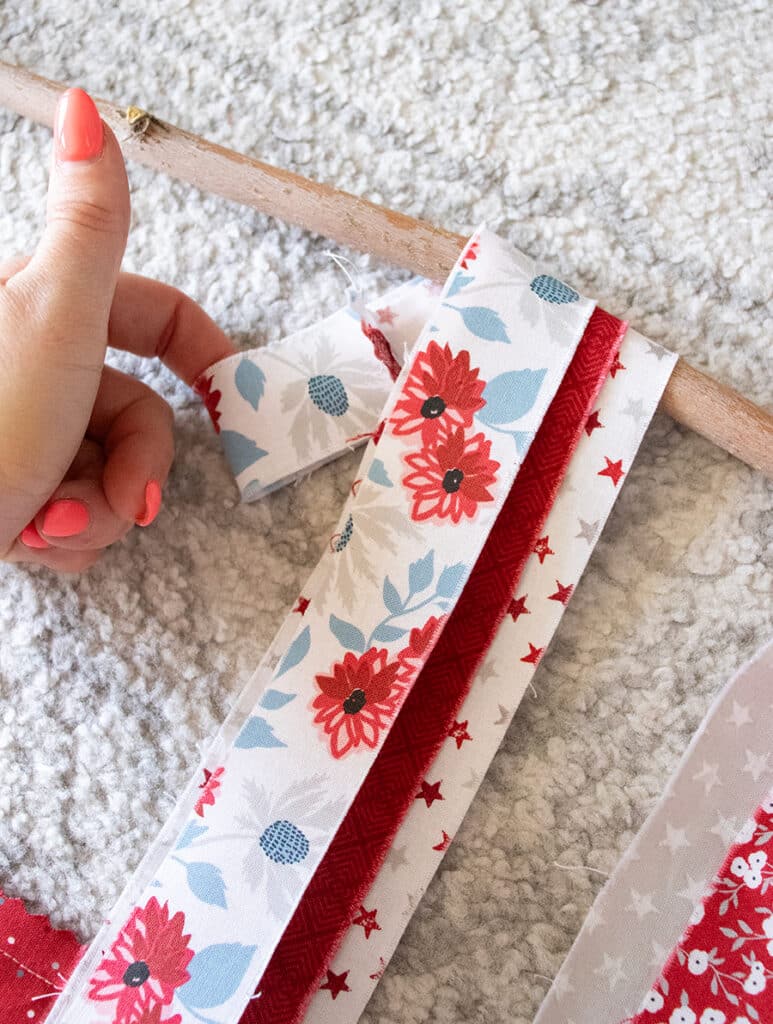
For the next part, we are going to tie our layered strips to the right-half of the rod/dowel using a knot similar to a gift tag knot. (I’m not sure what the actual name of the knot is, but that’s where I’ve seen it.)
Pull the top strip of the set above the rest by an inch or two.
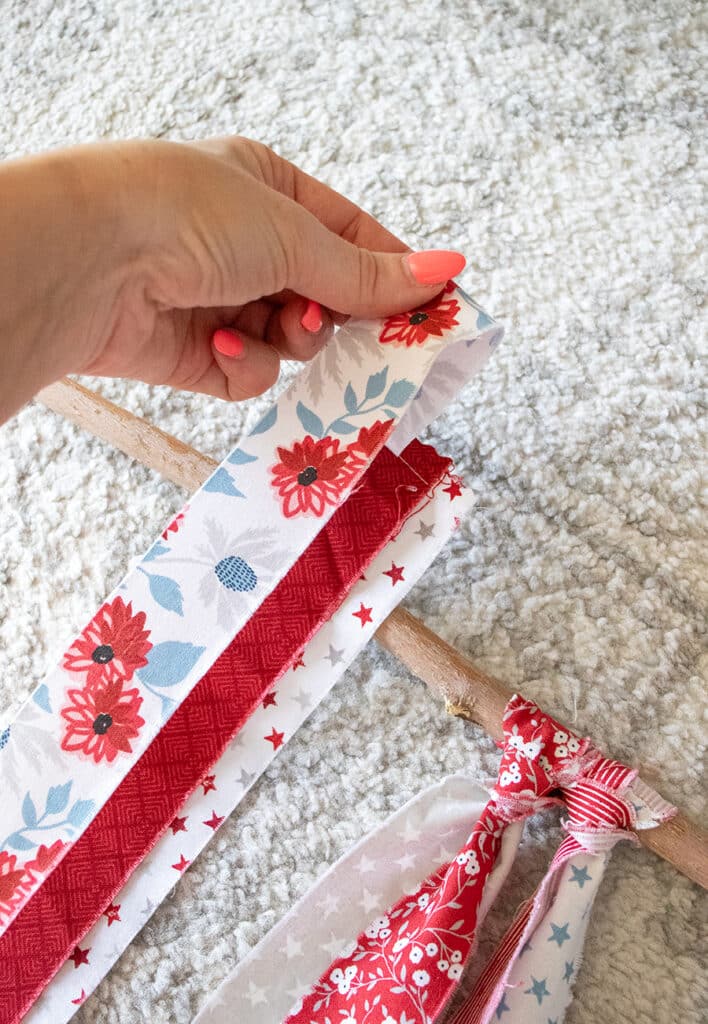
Wrap it up and over to the back of the stick/rod, pulling the strip set with it.
Pull the strip set through this back “loop” and start pulling…
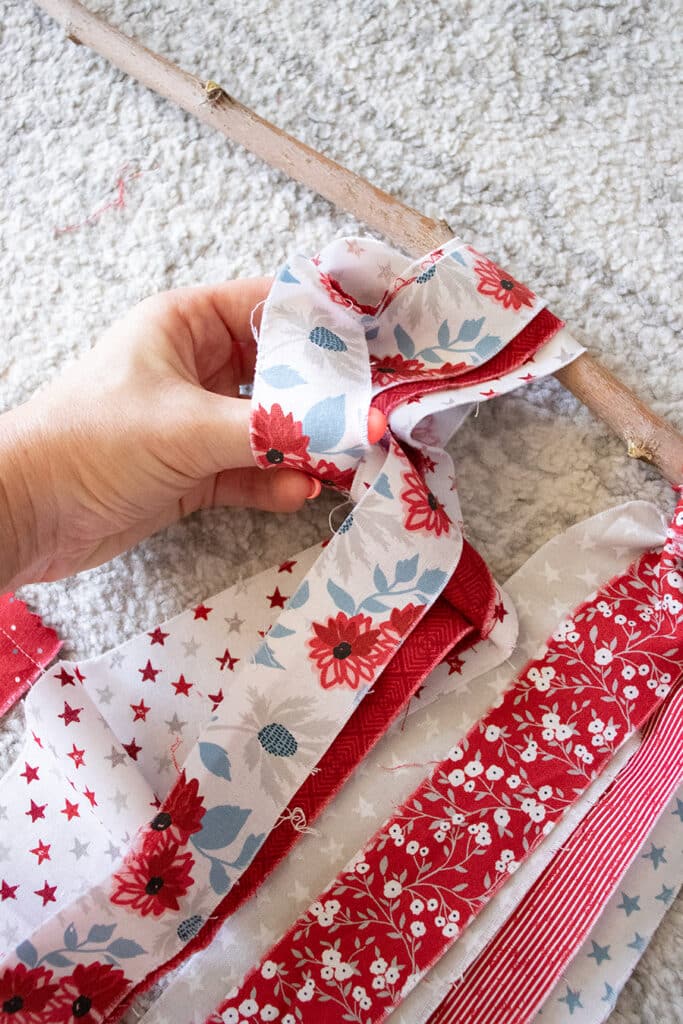
It will look something like this, like a neck tie. (I need to pull it tighter… at this point I try to tuck any raw edges first.)
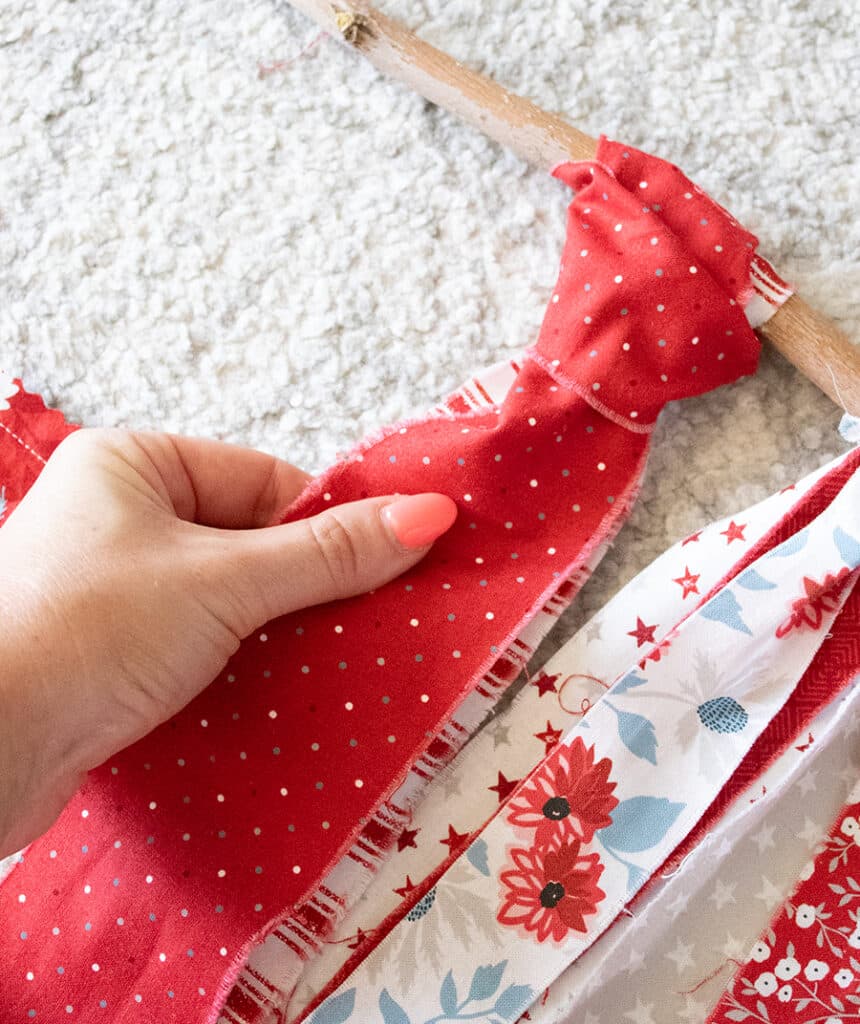
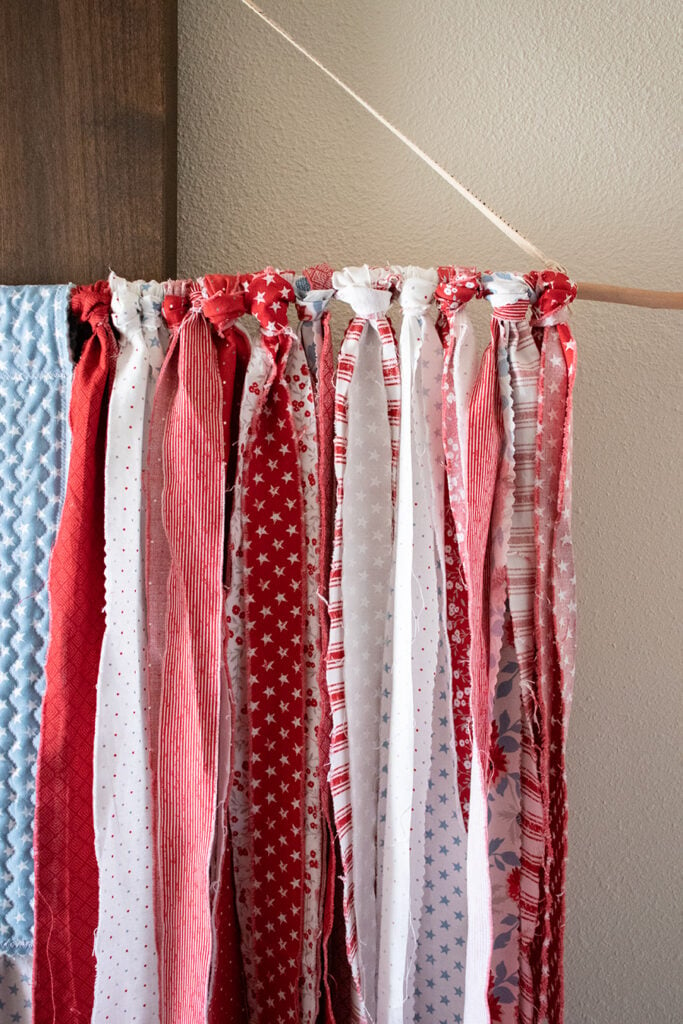
Once they’re all pulled tight, they will look something like this:
Left Side: Regular Knots
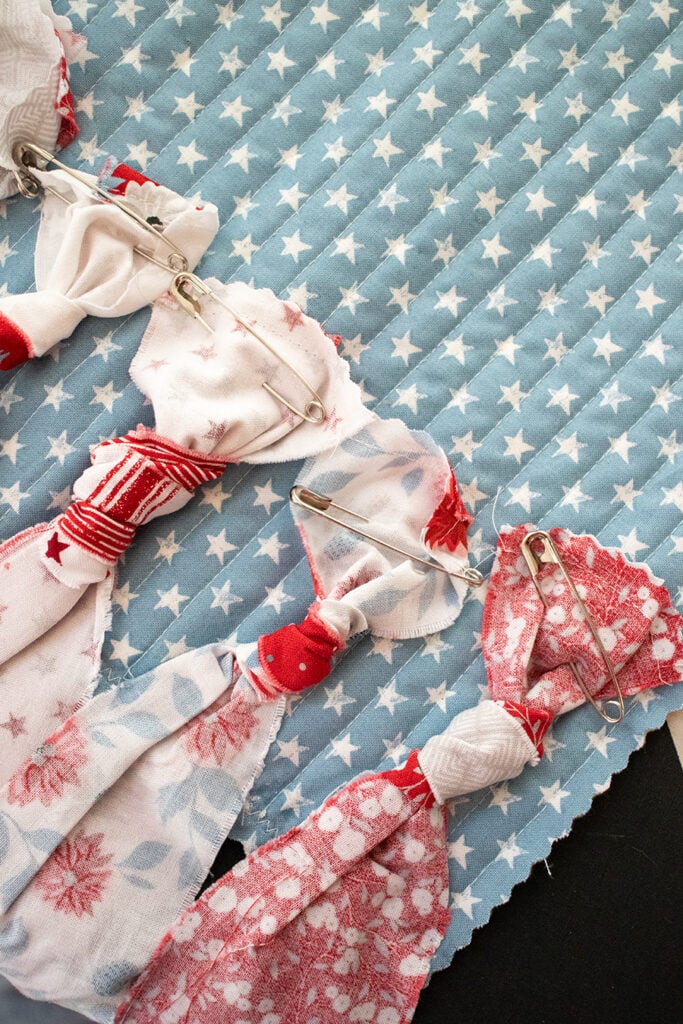
For the strip sets on the left, I took each set and tied itself into a knot near the top. This is to help give a “bunched” look to the strips before sewing to the quilted blue rectangle.
Next, flip the knotted strip sets over (right side of the fabric facing down). Pin them to the “bottom” (shorter) side of the quilted blue rectangle, spreading them out evenly. (This will now be considered the “back” of the quilted blue rectangle.) Use safety pins – and pin them high enough up from the bottom edge so the existing zigzag stitch line (underneath them) is below the knots by at least 1/2″.
Flip it over so the front of the quilted blue rectangle faces up with the pinnings underneath. Carefully topstitch over the existing zigzag edge with another layer of zigzag stitching. Stitch slowly, making sure the strips don’t get tangled/flipped.
Flip it over to the back again. Remove the safety pins from the knots and trim the knots off (leave at least 1/4″ above the zigzag stitches). Next, fold the top-end down approx. 2″ and press with an iron. (This measurement may need to adjusted based on the thickness of the stick/dowel being used to hang this all from.)
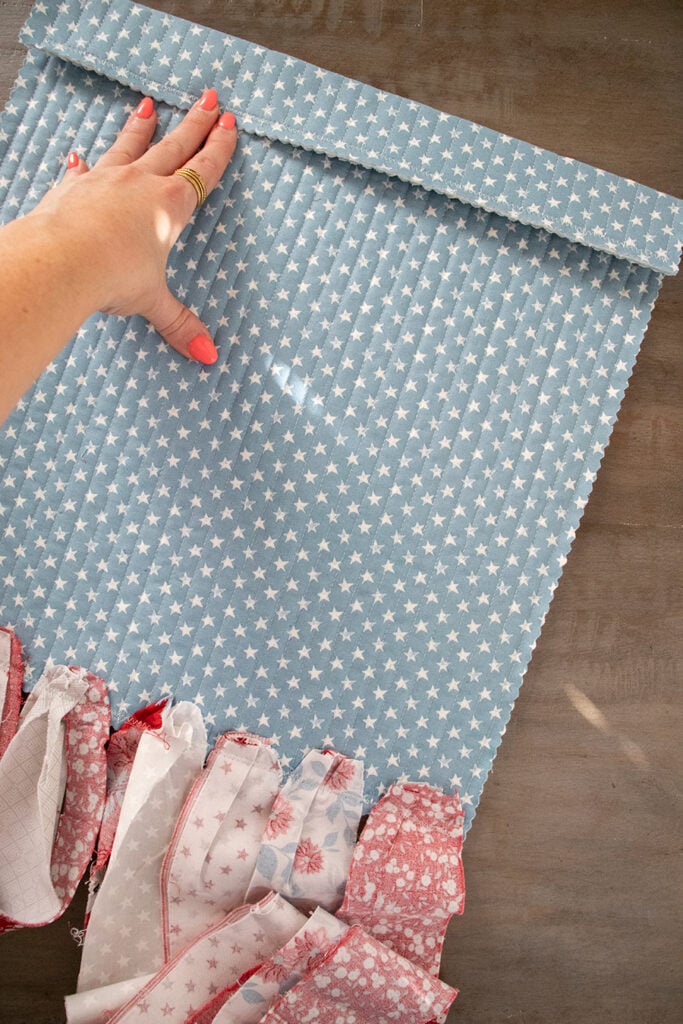
Now you can slip the blue rectangle “sleeve” onto the left side of the stick/dowel. Adjust as needed so everything is centered within the stick. The strips on the left side will be longer – carefully trim them to mirror the length of the strips on the right side. (Vary the lengths.)
Hope you enjoyed making your scrappy rag flag! If you have any questions, let me know in the comments below!
Like this post? Drop your email in the box below to get new post notifications via email.
Leave a Reply
You must be logged in to post a comment.
9 Comments
Tara
June 26, 2024 at 5:12 amLove this! My hunt for the perfect stick is on!
Thank you for the inspiration!!❤️
Kim Patterson
June 26, 2024 at 7:55 amThank you for all the detailed pictures! They help so much! I love Old Glory fabric ~ it’s gorgeous!! I’m making several quilts with it so I have plenty of scraps to make this flag! Can’t wait to hang it on my front porch!! 🇺🇸❤️🇺🇸💙
Nancy F
June 26, 2024 at 8:25 amVanessa,
This is adorable, I will make this.
Thank you.
Nancy
Robyn
June 26, 2024 at 10:30 amThank you for sharing! This flag is absolutely amazingly creative. I have patriotic fabric and trying to decide what to make. Now I know as this is Perfect!
lellaboutique
July 9, 2024 at 11:03 pmSo glad I could help provide some inspiration! 🙂
Janet Hug
June 26, 2024 at 2:21 pmI love this idea for a seasonal window valance over my kitchen window. Thank you for posting the instructions and photos. I am currently making the Fat Quarter Shop Liberty Box quilt. I love your fabrics!
lellaboutique
July 9, 2024 at 11:03 pmThat’s a lovely idea! I’m glad you like it and can already imagine it at home. Thanks for the Old Glory love!
Karen Sanford
June 27, 2024 at 9:46 amThank You Vanessa for these instructions to make this Adorable Scrappy hanging Flag. I’m going to attempt to make one🇺🇸❤️💙
lellaboutique
July 9, 2024 at 11:02 pmGood luck, Karen! I hope it turned out just as you wanted and you got to enjoy it for the 4th!