
Chenille-It Sew Along: Week 1
Who’s ready for some Chenille-It fun?! Welcome to Week 1 of the Chenille-It Sew Along hosted by me (Vanessa of Lella Boutique) and Nannette of Chenille-It. For years, I have loved watching Nannette add that yummy soft texture to my quilt panels and many other projects. Now I get to join in the fun and learn all about the process with you.
Check Your Supplies
Before we get started – let’s double check you’ve got everything you need to get started. Here’s what you’ll need for the Chenille-It Sew Along:
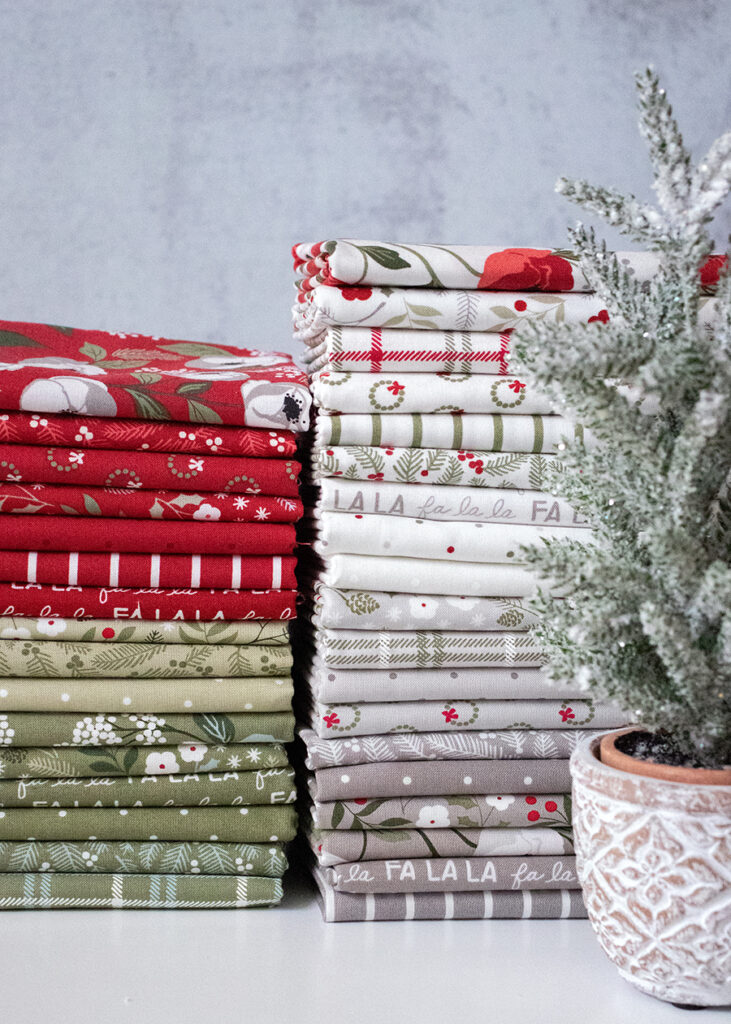
- (1) ‘Tis the Season quilt panel (part of the Christmas Eve collection by Lella Boutique for Moda Fabrics
- (4) yards backing fabric (pick your favorite print from Christmas Eve)
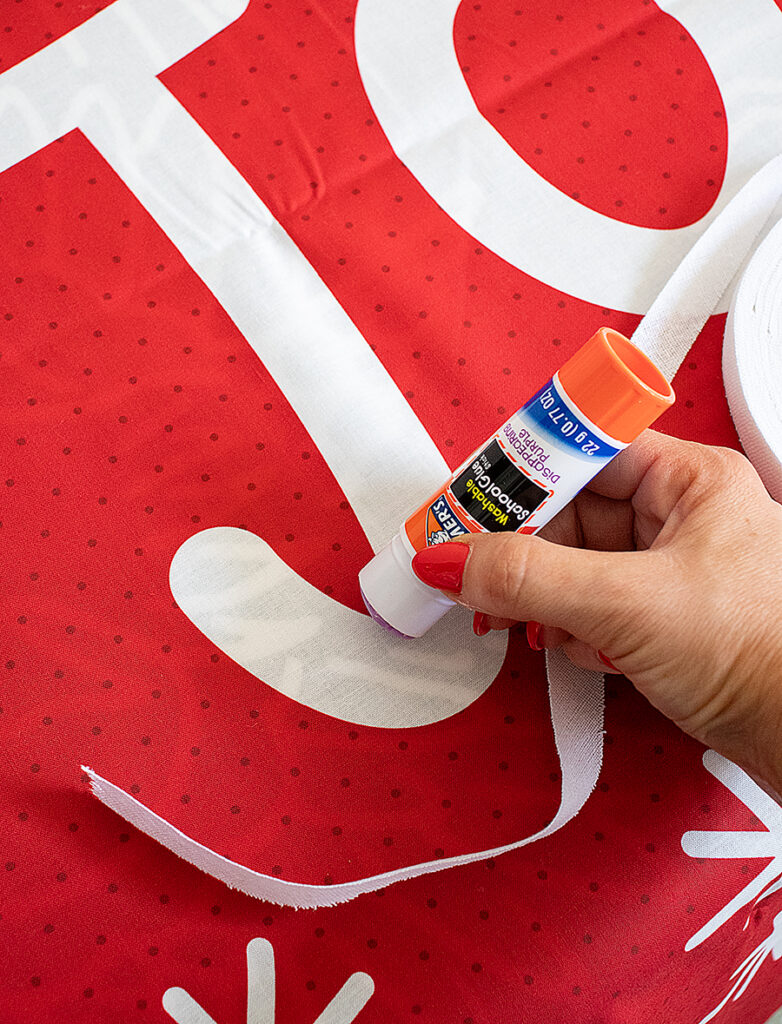
- (1) Washable glue stick (Elmer’s School brand works great)
- Chenille-It Blooming Bias in the following colors/widths:
- 1 roll + 8 yards “White” 3/8″ Blooming Bias
- 1 roll “Chocolate” 3/8″ Blooming Bias
- 15 yards “Sage” 3/8″ Blooming Bias
- 3 yards “Red” 3/8″ 3 yards” Blooming Bias
- 1 roll “Fern” 3/8″ Blooming Bias
- 1 yard “Pale Pink” 5/8″ Blooming Bias
- 1 roll “White” 5/8″ Blooming Bias (for “Jolly” letters and binding)
NOTE: If you need help finding supplies, check with your favorite local or online quilt shop. I think Nannette still has a few ‘Tis the Season Chenille-It kits left here too.
Week 1: Words & Snowflakes
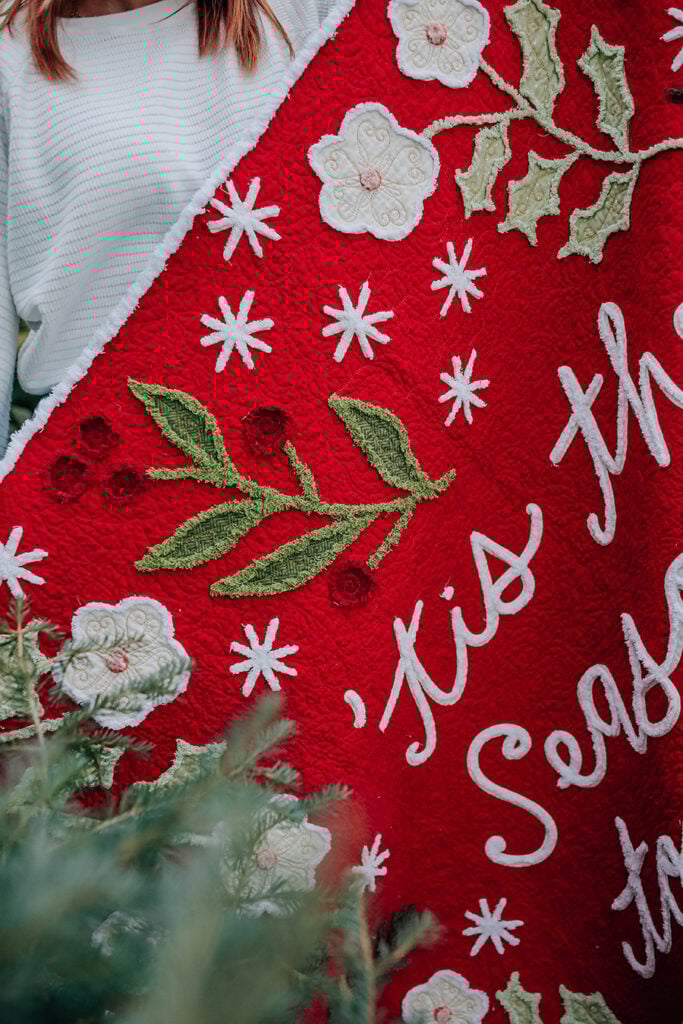
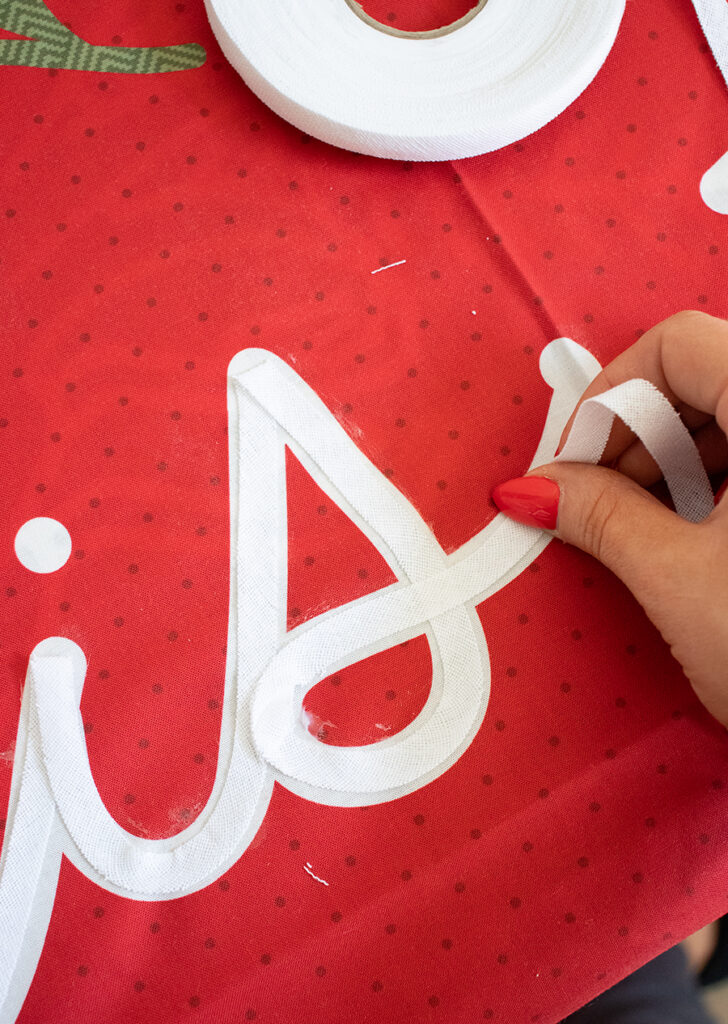
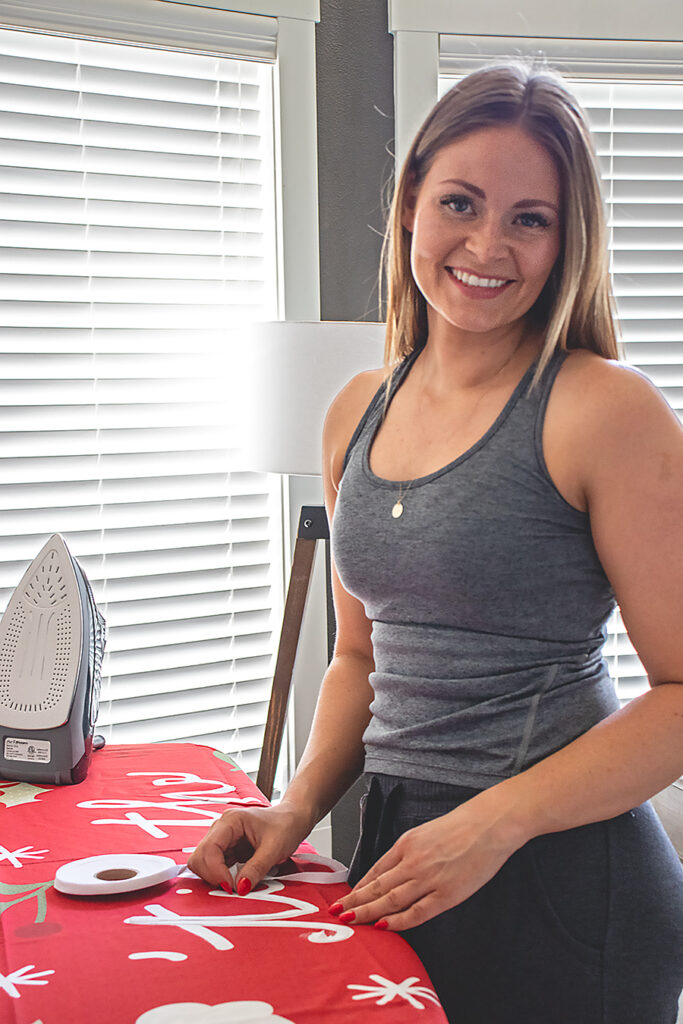
This week, we will begin stitching the blooming bias strips in place by focusing on just a couple areas of the ‘Tis the Season quilt panel. Specifically, the white lettering and little asterisk/snowflake shapes. We will be using both the 3/8″ and 5/8″ widths of blooming bias in White from the kit. Today’s class comes to use thanks to a video tutorial Nannette put together on the Chenille-It YouTube channel so there’s not too much I need to go over in this post. The gist is this – we are outlining the panel’s lettering with the blooming bias ribbon, first gluing it in place before stitching it down. Now, using a glue stick is optional, but I highly recommend it! (This is the easiest way to hold the blooming bias ribbon in place.) And there’s literally no downside – the glue will wash out later.
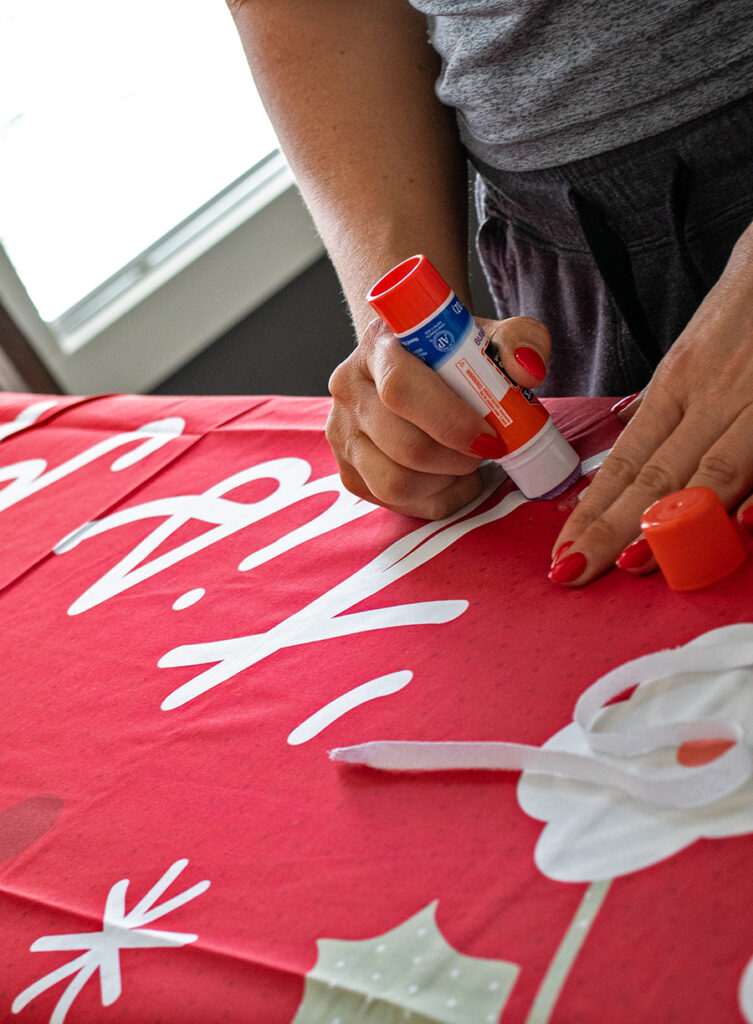
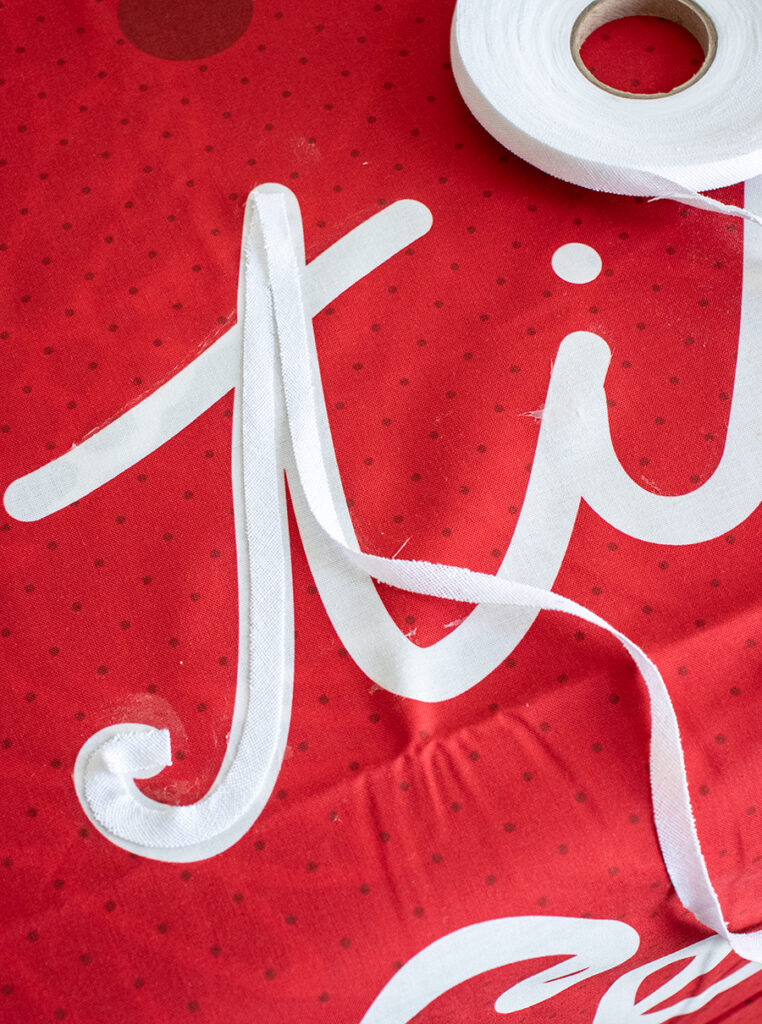
I found the process to be fairly straightforward. We’re gluing the blooming bias to the panel, laying it to follow the path of the lettering as if writing it. Use the 3/8″ width for the smaller letters (“’tis the season to be”) and the 5/8″ width for the big ones (“jolly”). Because this ribbon has a perfect bias, it’s fairly easy to bend around curves. But if you feel a corner is too tight, fold it down instead. (There’s no right or wrong side to the ribbon.)
Here’s another closeup. As you can see, it’s perfectly fine to overlap the blooming bias ribbon as seen in the “S” letter.
Don’t forget to switch to the 5/8″ width of blooming bias ribbon on the big letters that spell “JOLLY.”
Once everything is glued in place, stitch the lettering in place, focusing on keeping the stitching as center over the ribbon as possible. Of course, you can move things as you go (if needed). Be sure to watch the video for all of the little details. (I love Nannette’s trick for the asterisks/snowflakes.)
Post for Prizes #ChenilleItSAL
Let’s make this sew along extra fun! Post a pic of your progress for Week 1 on social media and use the hashtag #ChenilleItSAL to be entered. The prize for Week 1 is a fat quarter bundle of Christmas Eve fabric! Good luck everybody and have fun – I’ll announce the winner on next week’s post. So glad you’re here!
Also. If you have any questions that aren’t answered in the YouTube video, please drop them in the comments below. Chances are, if you have the question – someone else probably does too! You can also ask them directly on the YouTube video.
Like this post? Drop your email in the box below to get new post notifications via email.
Leave a Reply
You must be logged in to post a comment.
12 Comments
Linda Pickenpaugh
July 10, 2023 at 4:55 amSo much fun to learn something new. Really like the look of this and appreciate the video.
Karen Griffin
July 10, 2023 at 5:48 amCan’t wait to get started!
Gail Heyblom
July 10, 2023 at 5:50 amSo excited to do this project!
Deb Hamer
July 10, 2023 at 7:24 amJust ordered my chenille-it kit!
Can’t want to get started!
Roxanne Sposato
July 10, 2023 at 9:37 amI’m so excited to start this. I got 3 kits, one for each of my daughters and one for myself. Going to do mine first so I can learn the “tricks of the trade”. Thanks so much for the sew along.
Debi Haupt
July 10, 2023 at 7:57 pmI have my kit and am anxious to get started however a vacation was on the books so I’ll be behind but can’t wait to get started.
Terri Mulinix
July 11, 2023 at 9:36 amI’m so excited about this project
Randi A
July 16, 2023 at 2:15 pmI’m excited to try this new technique! Can’t wait to get started!
#ChenilleItSAL
Dana
July 11, 2023 at 11:10 amI’ve been looking forward to this!
Sarah
July 12, 2023 at 9:46 amWill I be overdoing it by double layering the Chenille-it for extra fluff?
Kat
July 15, 2023 at 10:37 amJust ordered my kit. I love trying new things! This is a fun way to use panels.
Shirley
July 29, 2023 at 11:19 amI am so glad I found this! Purchased the kit after seeing a past year’s quilt but was not sure how to start!! Thank you!