Goody Goody Binding Kit
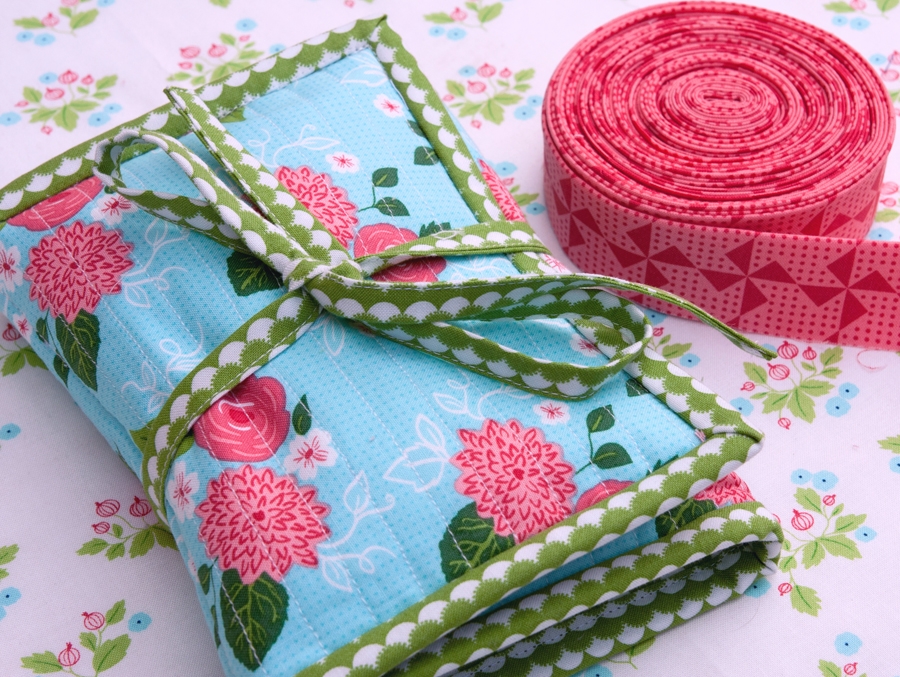
It is common knowledge that a quilter is in need a lovely binding kit.
I bind more than a few quilts every year, so a portable binding kit is essential for me. Whether I’m out on the road or at home, no matter the size of the quilt, I use my binding kit for every single project.
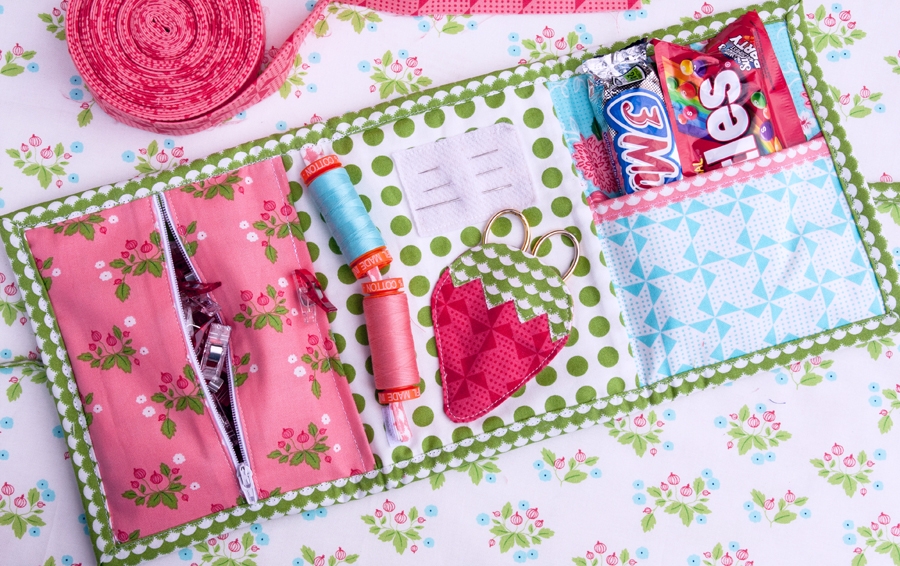
I recently made this one using my new Gooseberry fabric (ships October 2015) and have gotten a lot of compliments and requests to share some of the construction details so I’m posting the tutorial here today.
I didn’t invent the idea–I was inspired by my friend Amy and her fabulous Travel Sewing Kit. It includes my own additions like this zipper compartment to store binding clips. I am not a fan of sewing with zippers but this was EASY. If you’ve never sewn with a zipper, this is a great project for you.
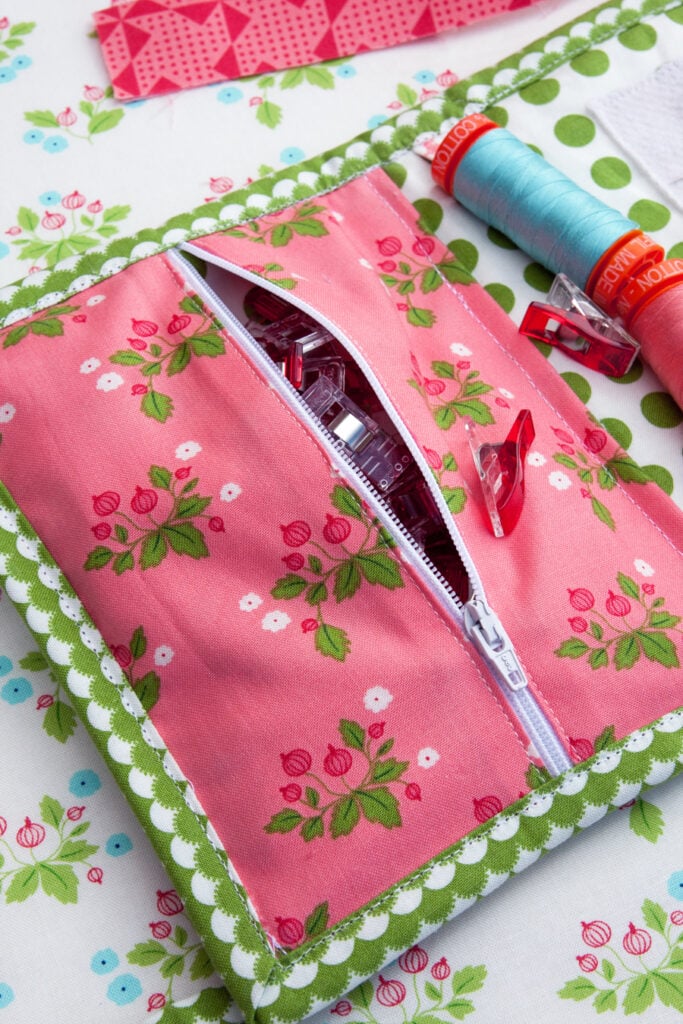
Before we get started, let’s take a look at some of the other features of this binding kit.
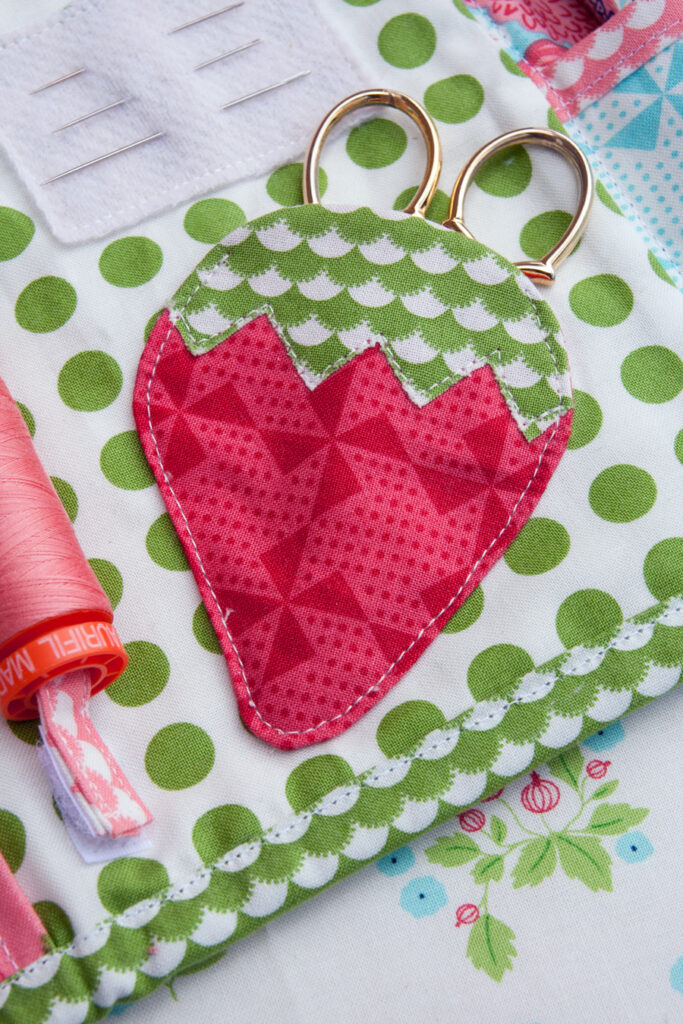
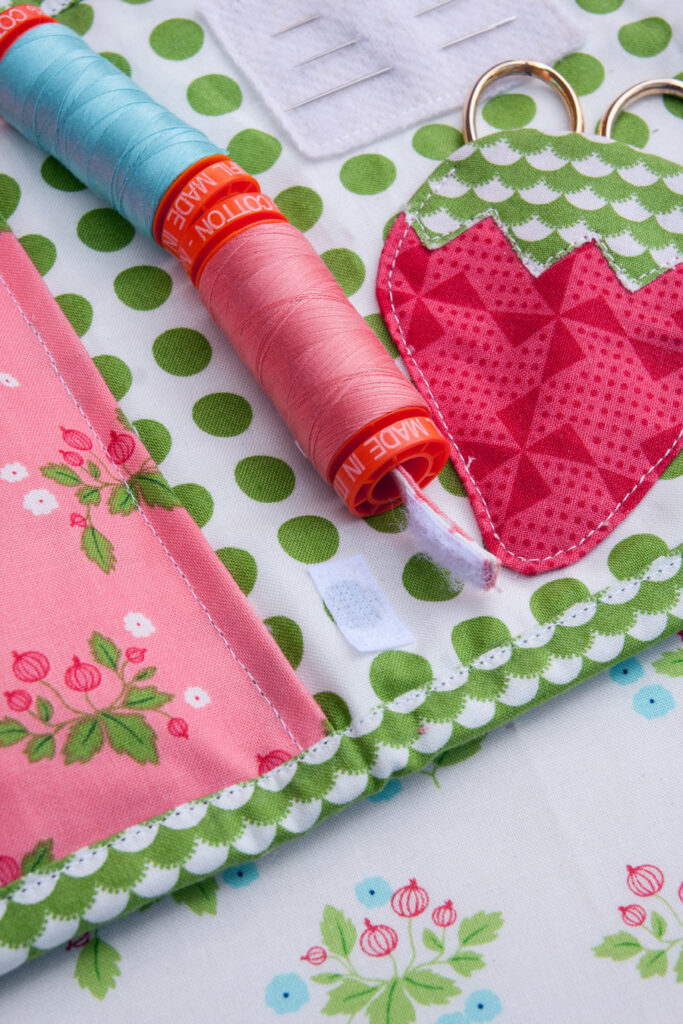
In the center section of the kit, there is a thread holder for your favorite Aurifil thread spools, a wool felt rectangle for needles, and a sweet strawberry pocket for a small pair of scissors.
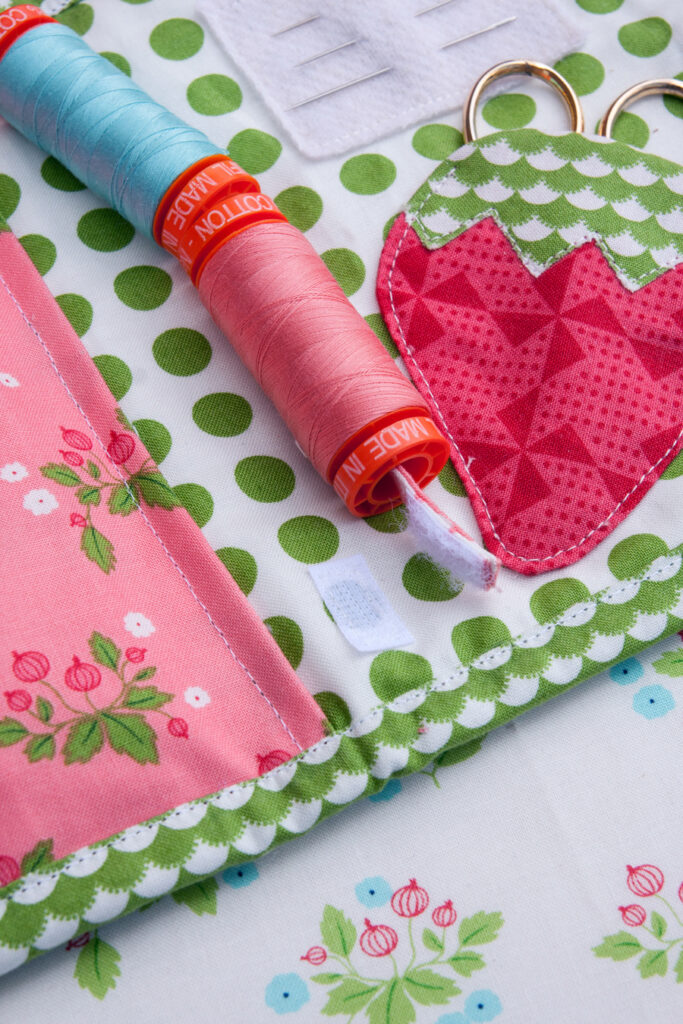
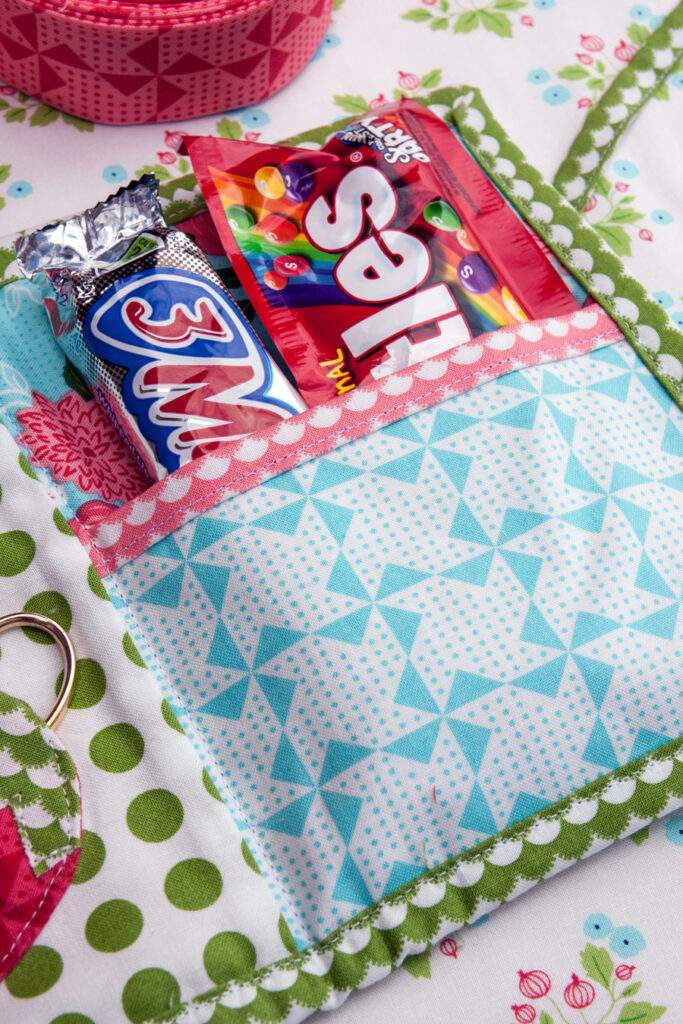
You’ll also find a nice spacious pocket for anything else you might want to tuck in there for binding time. Here are a couple of my “essentials” (and the reason I call it my Goody Goody binding kit):
Let’s get started.
MATERIALS NEEDED FOR YOUR GOODY GOODY BINDING KIT:
- 1 fat quarter for exterior/interior panel B
- 10 x 20” cotton batting
- 1 fat eighth interior panel A
- 1 fat quarter binding/exterior tie
- 1 fat eighth zipper compartment fabric
- 1 polyester zipper (9” or longer)
- 1” square of Velcro
- 1-3/4 x 2-1/2” rectangle of wool felt
- 5” square HeatnBond Lite
- 2 x 4″ scrap for strawberry stem
- Two 5 x 5” scraps for strawberry pocket
- 10” square pocket fabric
- 10” square thread holder/pocket binding fabric
- Walking foot, for quilting
- Zipper foot
CUTTING YOUR GOODY GOODY BINDING KIT:
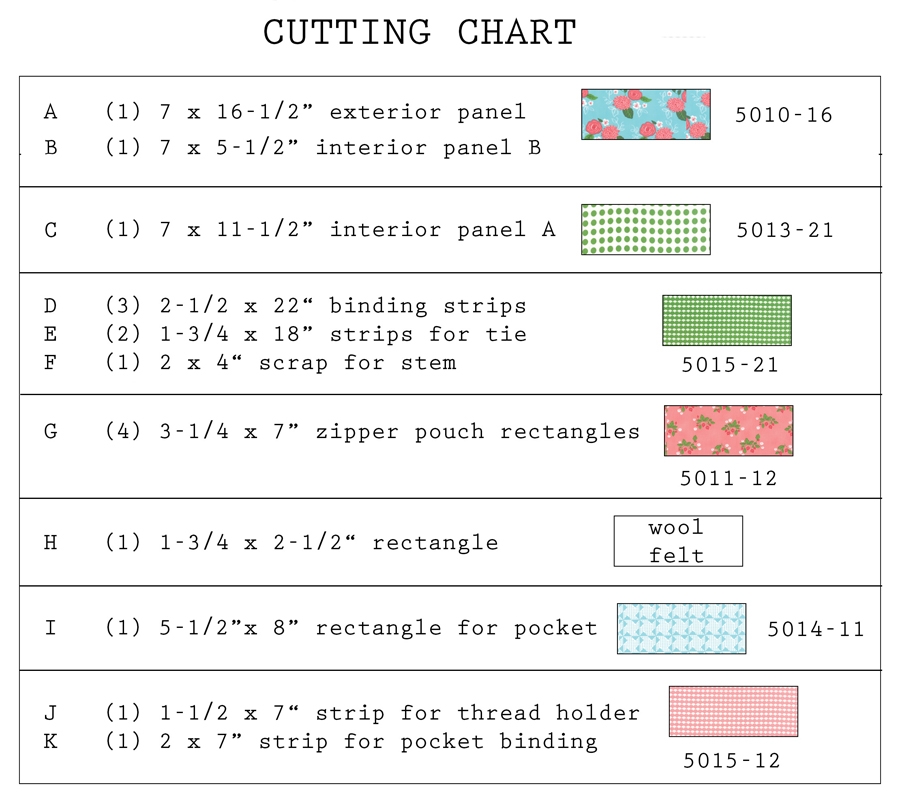
Cut all pieces according to the cutting chart below and label according to each letter designation.
GOODY GOODY BINDING KIT GENERAL ASSEMBLY:
*Assume 1/4″ seam allowance
*RST means right sides together
Before you get started, check out this fun little video I filmed with Fat Quarter Shop. It shows a little about the binding kit, but mainly provides a video tutorial for step #2–how to sew the zipper compartment:
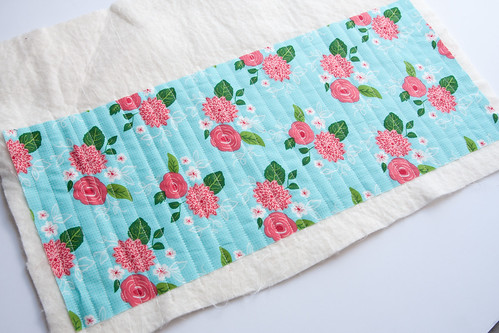
1. Exterior Panel: Baste the “A” exterior panel to the batting. Using your walking foot, quilt with vertical lines 1/2″ apart. Trim the excess batting and set aside for later.
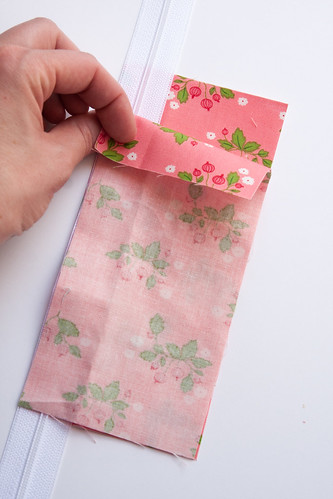
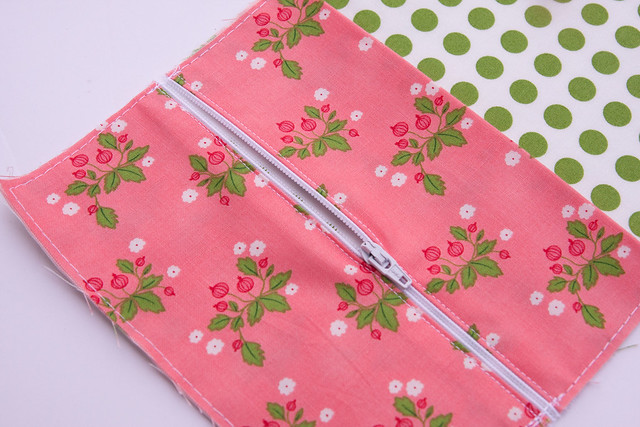
2. Zipper Compartment: Bring 2 “G” zipper compartment rectangles RST with the zipper in between, aligning all raw edges to the LEFT side. (NOTE: The zipper is longer than the fabric intentionally–the fabric should be centered in the length of the zipper with the zipper-pull out of the way.) Glue or pin in place. (I love Elmer’s school glue.)
Install the zipper foot and move the the needle to the edge. Stitch next to the zipper teeth on the left side along the entire length of fabric.
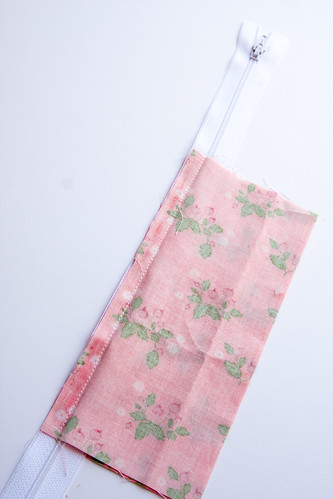
Flip the sewn rectangles wrong-sides together to the left side of the zipper teeth, press, and top-stitch next to the zipper.
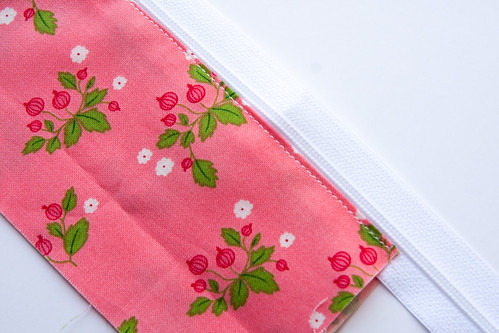
Repeat to the RIGHT side of the zipper–remember to move the needle accordingly. (Align raw edges on the right side of the zipper, pin or glue in place, and stitch next to the zipper teeth.)
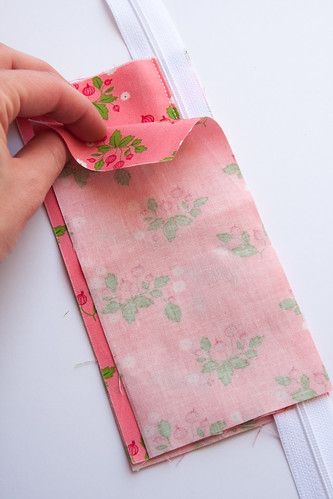
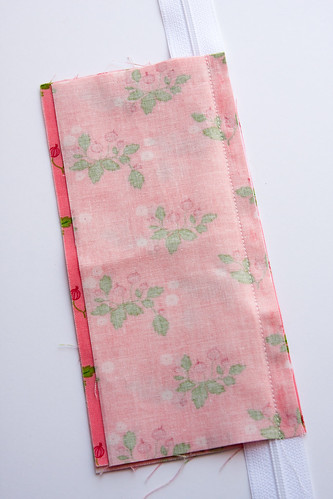
Flip the sewn rectangles wrong-sides together to the right side of the zipper teeth, press, and top-stitch next to the zipper.
Once you have top-stitched on the right side, mark a line across the top of the zipper.
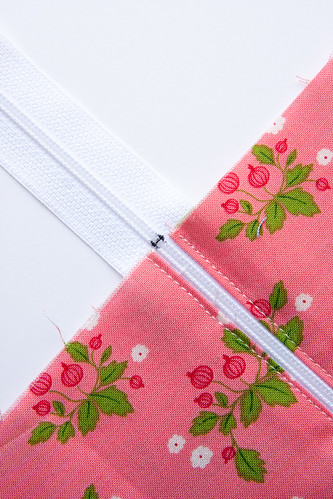
The next part is very important to do in the right order. The first thing you must do is bring the zipper-pull down so it is within the fabric area. I REPEAT, PULL THE ZIPPER INTO THE MIDDLE OF THE FABRIC AREA BEFORE TRIMMING THE ZIPPER. Only then should you trim the zipper across the marked line at the top, and across the bottom.
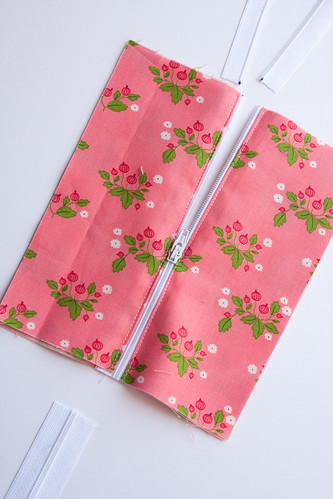
Install the walking foot onto the sewing machine and reset the needle position to center. Bring unzipped teeth at the top together and stitch back and forth a couple times to keep the teeth together.
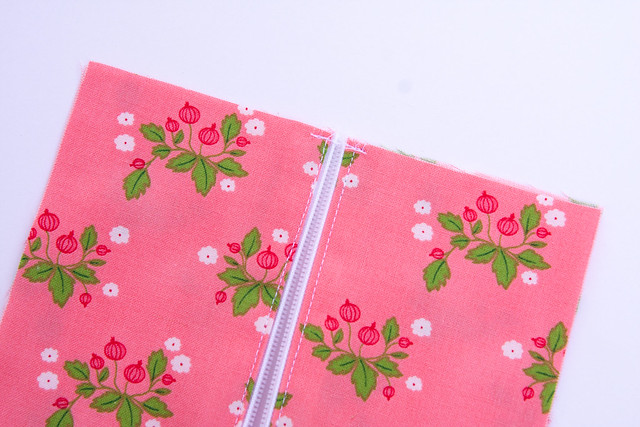
Fold the right-side of the zipper compartment under 1/4″ and iron the fold in place. Align the zipper-compartment to the left-side of the “C” (interior panel A) rectangle.
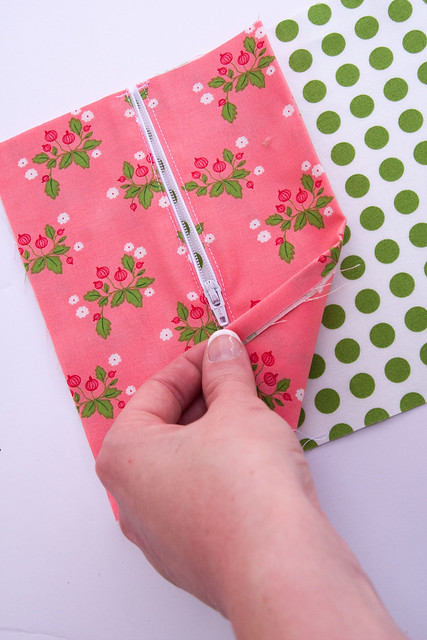
Using the longest stitch length on your sewing machine, baste the top, left, and bottom sides of the zipper compartment to the “C” (interior panel A) rectangle, leaving the folded edge unstitched.
3. Goody Pocket: Take the “I” pocket rectangle and fold in half, wrong sides together, and iron flat.
Fold the “K” pocket binding strip in half, wrong sides together; press. Align the raw edges of the folded pocket and binding strip at the top. The binding strip is slightly longer than the pocket rectangle–just center the pocket with the folded binding strip.
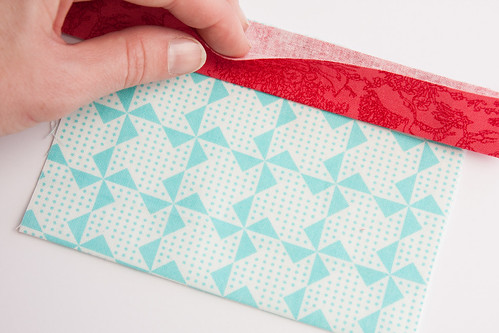
Sew 1/4″ away from the aligned raw edges.
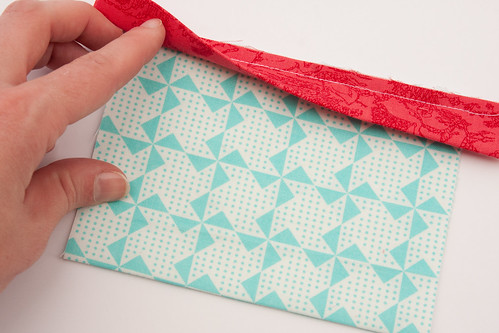
Flip the folded edge of the pocket binding upward. Iron.
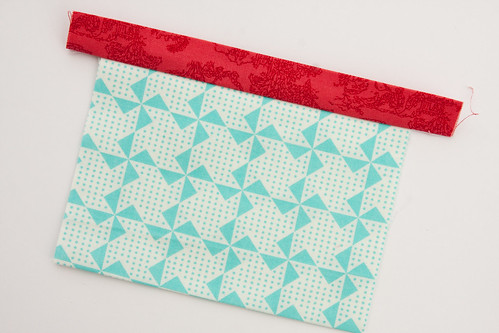
Flip the whole thing over, and apply Elmer’s School Glue above the seam.
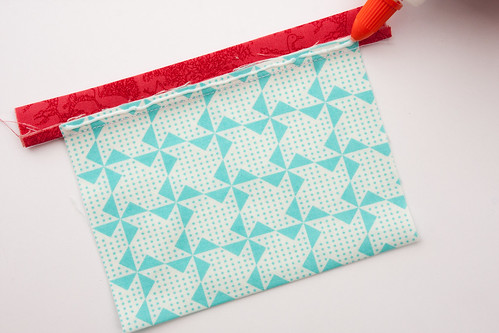
Bring the folded edge down to cover the seam from the front. Press in place.
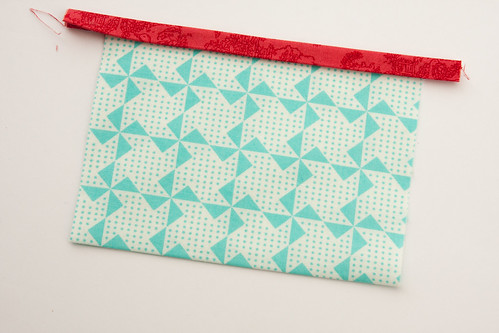
Turn it back to the front of the pocket and “stitch in the ditch.” (Stitch just below the binding, in the seam–this will catch the binding in the back.) When you flip it over, you’ll see the stitching came through to secure the folded end.
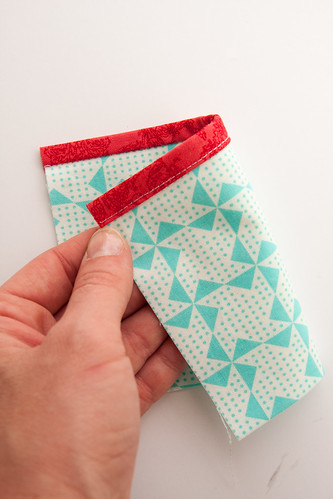
Place the pocket onto “B” (interior panel B) rectangle, aligning edges at the bottom. Using the longest stitch length, baste the left and right sides of the pocket to the “B” (interior panel B) rectangle.
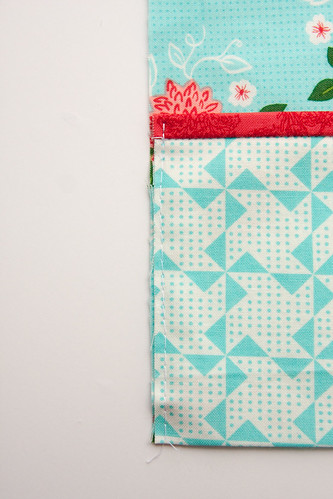
Sew the pocket panel to the right side of the “C” (interior panel A) rectangle using 1/4″ seam allowance. Press toward “C.”
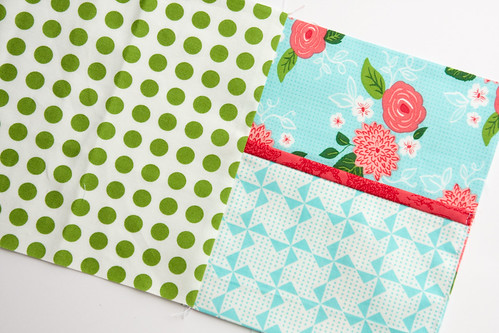
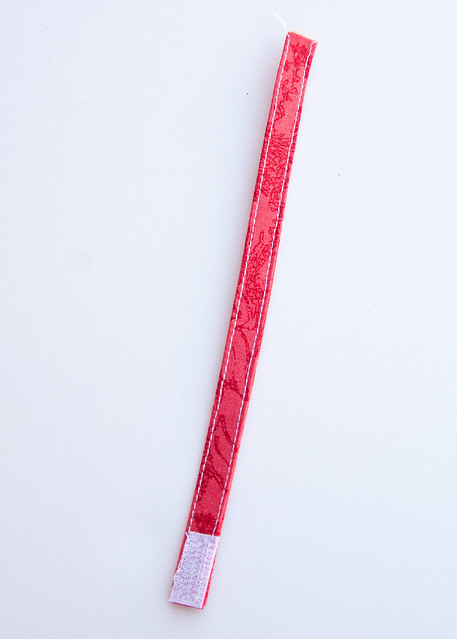
4. Thread Holder: To the “J” strip, fold in one short-end 1/4” and press. Fold the strip in half along the length and press to make a crease down the center.
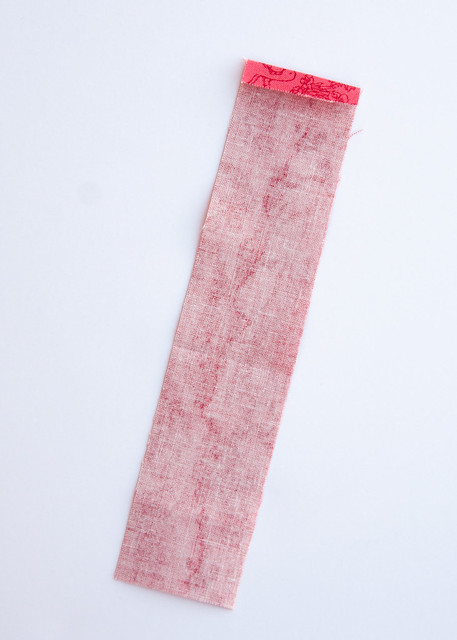
Fold the raw edges of each long side in to meet the crease in the center.
Press the new folds, then re-fold in half at the center crease to conceal raw edges; press. Glue one Velcro snippet at the finished end.
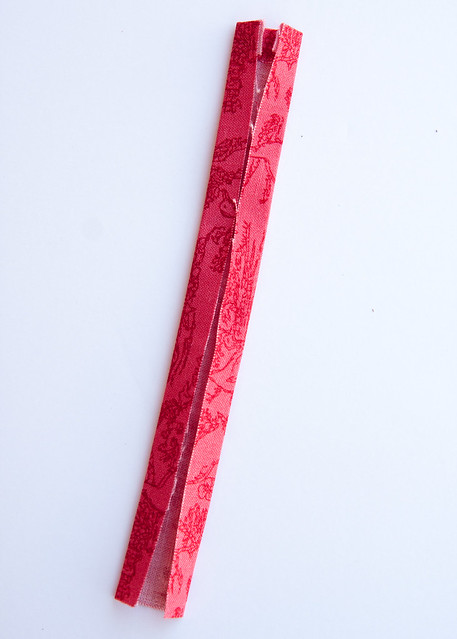
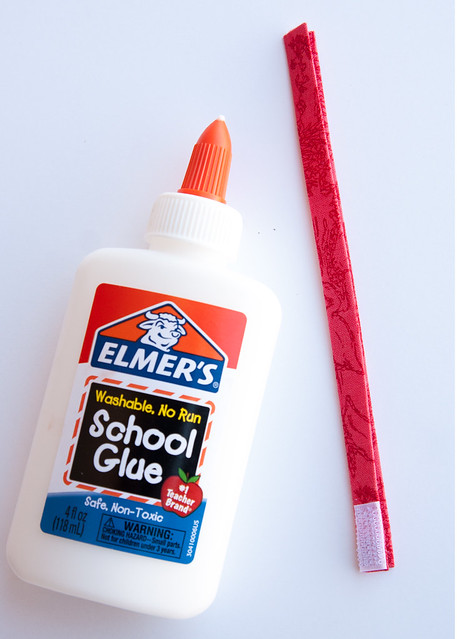
Top-stitch down both long sides and one short (the finished end), catching the Velcro snippet in the stitching to secure in place.
5. Strawberry Pocket: Download the Strawberry Pocket PDF here. (Make sure your printer setting is set to print it as an image at actual size–do not scale to fit.) Measure the 1″ square to make sure it printed correctly.
Using a sunlit window or lightbox, trace the “stem” onto the paper-side of the HeatnBond Lite iron-on adhesive.
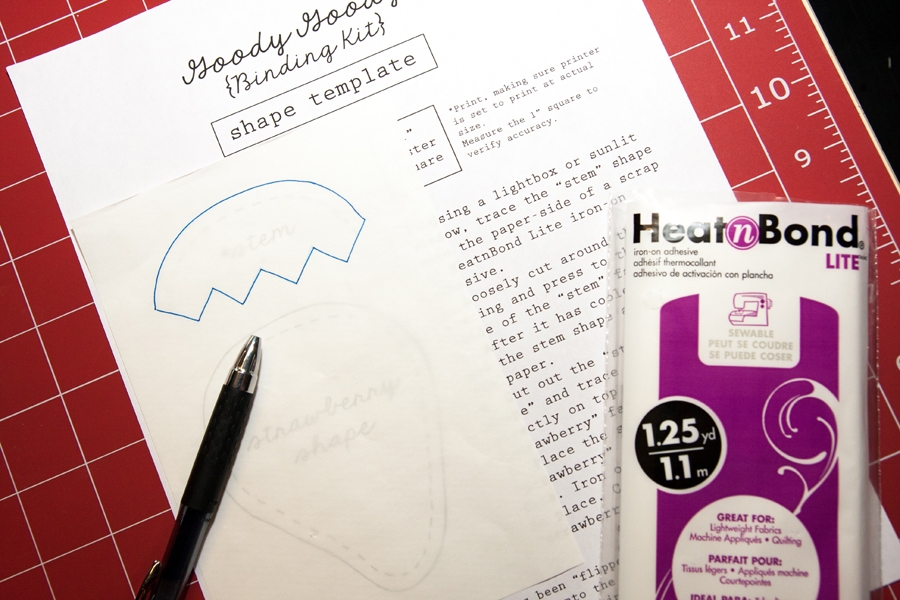
Loosely cut out the paper shape and fuse the gritty-side onto the wrong-side of the stem fabric scrap following package directions. Cut out the “stem” tracing.
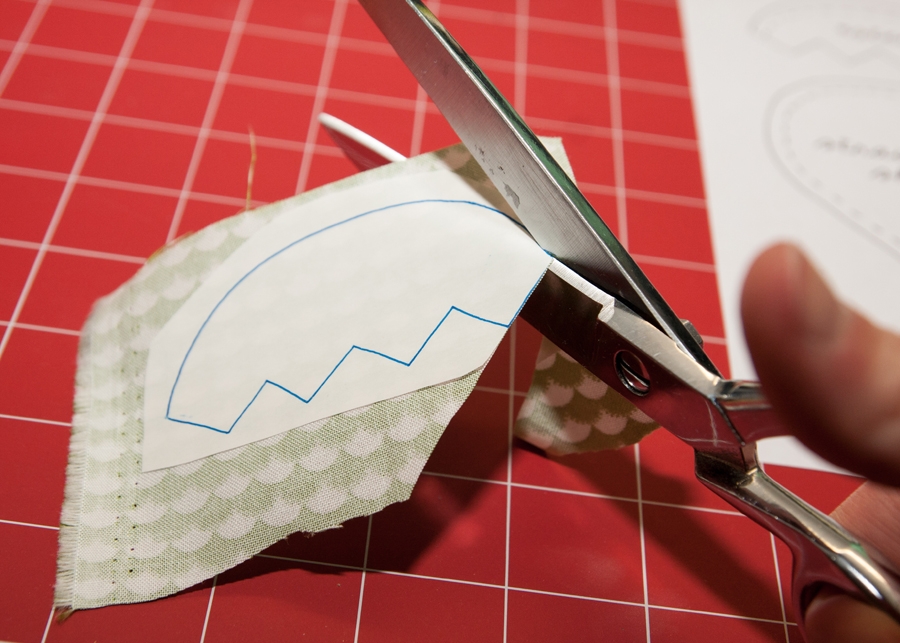
Cut out the “strawberry shape” template and trace onto the right-side of the strawberry fabric.
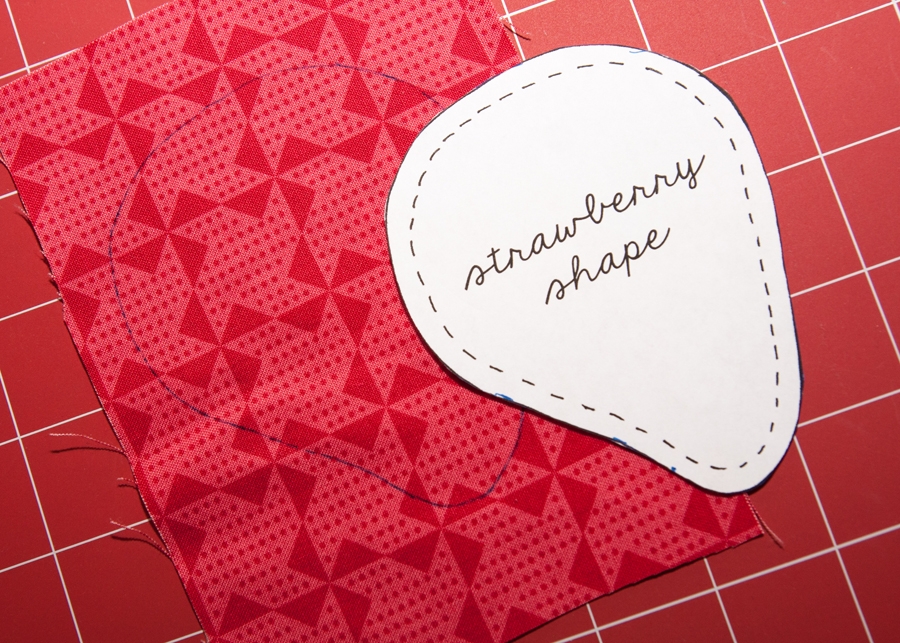
Peel the paper from the “stem” and arrange onto the “strawberry shape.” Fuse in place with an iron.
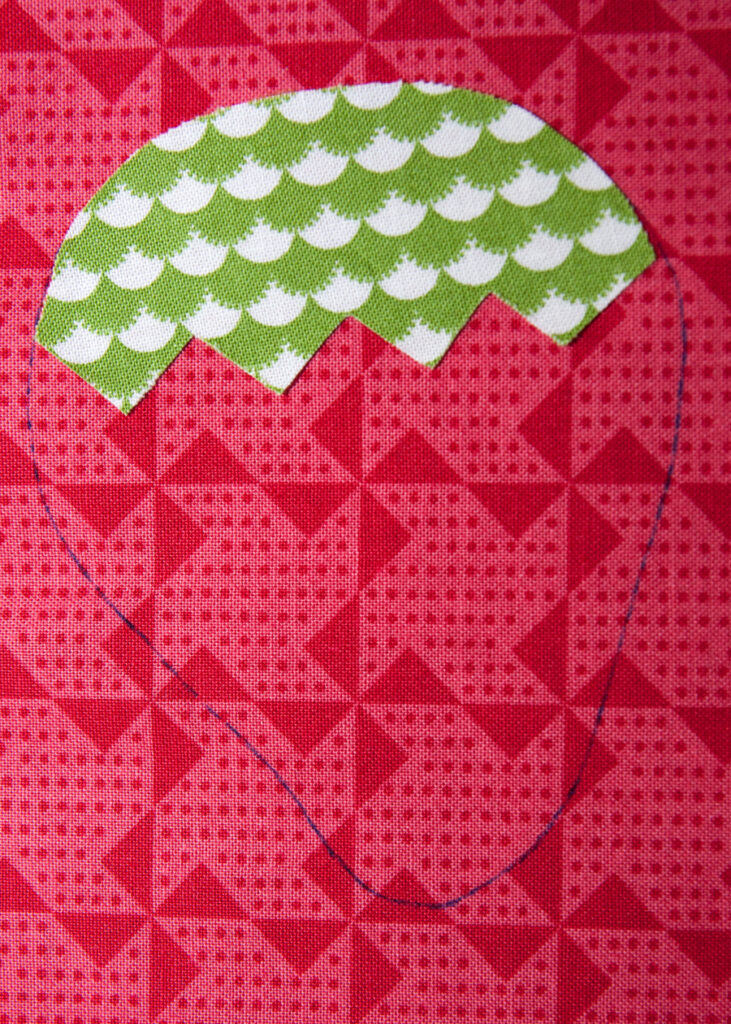
Cut out the strawberry and bring RST with the other strawberry fabric scrap. Sew 1/4″ away from the edge of the strawberry shape, leaving 2″ open in the side for turning right-side out.
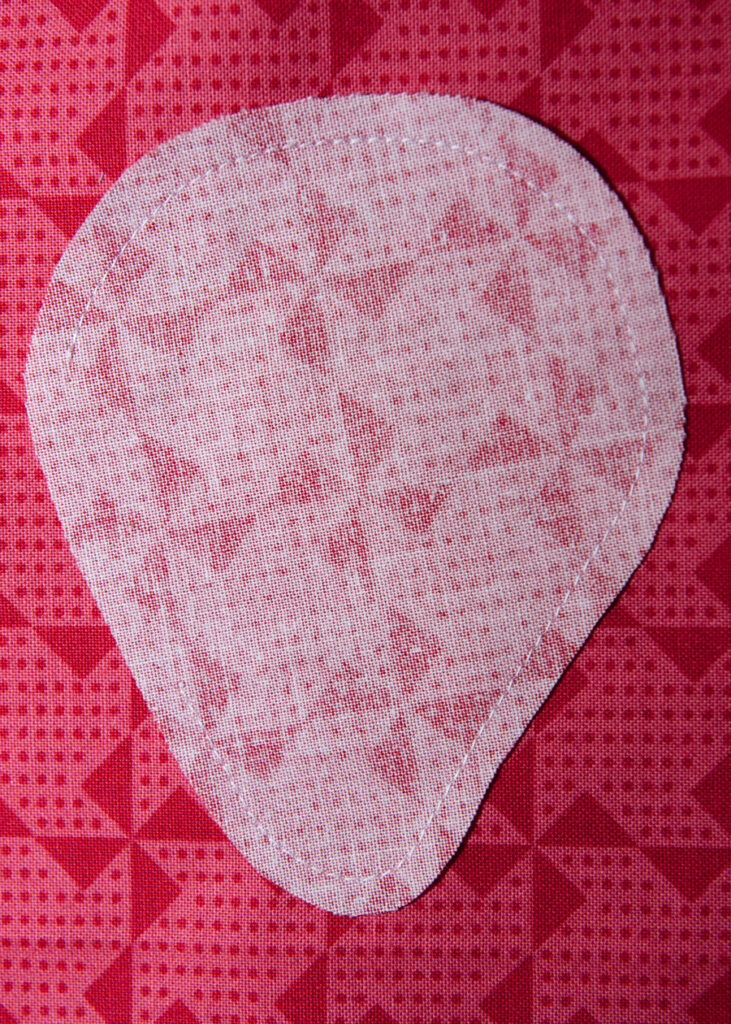
Trim the excess, turn right-side out, and fold the raw edges inside. Press flat. Top-stitch along the stem only.
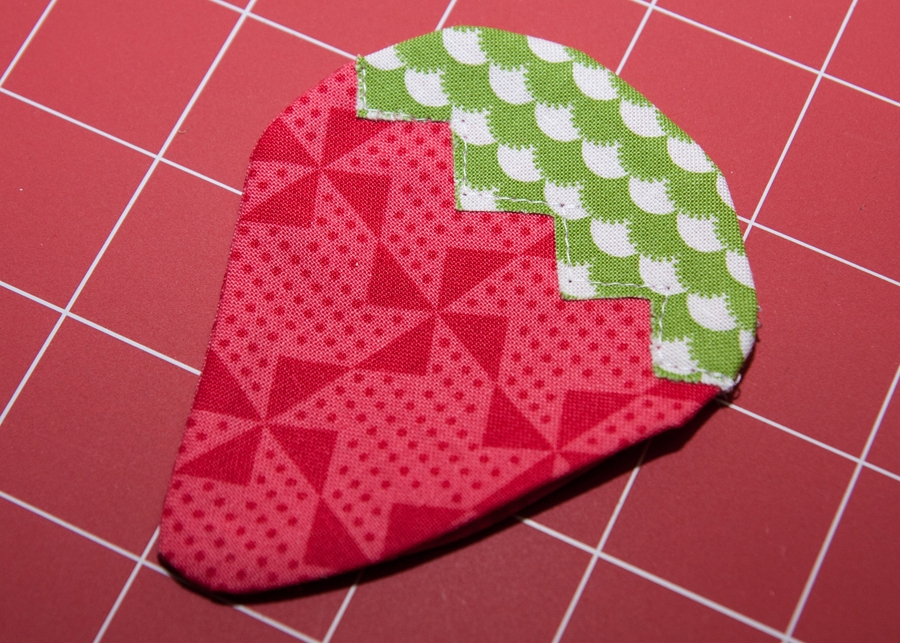
6. Interior Placement: Retrieve the thread holder, the strawberry pocket, other side of the Velcro snippet, and felt rectangle.
Thread Holder: Place the (unfinished end of) the thread holder 3/4″ to the right of the zipper pocket, the raw edge aligned at the top of the interior panel, making sure the Velcro snippet will face down. Stitch across the very top to keep in place.
Velcro Snippet: Place the other Velcro-half 3/4″ up from the bottom, 3/4″ away from the zipper pouch. Glue in place and stitch in place.
Felt Rectangle: Place about 3/4″ down from the top, centered between the thread holder and pocket. Stitch around the perimeter to secure in place.
Strawberry Scissors Holder: Angle and place 3/4″ up from the bottom, centered between the Velcro snippet and pocket. Stitch in place, leaving the majority of the stem-top open.
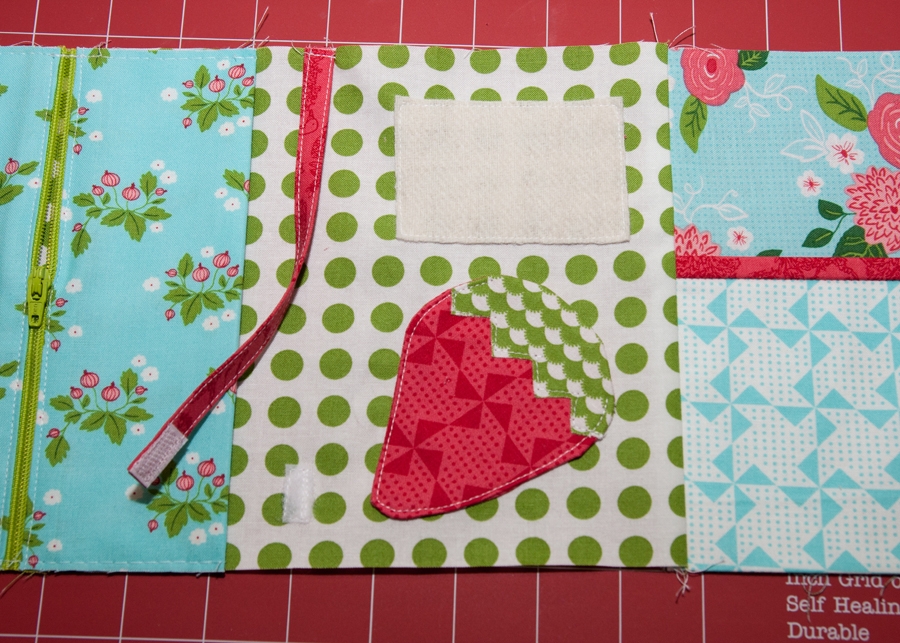
A close-up to show the strawberry pocket stitched in place. (Leave the top open) Also be sure to backstitch at the beginning and end to really keep it stitched down.
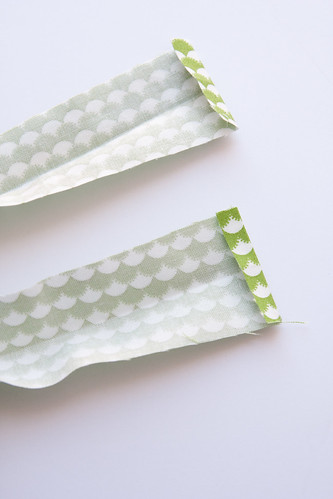
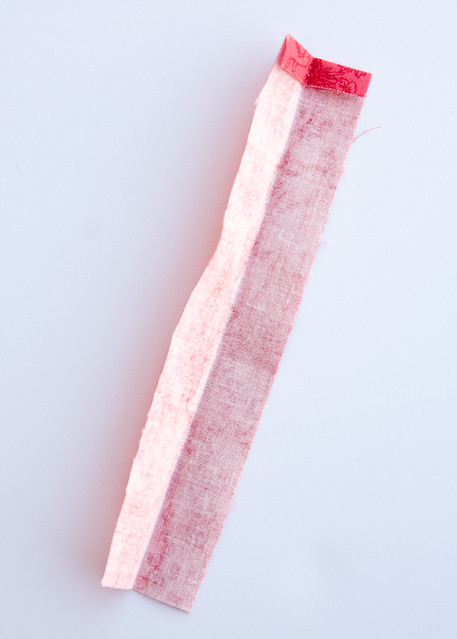
Exterior Tie: Piece (2) 1-3/4 x 18″ strips together to make one 1-3/4 x 35-1/2” strip. Fold the short ends in 1/4” and press. Fold the strip in half widthwise and press to make a crease down the center. (Sorry about the cropping–to be clear these are the ends of 1 strip.)
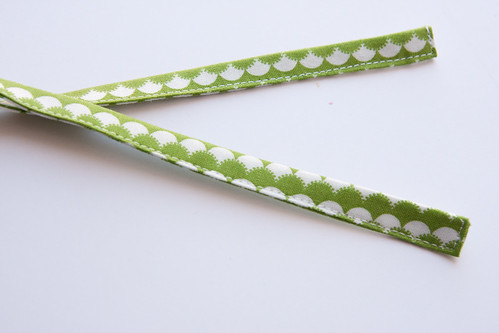
Open and fold the raw edges of each long side in to meet the crease in the center before refolding. Top-stitch closed. (This should be familiar since it is similar to the thread holder tie construction.)
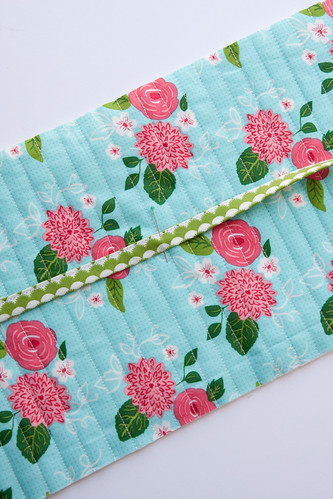
Measure to find the center-point of the exterior panel. Find the centerpoint of the tie; align the two centerpoints. Topstitch the tie center in place, stitching back and forth several times to hold it firmly in place.
The next step is to sew the interior and quilted exterior wrong sides together (aligning raw edges) while also dividing the interior section into its three sections.
The first line is intended to stitch down the folded edge of the zipper pocket. To do this, identify the nearest quilted line on the quilter exterior and place pins at the top and bottom to mark. Quilt over the quilter exterior line designated. It should looks something like this:
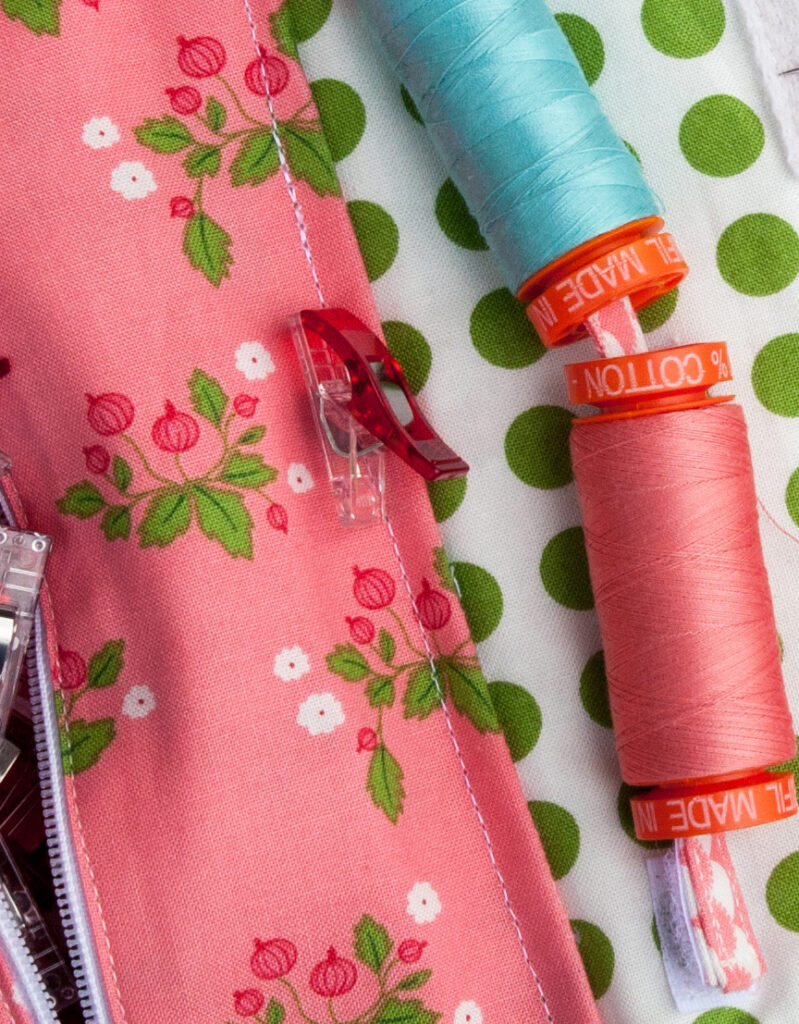
NOTE: If there is not a quilted line from the exterior that is close enough to where the folded edge needs to be stitch, just topstitch the folded edge in place 1/8″ in.
The second line is intended to fall just outside/inside of the open pocket area. Find the nearest quilted line on the exterior and stitch over it. (Once again, you can always opt to stitch where you want if a quilted line from the back is too far away.) As you can see below, my closest line was just inside of the open pocket area. It would be just as acceptable to be a little outside of the pocket area.

Next, the final step is to bind the goody goody binding kit. Before doing this, I increased my stitch length to the max length and basted the exterior/interior together by sewing around the perimeter close to the raw edges. Finally, bind the two layers together. (I have a binding tutorial here for a reference.)
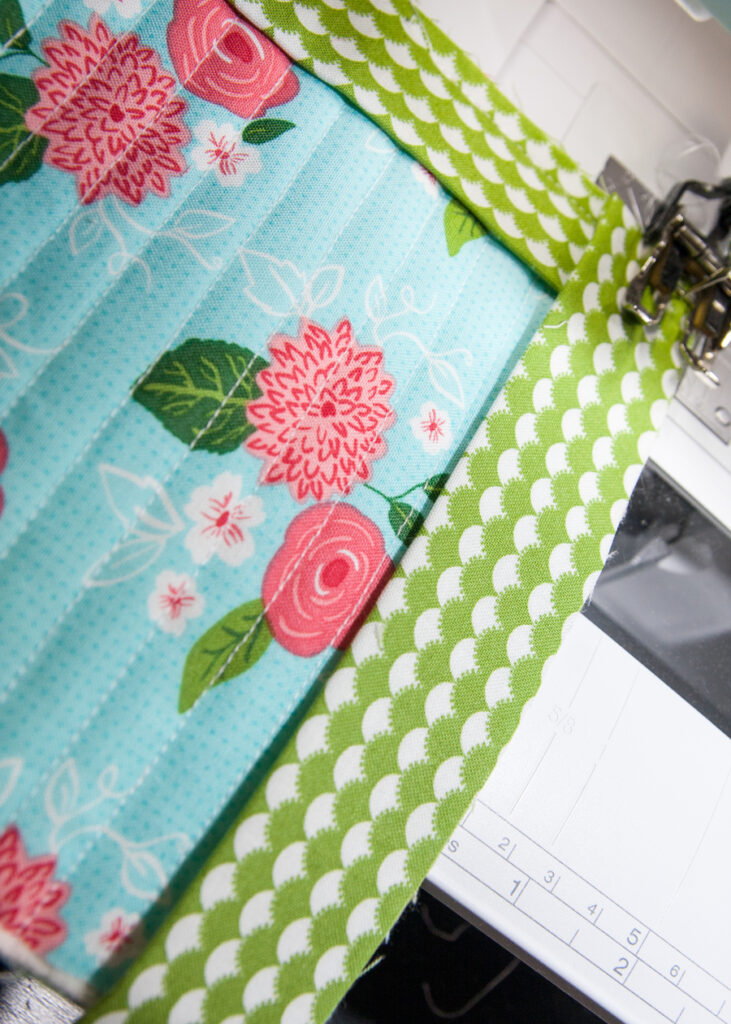
Fold the binding up and over to the interior and stitch in place by hand or machine, mitering the corners. And that’s it! Just fold into thirds and tie.
Stay tuned for a fun sew-along with Fat Quarter Shop. Use the hashtag #goodygoodysewalong and #goodygoodybinding kit to share your version with the sewing community.
Like this post? Drop your email in the box below to get new post notifications via email.
Leave a Reply
You must be logged in to post a comment.

63 Comments
Hildy
July 6, 2015 at 9:33 amLove your binding kit it's really cute!
Andrea C
July 6, 2015 at 10:25 ami adore this! so cute & functional!
Christina
July 6, 2015 at 1:52 pmLove this! Wish I had some yardage of Gooseberry to make this now!
Anita
July 6, 2015 at 8:45 pmSo cute! Thanks for the great tutorial 🙂
Patti
July 7, 2015 at 8:21 amThis is perfect! Thanks for sharing!
Karen
July 7, 2015 at 8:45 pmThis is wonderful and the perfect use for the Gooseberry layer cake I won in a Moda giveaway. There will be some piecing and patchwork to make those 10" squares work for all pieces, but I look forward to the process. 🙂
Susan
July 20, 2015 at 5:24 amLooking forward to trying this one.
@pril
July 21, 2015 at 6:49 amThis is too cute & could double as an embroidery kit as well. I am so going to make this for my next Fat Quarter Friends Swap! We've been swapping every month since April 2013. Anyway, I did have 1 question: Why is the outside panel 16.5" long & the inside panel is only 11.5" long??
Tanya Quilts in CO
July 21, 2015 at 7:12 amCan't wait to make one! Thanks for the free tutorial.
Nana for Miss Molly
July 21, 2015 at 7:49 amLove that fabric!
Kathleen
July 21, 2015 at 7:50 amLove this!!
susan
July 21, 2015 at 10:58 amso stinking adorable! cant wait to make one (or six!)
Karinda
July 21, 2015 at 12:42 pmHow adorable and functional! I'm pretty sure I need this; a sew-a-long, how fun! Count me in.
Kristy
July 21, 2015 at 12:54 pmSo very cute! I would love you to make your tutorial into a pdf as my computer is no where near my sewing machine. LOL!
Unknown
July 21, 2015 at 1:41 pmso cute I have never did anything with a zipper Thank you for making it easy to do!
Unknown
July 21, 2015 at 3:35 pmSo cute and very useful.
Unknown
July 22, 2015 at 2:24 ambeautiful…thanks.
Carol
July 22, 2015 at 7:08 amLove it! Thanks for sharing the tutorial!
Teresa
July 22, 2015 at 7:25 amThis is a fabulous tutorial… Thank you so much. I made one handy little binding kit tonight… but now I want to make another one.
craftygramma
July 22, 2015 at 9:26 amApril-
This is just a guess, but I think the 'goody' pocket is sewn TO the interior as opposed to ON it as the zipper pouch is. If you look closely at some of the pictures, I believe you can see the seam allowance.
You are correct; this needs clarification.
Hope this helps.
Helen L
July 22, 2015 at 2:54 pmWhat a fabulous kit!! I found it through Sherri McConnell's blog. Looks like I'll have to be following you now!! 🙂 Hugs, H in Healdsburg
berezka
July 22, 2015 at 11:28 pmThanks for sharing!
Pippa Parsons
July 23, 2015 at 1:04 pmyes your completely correct, I made it and it seemed weird when I was making it but it finishes great
rosi
July 24, 2015 at 3:18 amThis blog is so nice to me. I will continue to come here again and again. Visit my link as well.
Good luck
voyance gratuitement
Maryjo
July 27, 2015 at 7:16 amI love this soooo much! Is there a chance that you will put it in a file so that we can download it and keep it? Thanks so much!!
Unknown
July 28, 2015 at 12:36 pmI love this. It is so adorable. You are a genius to have come up with this idea. Can't wait to make one for myself and many for others I know will love it too. Thank you so much for sharing the pattern.
Unknown
August 1, 2015 at 11:17 amLove this kit and Love your shop name!! My mother's name is Lella and we NEVER see her name anywhere. I will definitely be following your blog!!
Unknown
August 9, 2015 at 11:21 amI was about to start this today and realized I had given away all my batting scraps! Any reason why I couldn't use fusible fleece (Pellon 987F) instead? I have plenty of scraps of that. Also, I use regular Coats and Clark thread for binding, do you think the bigger spools will make a difference in how the kit closes?
Jackie
August 12, 2015 at 7:41 amI saw your tutorial on Fat Quarter Shop's Jolly Jabber. I'm definitely going to make one of these for my binding clips. I haven't sewn a zipper in anything since 8th grade (and we're talking decades here!!). Thank you for the tutorial….
Lori
August 19, 2015 at 3:37 pmI am making one right now. Super excited. It would be helpful to know how big the zipper compartment is because it depends on how close you sew to the zipper. Does eac section break down into a third of the interior or is their adjustments for the folds/bulk?
Lella Boutique
August 19, 2015 at 4:25 pmI didn't take note of the exact measurement, but there is definitely a little leeway. It does end up diving the interior panel into thirds, but as long as it's not drastically different it should be just fine.
Carol R.
August 24, 2015 at 11:15 amOh, I'm lovin' this! I've already made one and plan on making a few more as Christmas gifts for special quilting friends. Thanks so much for your great tutorial 🙂
Unknown
September 1, 2015 at 5:36 amIt’s really a nice and useful piece of info. I’m glad that you shared this useful info with us. Please keep us up to date like this. Thank you for sharing.
voyance gratuite en ligne
CapitolaQuilter
September 4, 2015 at 9:00 amThanks for all of the details. It's super cute and really useful.
Anonymous
September 11, 2015 at 9:31 amI really like this, and I plan to make some as Christmas gifts. Thanks for the pattern and tutorial!
Kate
September 16, 2015 at 1:52 pmWhat a great idea! Thanks so much for taking the super huge amount of time I know it takes to post a tutorial like this!
Unknown
September 23, 2015 at 6:35 amIn the final steps of creating my own – using fabric from my stash. I used a laminated fabric, "Seaside Rose", by 3 Sisters for the exterior. It matches the portable design wall I madefrom a design by Deonn Stott . I can't wait to show it off to all my quilting (and non-quilting) friends. It's adorable. Thank you for sharing.
Sydney H.
September 29, 2015 at 6:02 pmI have several questions:
-Instead of wool felt can polyester felt be used?
-Also how wide of velcro strip do i need to get? I know its suppose to be 1in long.
-Should it be regular velcro or soft flex velcro?
-Also I plan on making the "goody" pocket vertical instead of horizontal so when the kit is closed the stuff in the pocket won't fall out do you have any advice on how deep i should make the pocket or another idea such as having the pocket horizontal and adding something to it to keep the things in.
-I was also wondering if there was any other simple shapes i could use for the scissor pocket….I don't think the strawberry would work with the theme in my kit.
Any advice would really help I'm a newbie and would really love to make this kit and do it properly (sorry for so many questions). Thank you so much for the pattern its amazing.
Thank you,
Sydney H.
Mom O' Nine
October 15, 2015 at 11:40 amIt is really adorable. Love the fabrics.
Marsha
October 21, 2015 at 5:04 pmI'm a little late to the party but am making one today. Just need to bind it. Had lots of leftovers from the Wishes line so, I'm using them. Very cute! Thank You for a very cute bag.
Deonn
November 2, 2015 at 2:48 amSounds like this project is the perfect companion to my UFO-to-Go portable design wall!
Deonn
November 2, 2015 at 2:50 amI saw a couple of these made up at a Guild Sew Day–so adorable! Perfect gifts for quilty friends, too!
Anonymous
November 10, 2015 at 1:20 pmThere is a major cutting error in the cutting guide. The interior panel A should be cut to measure 7 x 16 1/2 and not 11 1/2.
Lella Boutique
November 12, 2015 at 3:25 pmHello! Actually, the interior panel A will be sewn together to interior panel B to get the 7'' x 16 1/2'' measurement. I hope that makes sense–thank you for writing!
Granny Maud's Girl
November 24, 2015 at 11:24 pmThanks! This was my question too. I now have the answer!
TUKI
December 2, 2015 at 1:58 pmI can't wait to make this! I'll be seeing my sister in two months and I told her we'll be making this kit!! 🙂 Thank you for a great tutorial!!
Sara
December 6, 2015 at 10:26 pmThank you for this tutorial! I just made two to give away for Christmas gifts and one for myself.
Granny Maud's Girl
December 17, 2015 at 5:46 pmThanks for the tutorial. I made a couple: https://grannymaudsgirl.wordpress.com/2015/12/16/binding-kits/. One for me and one to give away for Christmas.
Janice
December 31, 2015 at 2:08 pmThanks for the great tutorial. A friend and I have each made one and I am really happy with the results. http://jannimary.blogspot.com.au/2015/12/final-finishes-for-2015.html
Unknown
January 21, 2016 at 2:09 pmThank you! I'm going to use it for my hexie projects.
Candy Simmons
February 1, 2016 at 8:10 pmThis is so cute! I'm putting this on my to do list.
Candy Simmons
February 1, 2016 at 8:11 pmThis is so cute! I'm putting this on my to do list.
a1angiem
February 8, 2016 at 8:18 pmThank you very much for all your hard work. My kit turned out so well and I'm really proud of it. It's so cute and very useful! You are also sooooo pretty and I love your fabrics. Idk if I can find them any more (or at all) in Canada but it will become a quest!
Heather Spinks
April 28, 2016 at 8:25 amI have a question… when you sew the two lines to connect the exterior and interior (right side zipper pocket and the top stitch on the "goody" pocket) do you sew over the tie on the front to hold it in place as well or do you pull it out of the way?
telas mosquiteiras
July 22, 2016 at 10:38 amtelasmosquiteira-sp.com.br
telas mosquiteira
telas mosquiteiro
As telas mosquiteira sp , telas mosquiteiro sp garantem ar puro por toda casa livrando-a completamente dos mosquitos e insetos indesejáveis. As telas mosquiteira garantem um sono tranquilo a toda família, livrando e protegendo-nas dos mais diversos insetos. Muitos destes insetos são transmissores de doenças e a tela mosquiteira é indispensável no combate a mosquitos transmissores de doenças.
A dengue, por exemplo, já matou centenas de pessoas só na capital de São Paulo e um pequeno investimento em nossas telas mosquiteiras podem salvar vidas. As telas mosquiteiras também impedem a entrada de insetos peçonhentos como as aranhas e os escorpiões, estes insetos também oferecem risco, pois seu veneno em poucos minutos podem levar uma criança a morte.
telas mosquiteira jundiai
telas mosquiteiro jundiai
telas mosquiteira aplhaville
telas mosquiteiro alphaville
telas mosquiteira granja viana
telas mosquiteiro granja vinana
telas mosquiteira cotia
telas mosquiteiro cotia
telas mosquiteira tambore
telas mosquiteiro tambore
A chegada da temporada Primavera/Verão traz consigo a elevação da temperatura e a maior ocorrência de chuvas. Mas não é só isso. As estações mais quentes do ano causam muita dor de cabeça e muitos zumbidos indesejáveis em função das pragas urbanas – pernilongos, baratas, cupins e outros insetos -, que afetam todas as regiões brasileiras.
Nossa missão é oferecer telas mosquiteiras de qualidade a um preço acessível, fazendo com que as telas mosquiteiras sejam uma opção viável para muitas pessoas.
telas mosquiteiras Jundiaí
telas mosquiteiro Jundiai
telas mosquiteiras jundiai
telas mosquiteiro industria
telas mosquiteira restaurante
telas mosquiteiro restaurante
telas mosquiteira empresa
telas mosquiteiro empresa
Nikhil
July 27, 2016 at 3:30 amSuch a great information on C Tutorial. Also helpful to search and full details on Java Tutorial. Thanks for it…
ellisjoy
August 24, 2016 at 7:09 amThanks so much, I love this and NEED it! Your instrutions are great. So happy to have found your blog.
ellisjoy
August 24, 2016 at 7:09 amThanks so much, I love this and NEED it! Your instrutions are great. So happy to have found your blog.
Unknown
September 16, 2016 at 3:07 pmThank you for your so cool post, it is useful, i love it very much. Please share with us more good articles.
boutique paper bags
Deborah
January 30, 2018 at 11:30 amJust come across this and am going to make it my weekend project, thanks for an easy to follow tutorial.
Unknown
June 21, 2018 at 4:49 amI found this while pinteresting for a kit to make for a traveling/quilting friend. I combined ideas for pockets & supply storage, but this tutorial was the best- so clear & helpful. It finishes up so pretty. Thank you so much !!
Elizabeth Kelbaugh
October 5, 2021 at 5:59 amVery cute and useful kit. I look forward to making one or more.
kccookielady
October 21, 2021 at 7:34 amIs there a pdf for the instructions? That would be very helpful.