
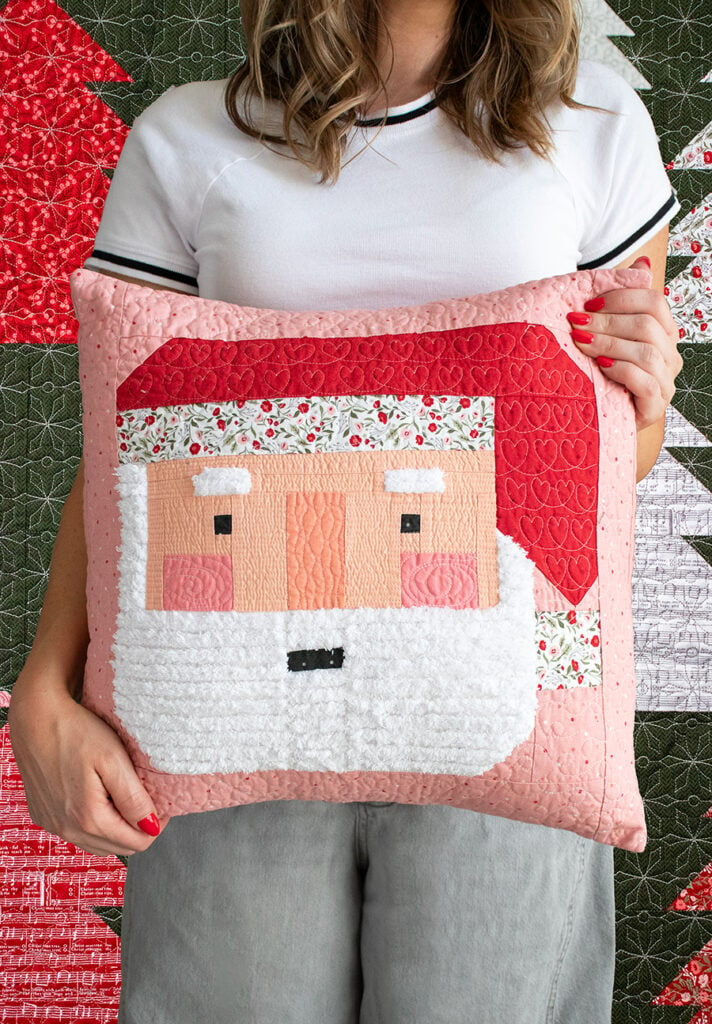
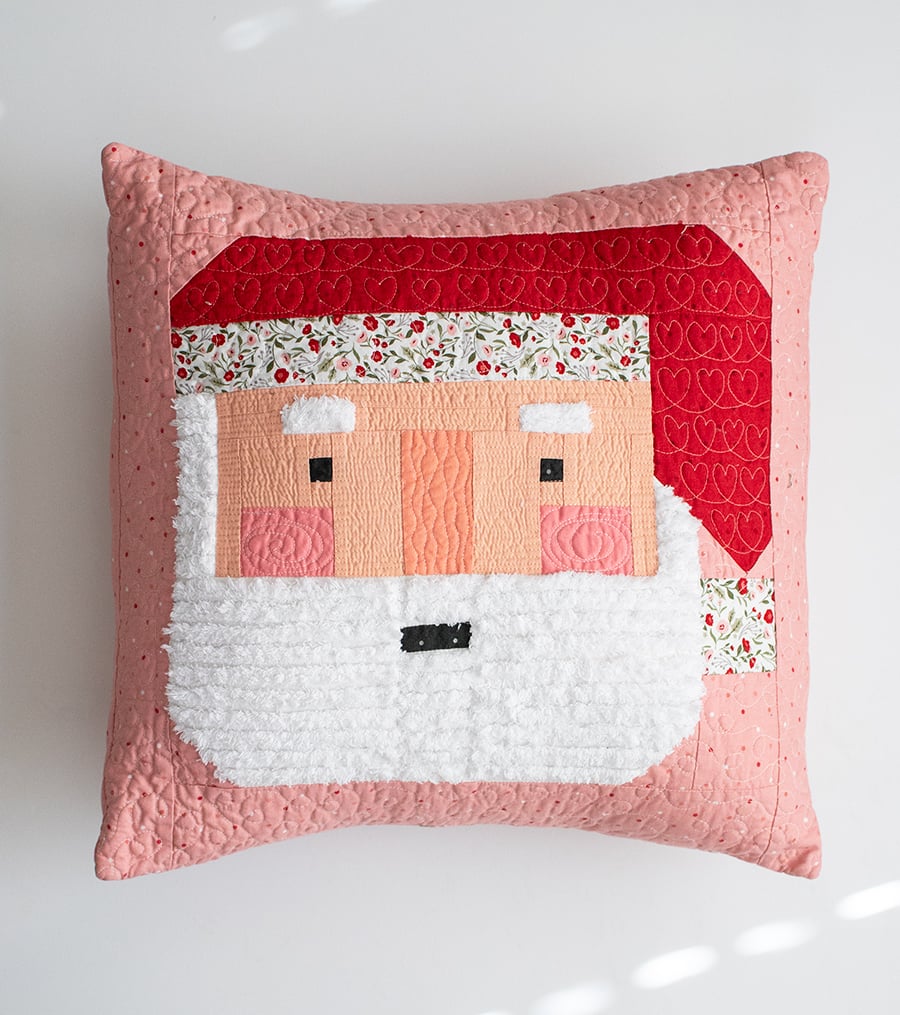
The Santa Pillow + a Chenille-It Beard
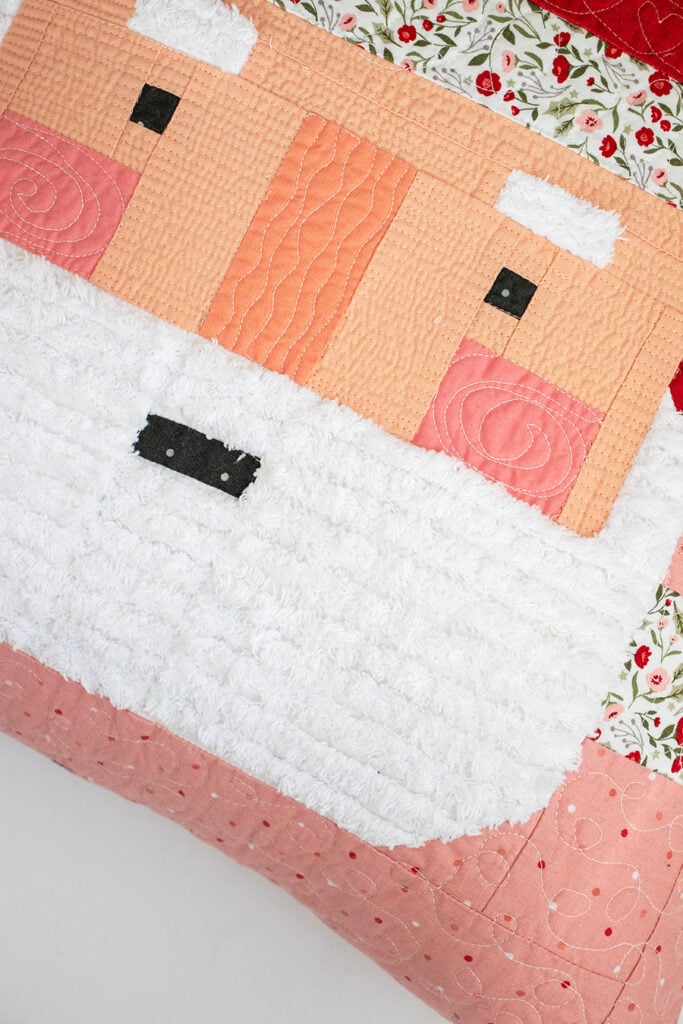
Santa Claus is coming to town… in pillow form, that is. The best part is his fluffy white beard made from Chenille-It blooming bias ribbon! The idea to embellish the Santa patchwork pillow with it hit me in the midst of sewing quilts for the new Berry & Pine collection. I literally dropped everything to get started. I thought some of you would also want to make one, so I’ve added a “Sew Jolly” Santa pillow pattern to the shop!
If you already have one of my quilt patterns featuring the Santa block (“St. Nick,” “Jolly Holiday,” or “Christmas Crew”) and you want to adapt it – no problem. I’ve already written a tutorial about transforming the block into an 18″ pillow HERE. Actually, it’s a great resource if you’d like to adapt any of my Christmas Eve pattern blocks. For this post, I’m repeating some of the info, and adding the Chenille-It embellishment step.
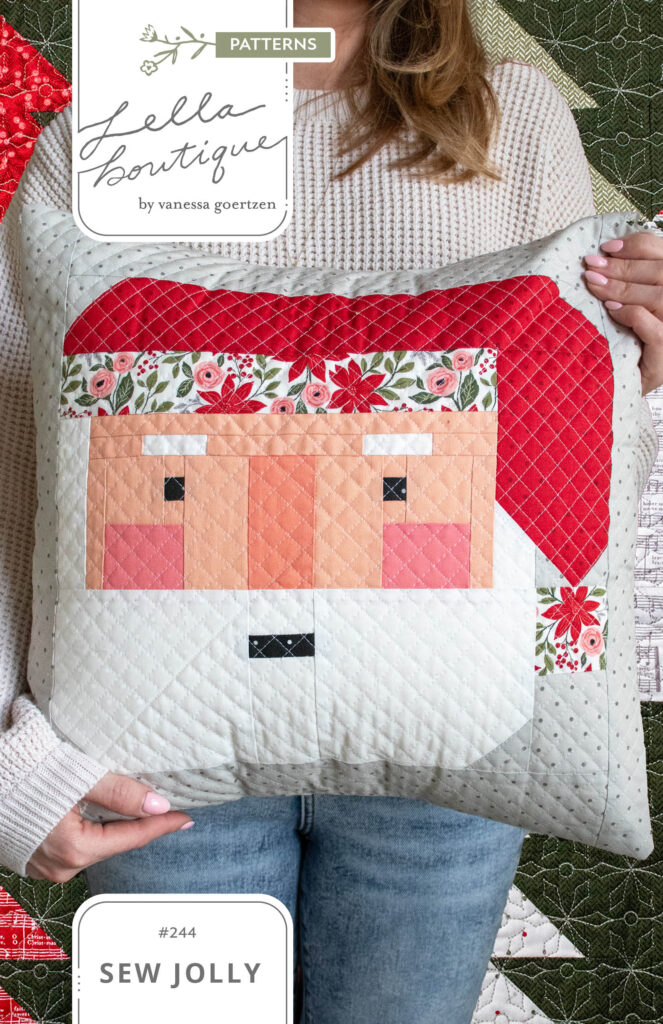
The Pattern
By popular request, I’ve finally put together an individual pillow pattern called “Sew Jolly” and it’s in the shop now. Not only does it contain the instructions for the pillow from start to finish, but it also includes an insert with a few details on adding the Chenille-It embellishment as well.
To adapt any of the other patterns, follow the individual pattern instructions to cut what is needed for (1) Santa block with the following tweaks:
If using #214 Jolly Holiday: Start with Step #20 for the cutting list / instructions to make a single Santa block, omitting the “MM” and “NN” rectangles of light accent border fabric. Make the following adjustments for the “T” and “W” units:
- (2) “T” rectangles 3-1/4″ x 14″
- (2) “W” rectangles 2-1/2″ x 18″
If using #218 St. Nick: Start with Step #15 for the cutting list / instructions to make a single Santa block, omitting the “EE” and “FF” rectangles of light accent border fabric. Make the following adjustments for the “T” and “W” units:
- (2) “T” rectangles 3-1/4″ x 14″
- (2) “W” rectangles 2-1/2″ x 18″
If using #242 Christmas Crew: Start with Step #1 (page 3) for the cutting list / instructions to make a single Santa block, omitting the “YY” and “ZZ” rectangles of background fabric. Make the following adjustments for the “CC” and “HH” units:
- (2) “CC” rectangles 3-1/4″ x 14″
- (2) “HH” rectangles 2-1/2″ x 18″
Cut everything out, but don’t piece the block yet! We will add the Chenille-It blooming bias embellishment to the individual white units making up the beard/eyebrows first.
The Fabric
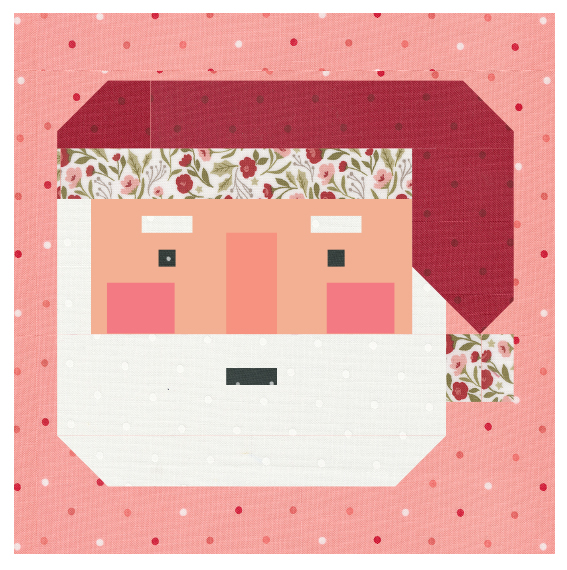
I love the coloring of the Santa block from Christmas Crew – which has brighter tones in the face/cheeks/nose than previous versions. It uses mostly Magic Dot (in shops Oct 2024), a little Berry & Pine (May 2025), and a few Bella Solids as well. Here’s the full materials list:
- (1) fat eighth face fabric (Bella #9900 78 “Peach”)
- (1) square 5″ x 5″ nose fabric (Bella #9900 147 “Coral”)
- (1) square 6″ x 6″ cheek fabric (Bella #9900 89 “Tea Rose”)
- (1) fat eighth white beard fabric (MD #5230 39 “Snow”)
- (1) square 5″ x 5″ charcoal fabric (MD #5230 36 “Charcoal”)
- (1) fat eighth red fabric for hat (MD #5230 15 “Cherry”)
- (3/4 yard pink fabric for block background/pillow backing (MD #5230 34 “Pink Lemonade”)
- (1) fat eighth hat trim fabric (B&P #5241 11)
- (1) 18″ pillow form
- Chenille-It blooming bias BB31 “White” (either 3/8″ or 5/8″ width should be fine)
(The materials for the non-Chenille-It version are listed in the “Sew Jolly” pattern product info here.)
Adding the “Fluff” with Chenille-It
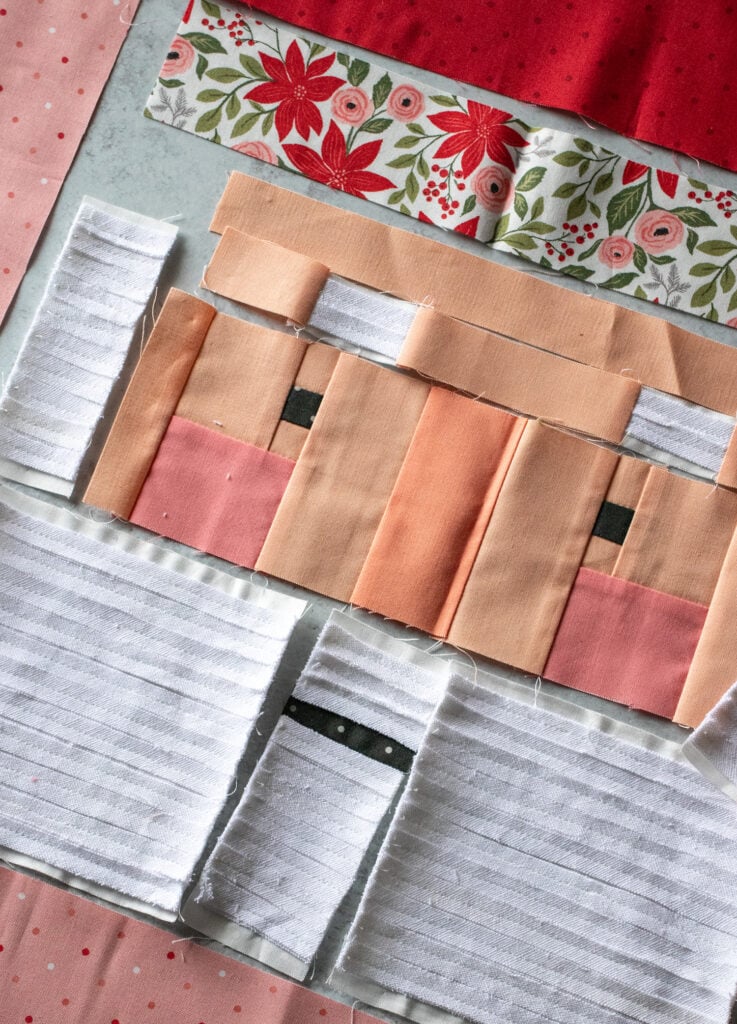
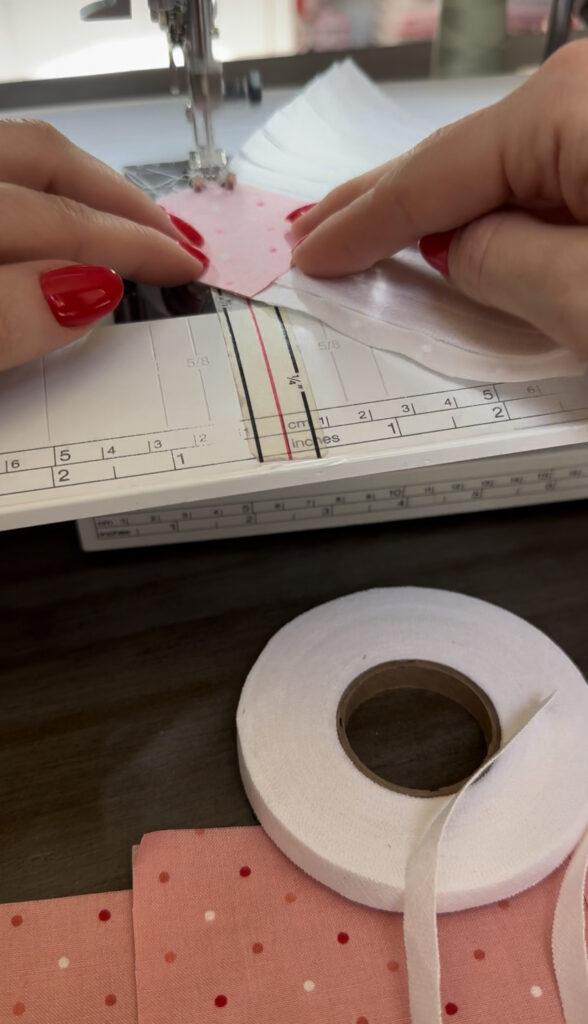
If you are completely new to embellishing with Chenille-It blooming bias, you are in for a treat. It’s very straightforward and fun. You can see a little photo snippet of my process below. Just a few things I want to point out:
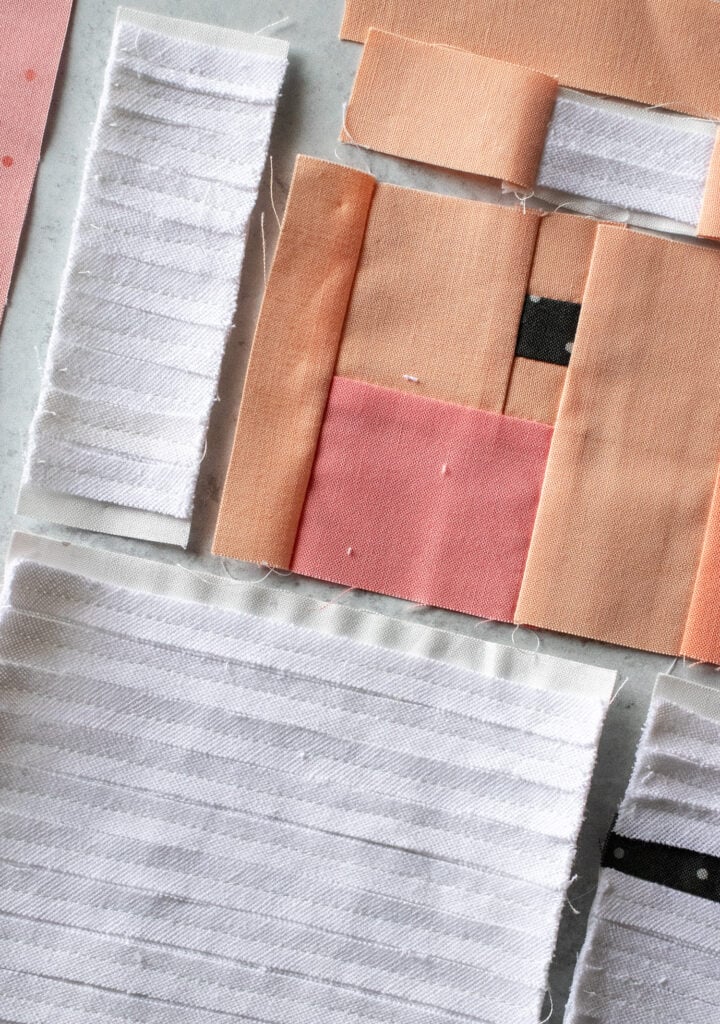
- It was easiest for me to lay out all the Santa block pieces, spread out, to make sure the white beard/eyebrow units were oriented correctly. (I did partially sew the face/cheeks/nose area together ahead of time.)
- Leave 1/4″ margin at the top and bottom of the white units so the Chenille-It doesn’t get “trapped” in those top/bottom seams. (It will make it hard to fray fully.)
- I stitched down TWO layers of the ribbon in each row to make this extra fluffy.
- The technique is just to top-stitch the ribbon in place, keeping your stitching centered down the middle. (I cut pieces slightly longer than I needed and trimmed everything up afterwards.) Notice the ribbons always run horizontally. You want to be consistent with this for a uniform look.
- I used the 3/8″ width of ribbon for the whole project because it was what I had on hand. But the 5/8″ width would be fine too. In fact, it would have been the perfect size for the eyebrows!
After the Chenille-It is stitched onto the white beard/eyebrow units, stitch the block together following pattern assembly instructions. The seams were obviously a little more bulky at the side than normal, but it wasn’t unmanageable by any means.
Once the block is pieced, “baste” it onto a slightly-larger piece of batting with safety pins to help prevent shifting during quilting. (You don’t need a “backing” fabric like you would normally have with a quilt.)
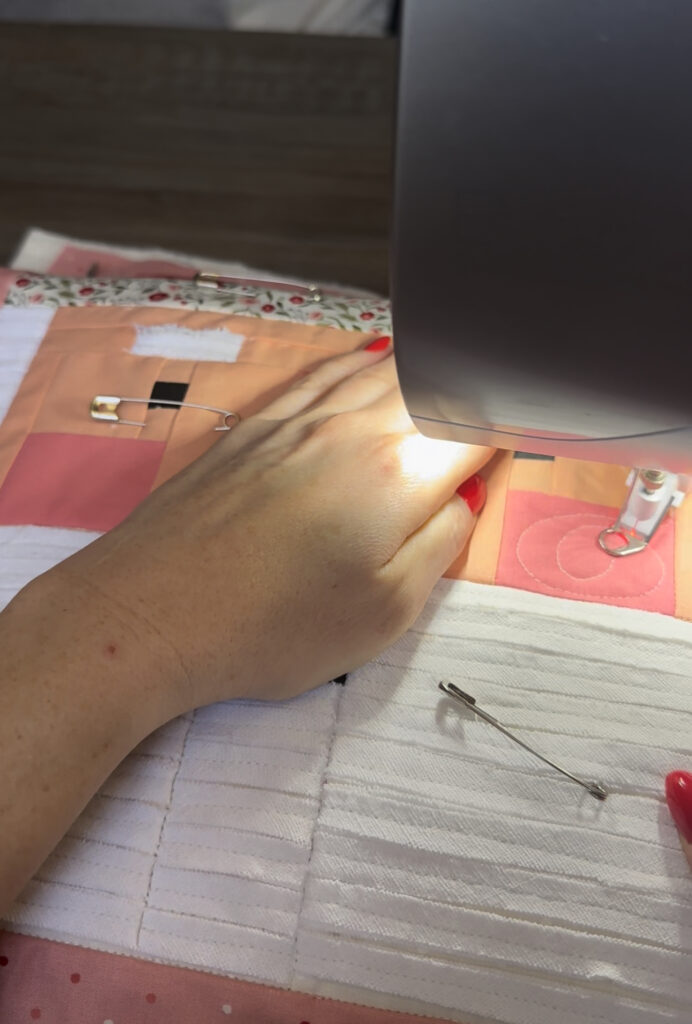
For the quilting, I installed my darning needle, lowered the feed dogs, and went to town with some freemotion quilting. I stitched densely pretty much everywhere except the Chenille-It areas. I did “stitch in the ditch” in those areas, outlining the beard perimeter and down the seams. It’s not perfect quilting by any means, but that’s part of the charm!
Finishing the Pillow
Once the quilting is finished, you’ll want to refer to this section of my original Christmas pillow-making post to make the envelope opening:
The last part is to use a Chenille-It brush to pre-fray the ribbon. (I got mine HERE) Then toss your pillow cover into the washing machine (cold cycle) and dry to watch it really fluff up! Stuff in the 18″ pillow form and enjoy that cozy little Santa pillow. Talk about a cutie patootie!
Like this post? Drop your email in the box below to get new post notifications via email.
Leave a Reply
You must be logged in to post a comment.