
Moda Blockheads 3: Free Block of the Week (Block 9)
Happy Wednesday! I’ve had a great time sewing along for Moda Blockheads 3 so far, and am happy it’s my turn to share a block. If you’re new to my blog–welcome!
Block 9 Inspiration
Meet block no. 9 “Taos.” This block was inspired by countless trips to New Mexico since I was a little–and most particularly, my favorite stop at the Taos Pueblo. This design reminds me of a motif you might see on native artwork like rugs, jewelry, pottery, etc.
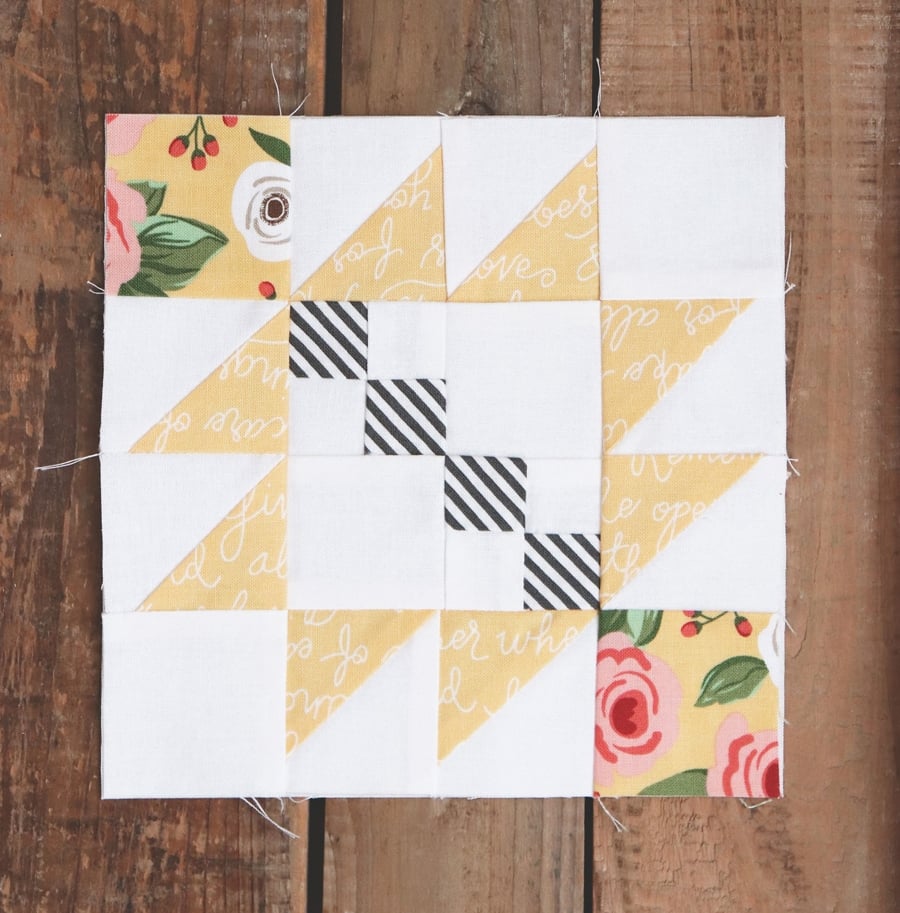
The fabrics I’ve picked make it look a bit like a spunky little sunflower! The buttery yellows are from my Farmer’s Daughter collection; the skinny bias stripe in charcoal is from my upcoming Bloomington collection (shipping in April). I think you’ll agree it’s a versatile block.
Block Piecing Tips
The instructions Moda wrote for me are pretty straightforward and easy to follow. I deviated a bit in how I constructed the block… In a nutshell, I made my HSTs (half squares triangles) using a different method; I also tweaked the center unit construction for fewer seams. Of course, you should do whatever makes the most sense for you.
If you’re interested, here’s the rundown of how I made mine–and how to calculate the math for whichever block size you’re making if you’d like to follow suit. I made the 6″ finished version, so I will use that as the example.
1. Cut “A” and “B” squares as instructed.
2. For “C” and “D” cutting, add 1/8″ to the square measurement listed. (For my 6″ finished block, I cut (4) “C” and (4) “D” squares 2 1/2″ x 2 1/2″ each.) Do not cut them in half diagonally.
3. Instead, mark a diagonal line on the back of (4) “C” squares. Bring (1) marked “C” square right sides together with (1) “D” square, aligning raw edges. Sew 1/4″ away from the marked line on both sides, cut along the marked line, and press the resulting HSTs toward the darker print.

4. Trim each HST to match your “A” and “B” squares. For me, that meant trimming my HSTs to 2″ squares. (Each was approx. 2 1/8″ x 2 1/8″ prior to trimming.)
5. Cut “E” squares as instructed.
6. Cut only (4) “F” squares…
7. …and replace the remaining “F” squares with what I’m calling “G” squares–each cut the same size as the “A” and “B” squares.
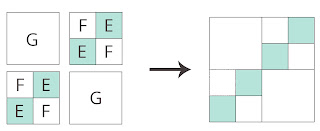
8. In lieu of “Step #3” on the pattern download piecing instructions: Arrange and sew the “E/F” squares into (2) four-patch units. Next, sew the (2) “E/F” units together with the (2) “G” squares to form another four-patch as shown below. Sew the units into rows; press. Sew the rows together; press.
9. From there, final block assembly is the same.
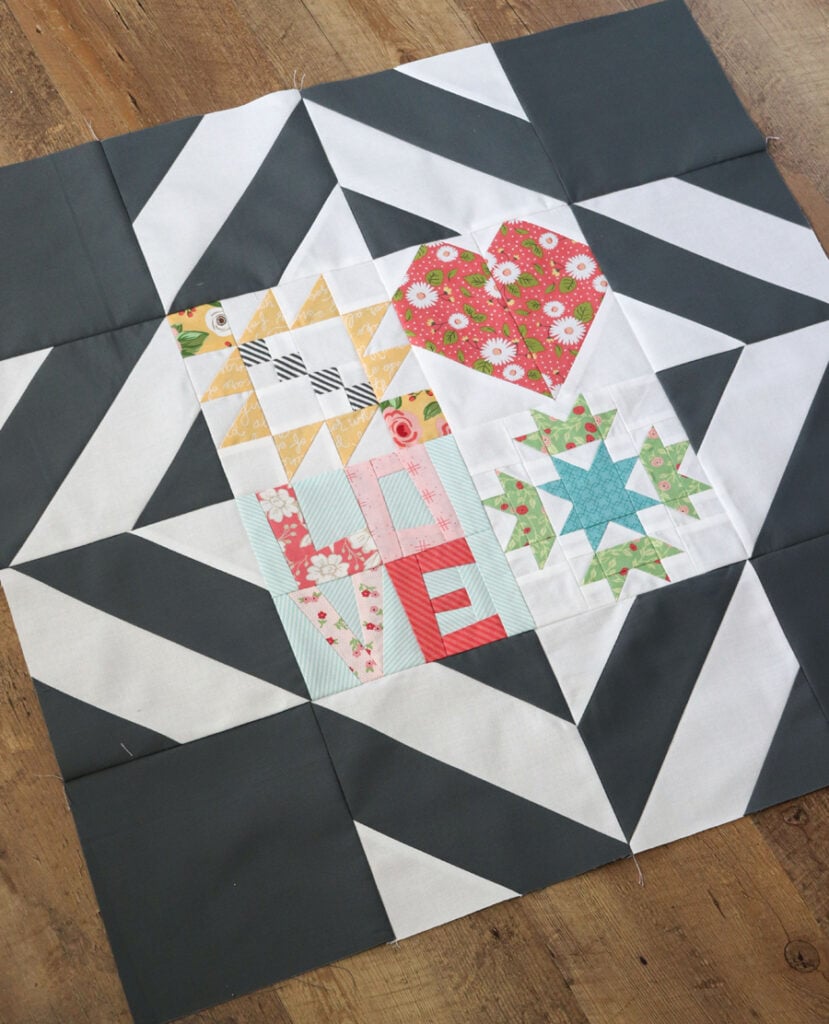
Hope you enjoy making this block as much as I did! If you missed it, I shared my final quilt top layout plans in a blog post here and even made a test block seen below. Stay tuned for a future blog post including the full instructions on duplicating my “Mama’s Linoleum” layout.
If you’d like to stay up-to-date on all of my creations, there are a couple ways to do it. One is to subscribe by email to this blog–which you can do by scrolling up to the top and entering your email in the box directly below my picture. The other is to follow me on Instagram @lellaboutique where I post the most.
Like this post? Drop your email in the box below to get new post notifications via email.
Leave a Reply
You must be logged in to post a comment.